DC Calibration of the Heathkit IM-1212 NIXIE DVM
Thursday, November 23, 2023 at 09:03:11
The Heathkit IM-1212 DVM is a 2 1/2 digit multimeter sold by Heathkit (obviously!) as well as under the Bell&Howell name as the IMD 202-2. They are the same unit with a different name on the front. I’ve also been told that DeVry had one marked with their name as well, but I’ve not seen one of those.
(Hi hobbyshoppin…will copy the actual relevant portions of the manual for you next week!)
These are not the most accurate meters, and are hard to keep in cal. DC calibration is fortunately, fairly easy.
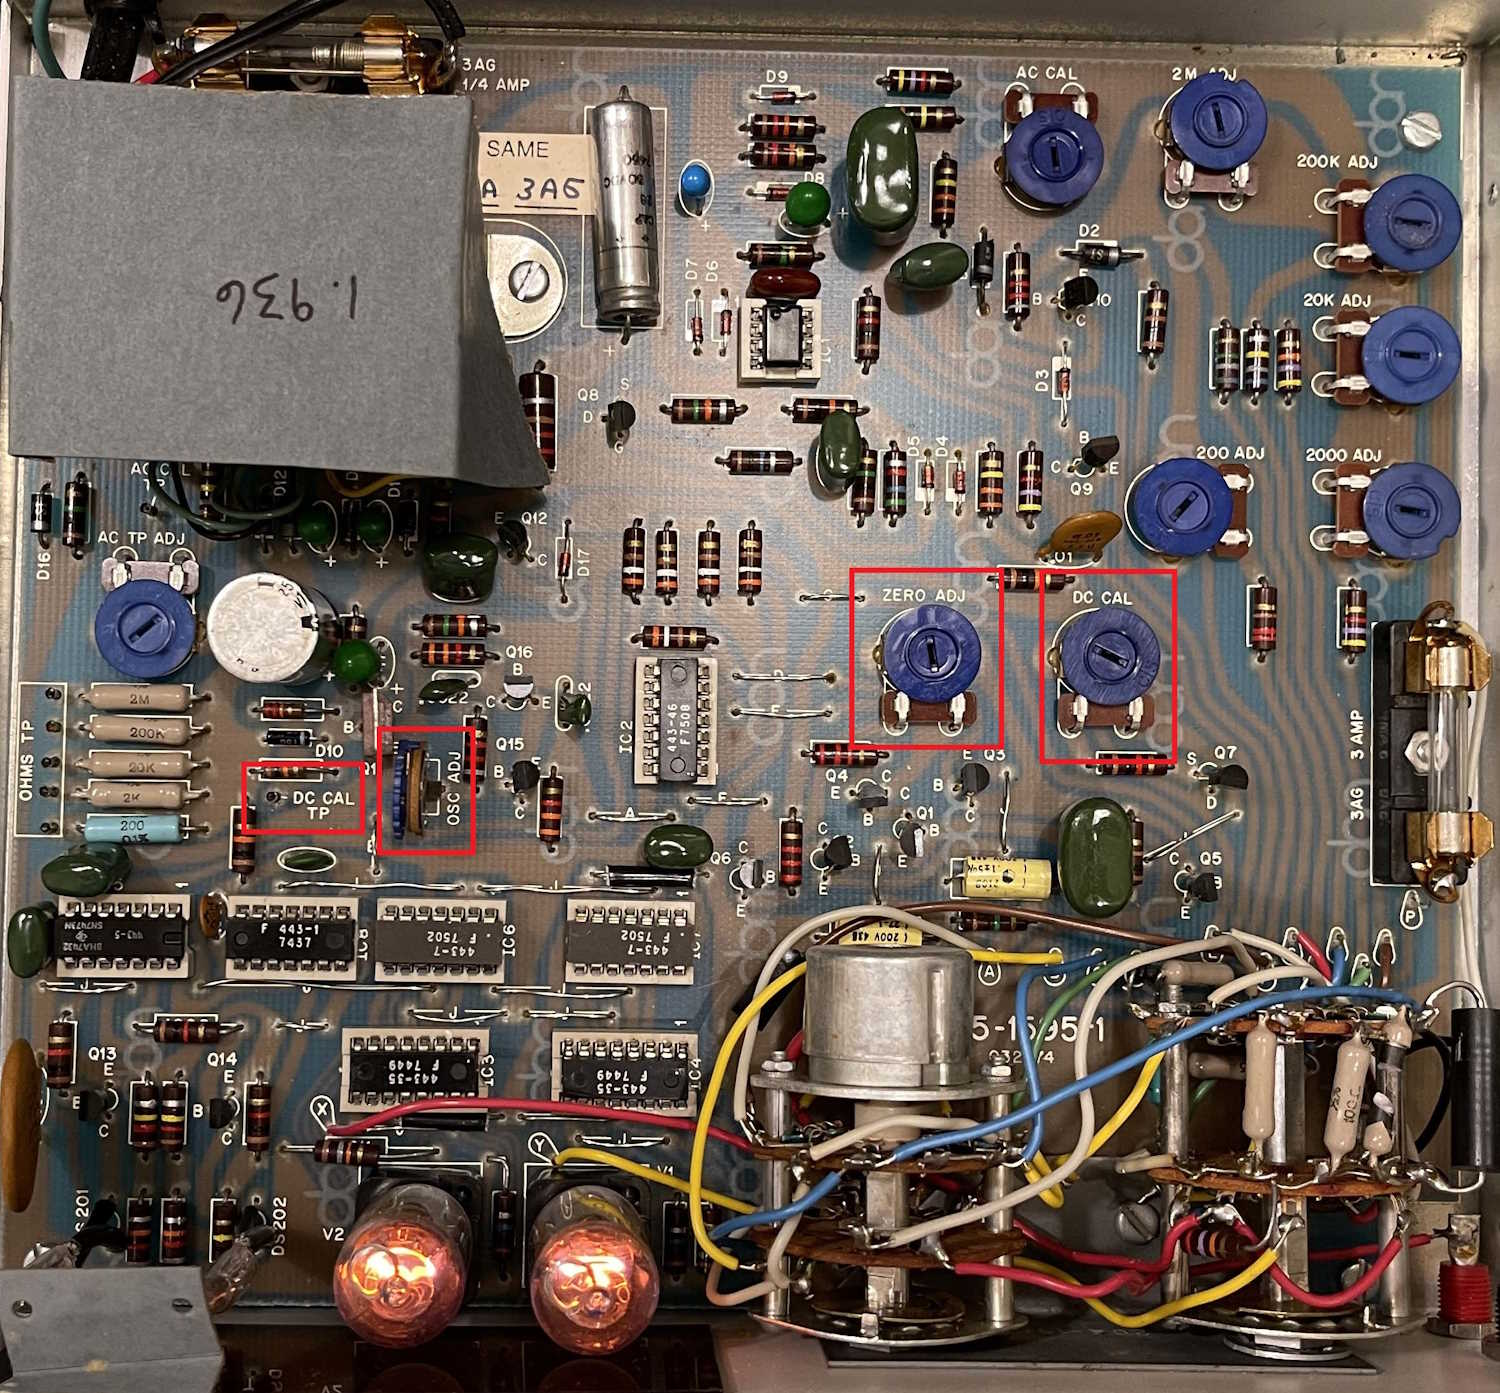
We’re interested in 4 spots in this meter, indicated by the red outlines in the image. They are, from left to right:
1: The DC CAL test point.
2: The OSC adjustment.
3: The ZERO adjustment.
4: The DC CAL adjustment.
(click on the image to enlarge)
What you’ll need:
A small flatblade screwdriver to turn pots. A plastic alignment tool will work best if you have it.
A meter with at least 3 1/2 digits of accuracy
A cliplead
Start by removing the screws for the cover. Look inside and make sure nothing looks burnt or damaged. If you’re good, put the cover back on, and apply power to the unit. Turn it on, and set it to DC Volts, “2” range.
Let it set with power on. The manual suggests 15-30 minutes warmup time, but I say give it a few days. You want this thing to be as warm as it’s going to get. Just let it set. It needs to be nice and temperature stable.
When it’s warmed up, remove the top cover. Start by looking at the paper on the transformer. There’s probably a number written there. Ignore it. That’s the DC CAL voltage as suggested by Heath. It’s wrong.
With your negative lead on the black jack on the front (all measurements are in reference to this jack) measure the DC voltage on the DC CAL test point. It should be 1.9xx-ish. It may be 2.xxx or 1.8xx, but note that to 3 digits. For example, mine states 1.936V, but the actual measurement was 1.901V. Note your voltage somewhere for later use.
Note: This voltage is generated by two crappy carbon comp resistors, so it’s going to drift as well. If you have something with a known voltage around 1.9V, then use it instead!
Jumper the red and black jacks. Using the ZERO adjustment, turn it until you get to 0.01, and then turn it until it JUST goes to 0.00. Heath suggests that at this point, the reading should flicker between 0.00 and 0.01. I usually just set it to 0.00 and don’t worry about it.
This part isn’t in the manual. I don’t know if it will help, but it may get you closer to the specified oscillator value…
Change to KOHMS and open the top. Let it set for a while open circuit so you’re getting the oscillator number. When it’s stopped changing, note it. Put the cover back on and observe the drift. When it’s stopped drifting, note this value as well. When you have the top off to adjust the oscillator, adjust it so that you’re accounting for the drift - i.e. if it drifts up, set it X counts lower, etc.
Or, just do what the manual says and…
Remove the jumper and change the input to KOHMS. The OVER lamp should be lit at this point, you want an open circuit. Using the OSC adjustment, adjust so the display reads .85.
Change back to DC Volts. Connect the red jack to the DC CAL test point. Adjust the DC CAL adjustment so the meter reads as close to your measured voltage as possible. Round the number based on the last digit of your measured voltage. Round up for 6, down for 5.
At this point, you should be able to get a good DC measurement out of the device. Be aware that it’s not very accurate, and on the 20 range you’re going to have a +/- of 0.5V. You may want to go through and adjust things again later after the unit has warmed up more, but you’re never going to get a super accurate reading out of this device.
That’s it for DC. If you want to do the rest of the calibration, I’ve copied the relevant portions of the manual and placed them here: