- 2024
- Dec
- 27
An Olson TE-189 C-R Analyzer - Rebuild, part 4 - What actually was replaced?
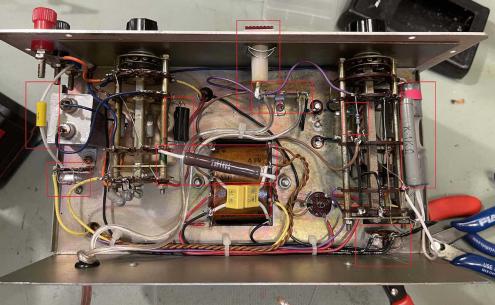
When I started this project, it was going to be a replace some caps and move on. Well…the unit was such a basket case that it needed a lot more love. So what was replaced?
Almost all of the coated wire. I tried to keep the original colors, even though they meant nothing for the most part.
The power cord.
(from left to right)
The input blocking capacitor
The bypass capacitor and a resistor for the eye tube.
The 0.04μF capacitor in the measurement circuit.
The 500Ω balancing resistor,
The two across-the-line capacitors on the transformer.
The neon panel lamp.
The neon panel lamp resistor.
The main DC filter.
The filter capacitor was an unusual 5μF @ 700VDC capacitor. I made one from two 10μF @ 450 units, enclosed in a piece of heat shrink. A red band was placed to indicate positive. I think it turned out ok.
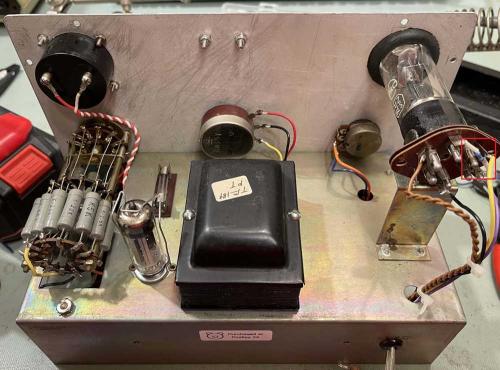
The only thing on the top that was replaced (other than wire) is a resistor for the eye tube, mounted directly on the socket.
Miscellaneous:
Knobs, most of them were stripped out.
Screws for the pointer because they snapped when I took it off for cleaning. I used #4 flathead screws here. They sit slightly lower in the pointer than the originals, which were the size of whatever Olson had on hand at the time.
Screws for the face because they were all missing. I assume these were also some odd size because M2.5 was slightly too small and M3 was slightly too large. I ended up going with M3 and just giving it a little elbow grease.
Screws for the back - no idea what these were, I just found something that worked. I think what I used was duplex screws. Who knows, they were in my parts bin and worked-ish.
Next up: Does it work?
Next part of this series: https://wereboar.com … -and-final-thoughts/
Previous part of this series: https://wereboar.com … ith-parts-and-wires/

