- 2025
- Jul
- 22
The Columbus, OH Hamfest - August 2nd 2025
The Shriner’s Hamfest in Columbus, Ohio is happening August 2nd. This is a small, local show, but it’s always been good for something decent - be it a project device or simply something unique. Since it’s my local show, I always make a point to attend. As always, I’ll have pictures shortly after the show.
Columbus (OH) Hamfest
Aladdin Shrine Center
1801 Gateway Cir
Grove City, OH 43123
August 2
8A - 1PMish
https://aladdinshrine.org/hamfest/
See you there!
My 2025 hamfest list, with pictures: https://wereboar.com … mfest-and-show-list/
- 2025
- Jul
- 8
An easy fix for this GE Microwave Oven.
As the great Monty Python’s Flying Circus once told us: “And now for something completely different.”
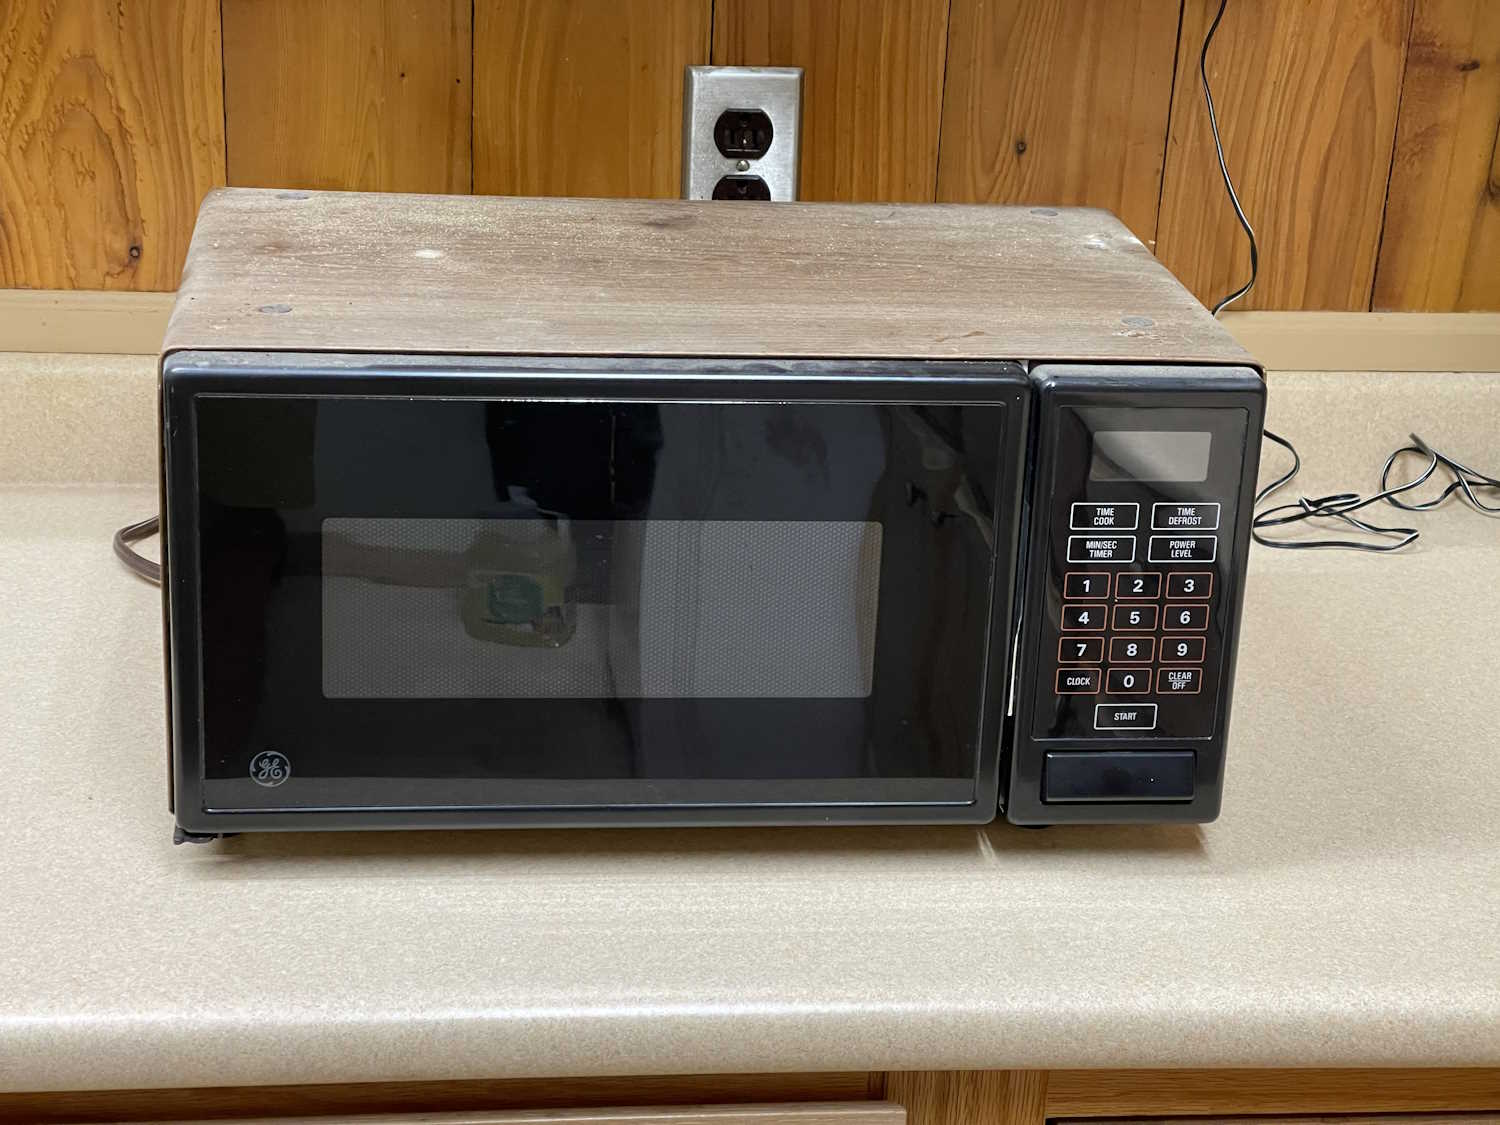
This is some unknown model of GE Microwave. It’s from the early 1990s, and was originally installed in a camper van that a relative is scrapping. Since the unit didn’t get used a whole lot, I took it home thinking that it would work great for an office microwave. There’s probably a model number on the information packet taped to the cavity, but I didn’t care enough to open the now-fragile paper envelope.
Well…not so much. This is what I saw when I plugged it in:

There’s a lot of things this could be. Disclaimer: I used to work as a factory depot tech at GE, and saw this thing’s cousin boards (we just did the controls, repair centers or field techs did the actual unit.) Depending on how much a replacement board cost, some came back to the depot, some just got a new board with the the tech being instructed to toss the old one. As I don’t recognize this particular configuration, this was probably in the “toss it” category.
Background
This particular unit was branded GE, but was made by Samsung. To the best of my knowledge, GE didn’t make any of their own microwaves. (Perhaps a few early ones.) They had other companies make them - in particular, Matsushita and Sanyo did many of the 1970s and 1980s units, with Samsung picking up in the mid 80s and going into the 90s, when I left the company. There were a few others in there, including one Mexican-made unit that was built on GE Coshocton circuit board.
Samsung had the lion’s share of these devices, manufacturing, packing, and shipping the units in GE-marked boxes right to the warehouse. GE never saw or touched these things.
This particular unit was very cost-reduced. GE had been pushing Samsung hard, and it showed in certain components on the board. Displays went from Japanese itron and Noritake oil-based paints to cheaper water-based paints (that’s why you got units where the fluorescent displays were bad after a year,) PCB itself was the absolute thinnest thermoset resin that would crack if you looked at it wrong, and relays - oh boy, these were absolute crapola. No more good Aromat relays, these were cost reduced to the point where someone saw a relay once and said “I can do that!”
Relays
There are, at minimum, a couple of relays in most microwaves. Some used triacs instead, but relays are cheap and isolated. This particular unit has two relays, one for the magnetron and one for the “everything else.” It uses these relays:

The previous generation of relay was typically Aromat or Omron. These were good Japanese relays with contact surfaces that were machined in some way as to suppress arcing and extend the life of the unit, as these were often switching 10A. Not these junkers - they were simply copper buttons on an arm, and they would arc. It wasn’t unusual to get a control board that didn’t operate - it was stuck on or didn’t work at all. The relay was usually melted closed, or had so much carbon on it (and melted surface area) that it wouldn’t close anymore. I don’t have exact numbers, but we went through these relays like they were free cookies.
My boss, the shop manager, asked the project engineer about these relays. Project engineer said that they received several samples direct from Samsung and they worked great, he wasn’t sure why they didn’t work here. Boss asks if he bought them through retail channels - no - so Samsung probably hand-built these test units. We’d constantly get ones with different names on them. Young Reem, Star, DEC, etc…I remember seeing at least 6 types, so who knows where they were actually coming from. They just looked and felt bad. The plastic was that kind that was so thin it would tear like paper.
What does that mean? Any microwave that used these was born to fail. This one, fortunately, has limited hours and a lower power magnetron, so the contacts haven’t blown themselves apart. Yet. However, it’s not if this thing fails, it’s when.
Diagnosis
When I first plugged this thing in, it’s “uh-oh.” There are several problems that could cause this kind of display, including:
Bad resonator (clock)
Bad microcontroller
Bad power supply
Bad soldering
Cracked circuit board
Something in the display/keypad lines
These units were better at soldering than some of their earlier brethren - those were terrible and you’d often get cracks in the board, cracked solder on the transformers, bad solders on the micro and resonator, or no-solders. I can’t count how many no-solder units I got on my bench, with a couple being that way because they had enough flux on them that the board was completely gooey with it.
I almost immediately eliminated the resonator and micro because I could see the scanning of the diplay in the camera’s preview. That means it was still driving the display properly, and not just in a locked up state.
A quick look and the board and soldering on this one look ok, including the resonator. I was getting ready to check power when I noticed the ribbon cable for the keypad just didn’t look quite right. I undid the connector, pushed it around a little, and closed it.
The keypad and display can share lines on the micro, so if one is bad the other can be bad as well. The keypad in particular is a ribbon with carbon contacts that slides down into a mating connector. The connector then has a plastic blade that goes into the body and pushes the ribbon against the contacts. These connectors are garbage, they will break at their hinge and change shape slightly over the years. As this sat in a camper van, hot, cold, hot, cold…the ribbon wasn’t seated properly.
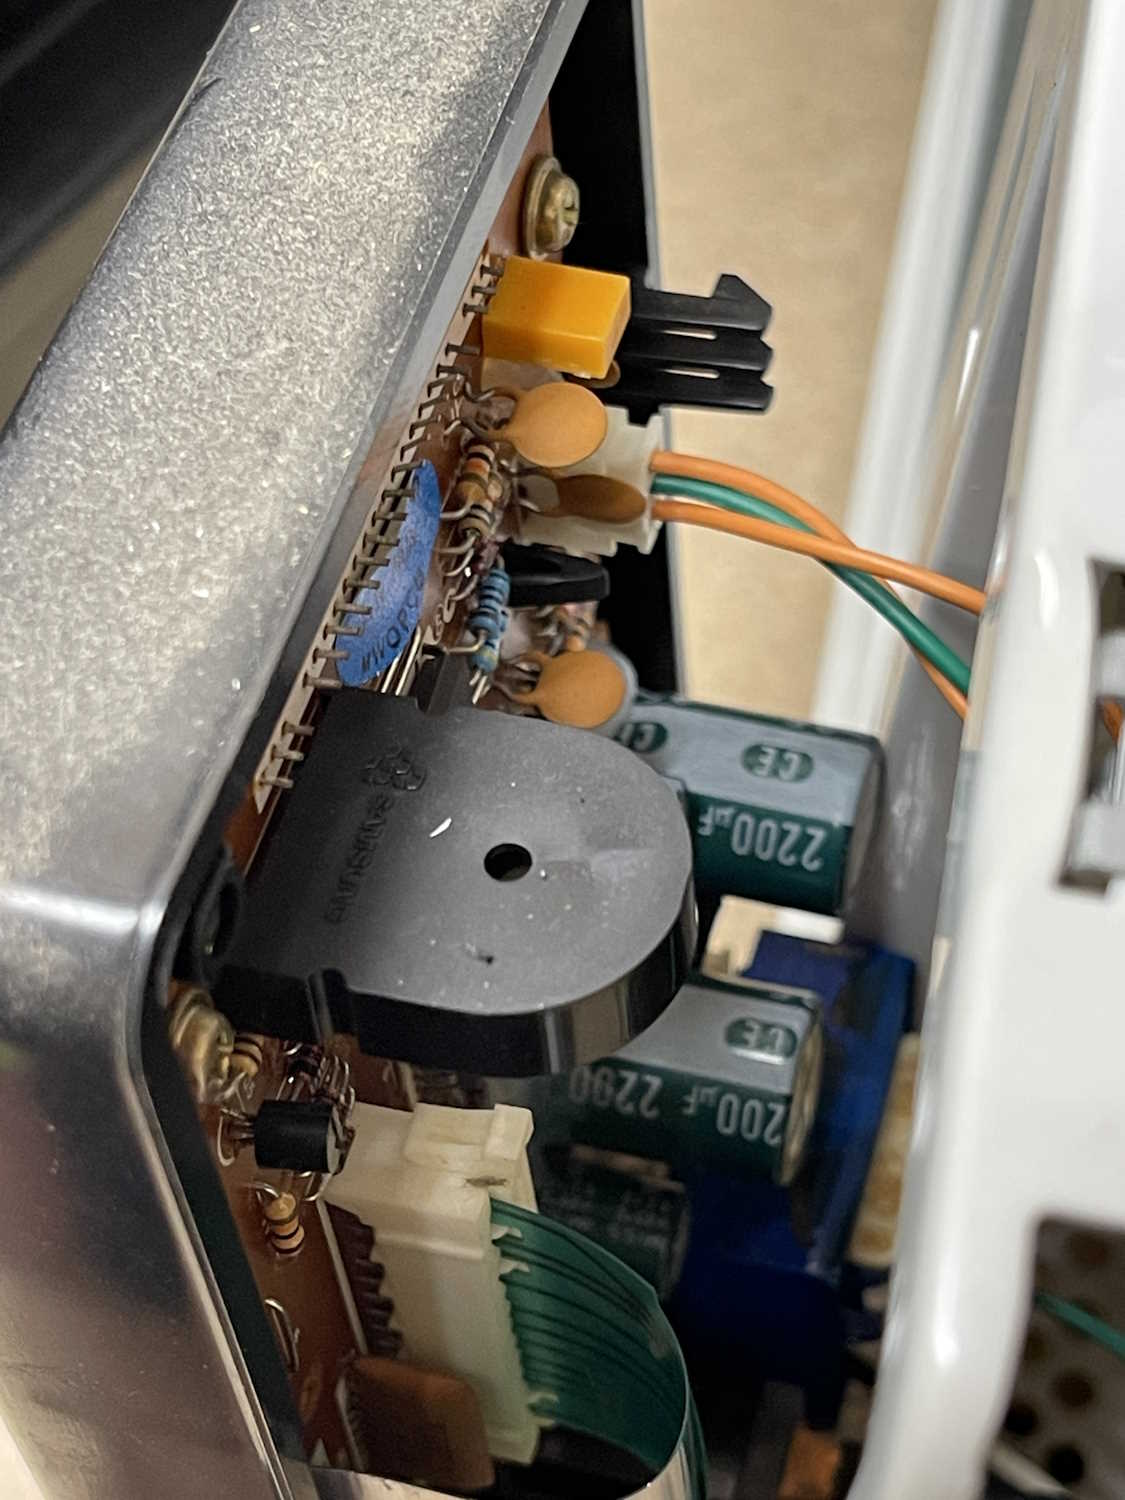
This isn’t the best shot, but you can see the ribbon coming around from the front of the keypad into it’s connector. This one didn’t break when I opened it(!)
It doesn’t take long to test, so I plugged it in and was rewarded with the power-fail all segments on display. Keypad works now, I was able to set the time:
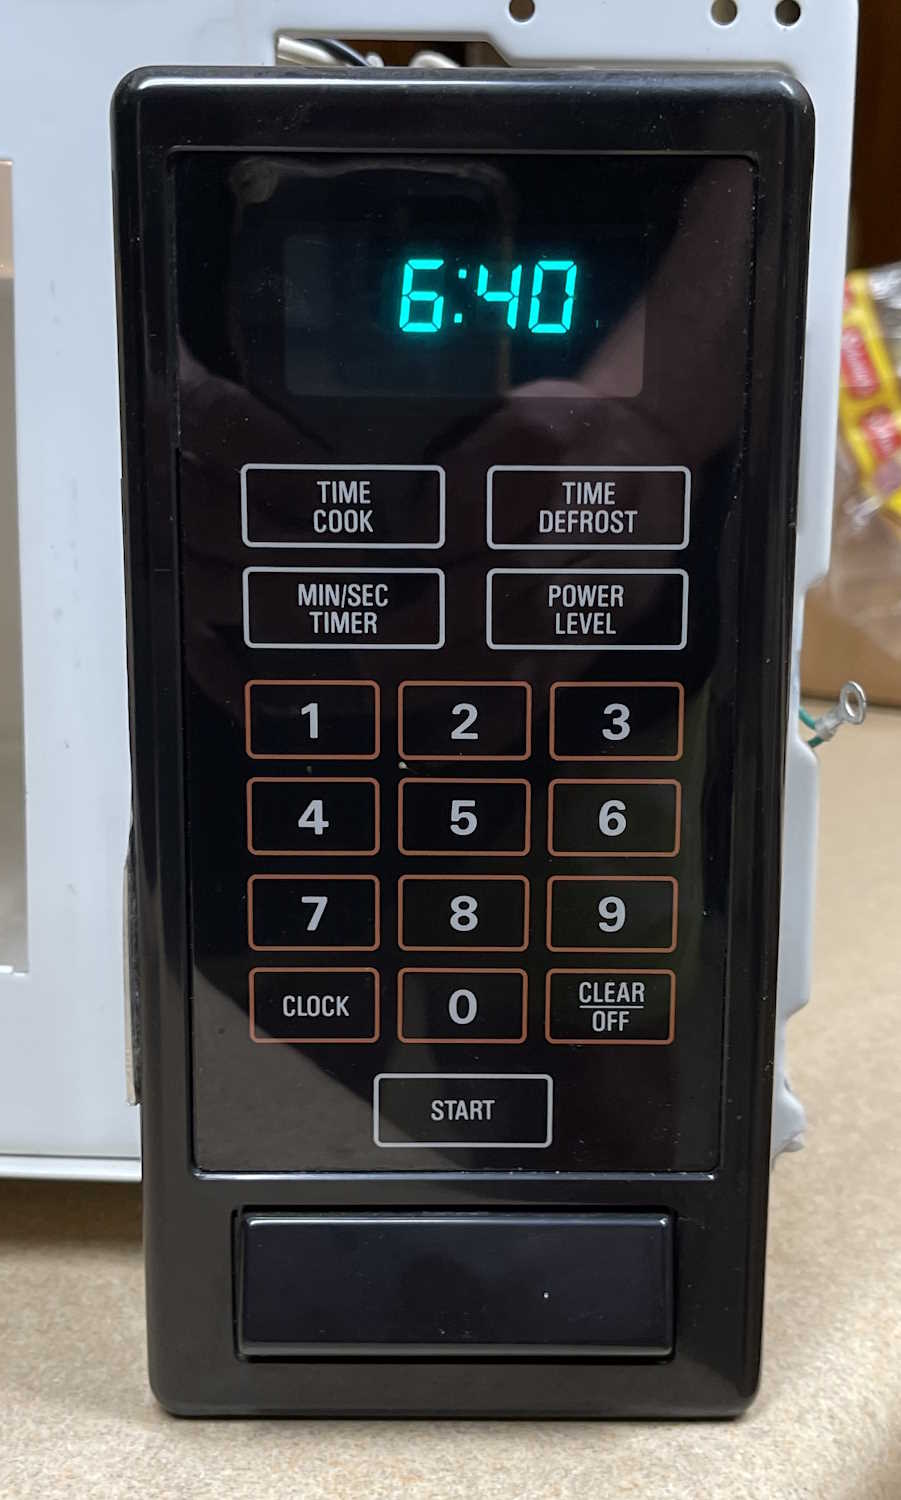
I put it back together, gave it a test, and it made much happy hot water.
That was an easy fix - I was worried some unobtainable part (like the mask-programmed microcontroller) was dead, but it’s not. Off to the office with you!
- 2025
- Jul
- 4
This is Project’s 4th anniversary.
July 4th, 2021 is when I opened this as pygg.xyz and transferred some of my old blogger.com content here.
I don’t have anything special to present except thank you - I appreciate all of the views I get here, and I hope you’ve found something of interest over the past 4 years.
I have a number of devices and shows in the works, please check back soon.
- 2025
- Jul
- 3
Connecting a shared drive and file sensor to Home Assistant Green.
The Home Assistant Green is just a Linux boxen running a containerized version of Home Assistant under a minimalist operating system. Technically, it should be able to do anything that the kernal supports, and one of those things is connecting to a shared drive.
I have a Raspberry Pi that has an I2C air pressure sensor connected to it. Once a minute, a cronjob reads that sensor and writes it to a location on the network - in this case a shared folder on a NFS-connected Synology drive. That file is then available for other programs to use - primarily my own garbage php frontend, and Cacti. Since Home Assistant has a nicer frontend than Cacti, I’d also like to present it there.
There’s a lot of conflicting information on how to do this online, and again - the documentation HA provides is just someone’s thought process. It’s actually fairly easy once you figure it out, however.
For this exercise, I’m using my older NFS connected Synology NAS. It has older versions of NFS opened up to the entire network. I’m not going to go into how to do that since I’m running a pre 5.0 variant, but if you want to do this for yourself make sure you understand how the NFS process works, and that you can connect to it. I’m also going to assume that you know how to access the configuration files in your system.
In order to create this new sensor, there are several steps:
1: Create the NFS share on your target device.
2: Create the share in Home Assistant
3: Allow HA to access the share
4: Create the sensor
1: We’ve already covered this, you need to make sure you can do this on your own.
2: Creating a share in Home Assistant is much easier than it used to be. Since a version in 2023, the system now has this builtin to the GUI. To access this, go to:
settings (sidebar gear icon)  > system
     > storage > add network storage
You’ll get a window that looks like this:
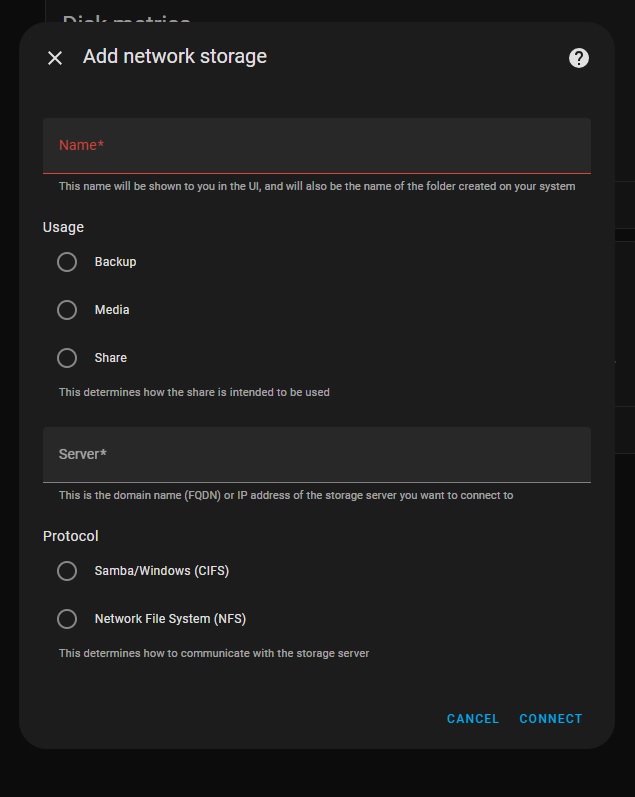
Give your share a name. I’m going to call my share raspi, because it was originally set up to share files between multiple SBCs on my network. This is the name that the HA process will use when you access it, so make it meaningful, one word, and as short as you can so you don’t have to type a lot of long things. Or, do whatever you like, but I’d suggest keeping it to a single, no-space word. I don’t know how HA handles spaces here.
The next section is entitled “Useage” - this is kind of misleading, as the only thing this does is identify where the share will be located under the HA process. For example, if you choose “share,” your file path will be “/share/raspi” - it’s more of a human readable delineation than an actual “thou shalt only put thine backup here” type of thing. I chose share just because why not.
Next, choose the type of connection you want to make, NFS or CIFS. CIFS is just a fancy name for the type of shares that a Windows system uses, while NFS is the preferred Linux connection method. There’s plenty of info out there on what these acronyms mean if you’re so inclined.
CIFS usually requires a user/pass/domain type thing (Think your windows login and workgroup) whereas NFS can just operate based on IP address limiting. Since I’m using NFS, I chose that and entered my share:
<ip address>:/volume1/raspi
ip address is self explanatory, it’s the address of my share. Follow this with a colon, and the entire path of the share - Synology units call each volume by it’s numeric name, so “volume1, volume2,” etc. My share is on the first disk and is called raspi, which is the same as the name I gave it for home assistant. I’m calling my share on HA and on the remote share the same thing, but you don’t have to. Call it whatever you like within the Home Assistant system, as long as you’re mapped to the correct place on the remote share.
Assuming all is correct, hit connect and if right, it should just do it. Now, on the storage page you should see your new connection as ipaddr/path/to/share. It won’t say this, but now home assistant has mapped /share/raspi to this shared location on your network.
3: You’ll need to allow the Home Assistant container access to these foreign locations, and that involves editing your configuration.yaml file. So load up the file editor add-on (or install it) and navigate to your configuration file. You’ll need to add a new block to your config - I like to do this right before my sensor: block.
homeassistant:
  allowlist_external_dirs:
    - '/share/raspi
    - '/share/raspi/hass'
Note the single quotes!
What we’re doing here is adding a block called homeassistant: and using the allowlist directive to tell HA it can indeed access these locations that aren’t it’s native systems. I’ve gone ahead and added both the directory I need to access, as well as a directory I can write to later that’s specifically set up for this machine. I don’t know if top-level permissions are inherited, so I just added each individual directory on it’s own. This is pretty much the same format as all other directives in the yaml file, so just follow others if you’re unsure. Spacing is important here!
In my example, raspi is the directory where all the sensor values I want get written, and hass is a directory just for this machine that I can write to and retrieve things from. Create directories as you need them, you don’t need to make extras if you’re not going to use them.
Once you’ve added the directories, use the configuration checker under developer tools to make sure your config is good, then restart the HA process. Allow some time for everything to come back up and populate the new fields. The share seems to persist through this, so you should be good to leave it alone.
4: To create a sensor, you’ll need the file sensor with the “file” integration. To do this:
setting (gear icon) > devices &services > add integration
     > file > set up a file based sensor
Search for file in the integrations list
You’ll get something that looks like this:
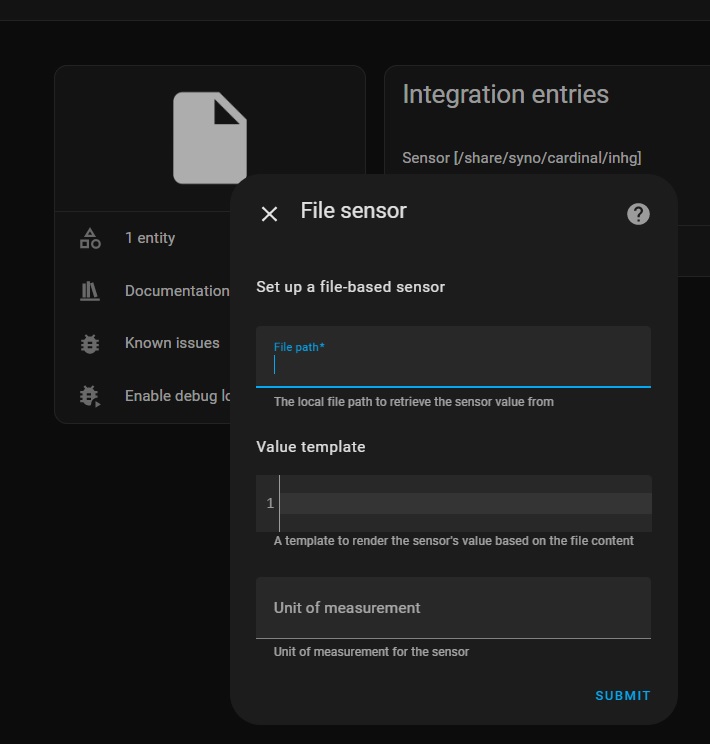
Fill out the form with your sensor (entity) information.
File path is the HA path you set up, in this example it would be:
/share/raspi/airpress.txt
where airpress.txt is the file we want to read. You’ll need to call this whatever you’re trying to read. This should be a single value with no other stuff attached.
Template is the yaml code you want to use to process the value you read. Since my value is already what I want, I left it blank. You may need to change that - yaml code is beyond the scope of this document.
Unit of measurement is just that. It’s just an identifier and only means something for you. In my case, I chose inHg since it’s air pressure. You could call it chickens/hour, °Quackenbush, or “Bob.” Whatever you like. Hit submit, and it should create a new entity creatively called “file.” Click on the entities link, then click the new “file” entity, and edit so the name means something using the gear icon.
You now have a new sensor populated by a value that you can manipulate like any other sensor.