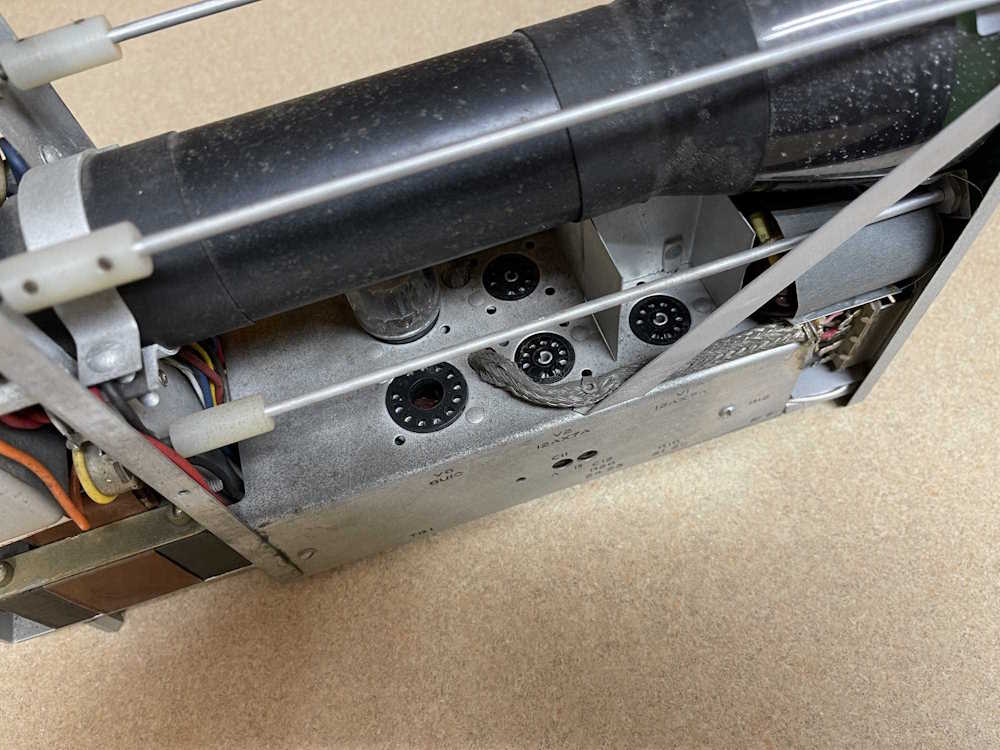
Back in part 5 of my Heathkit IG-72 series, I was getting ready to button things up when the socket for the rectifier tube started arcing. I assumed there as carbon tracking inside the socket and moved on with replacing it.
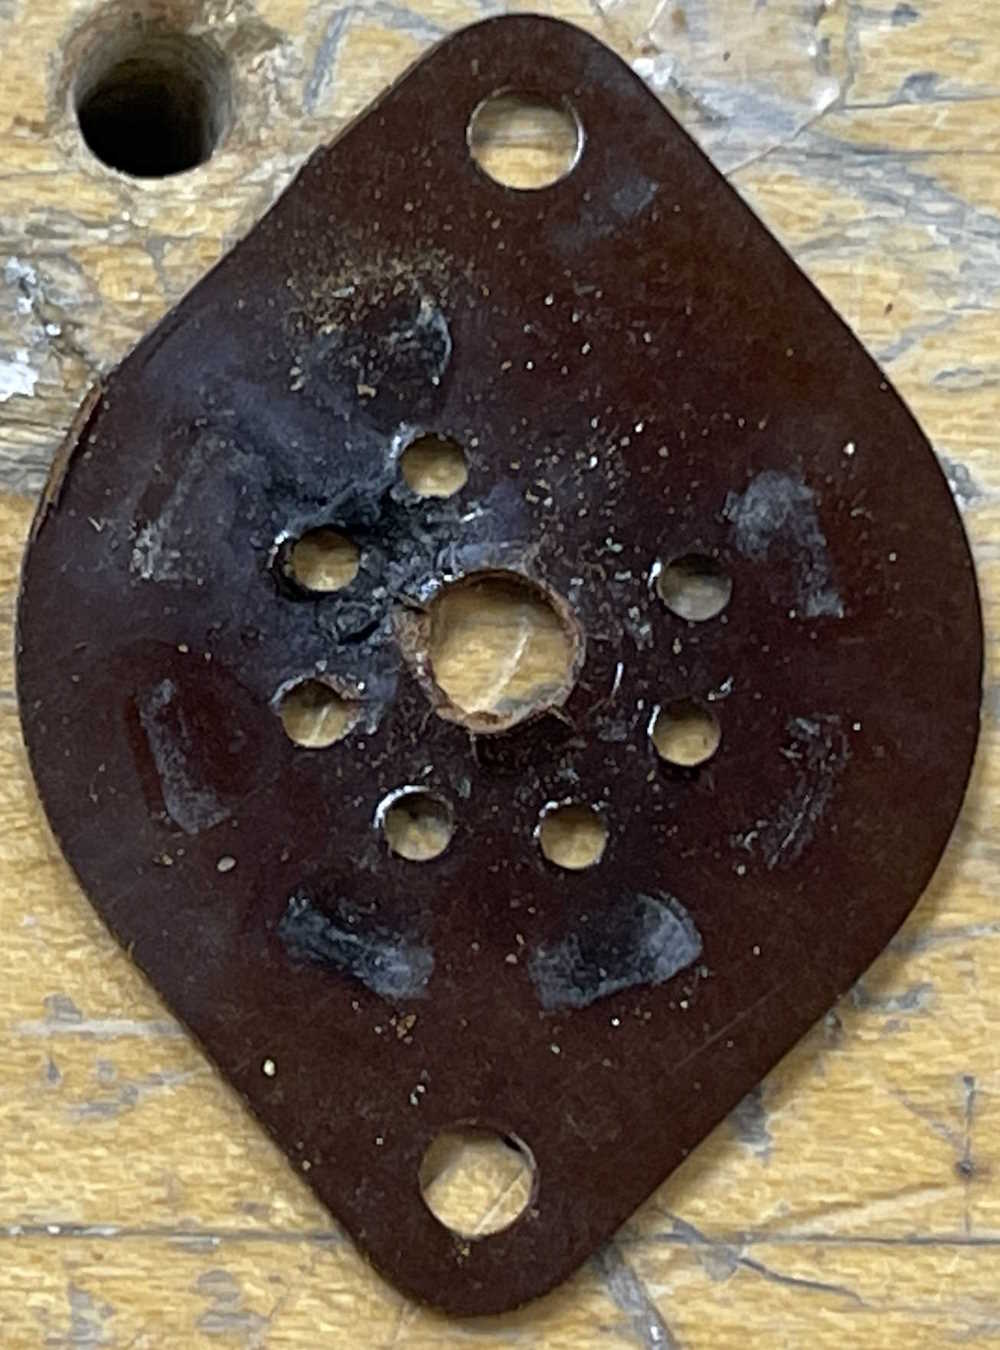
That assumption was correct. Here’s the top wafer:
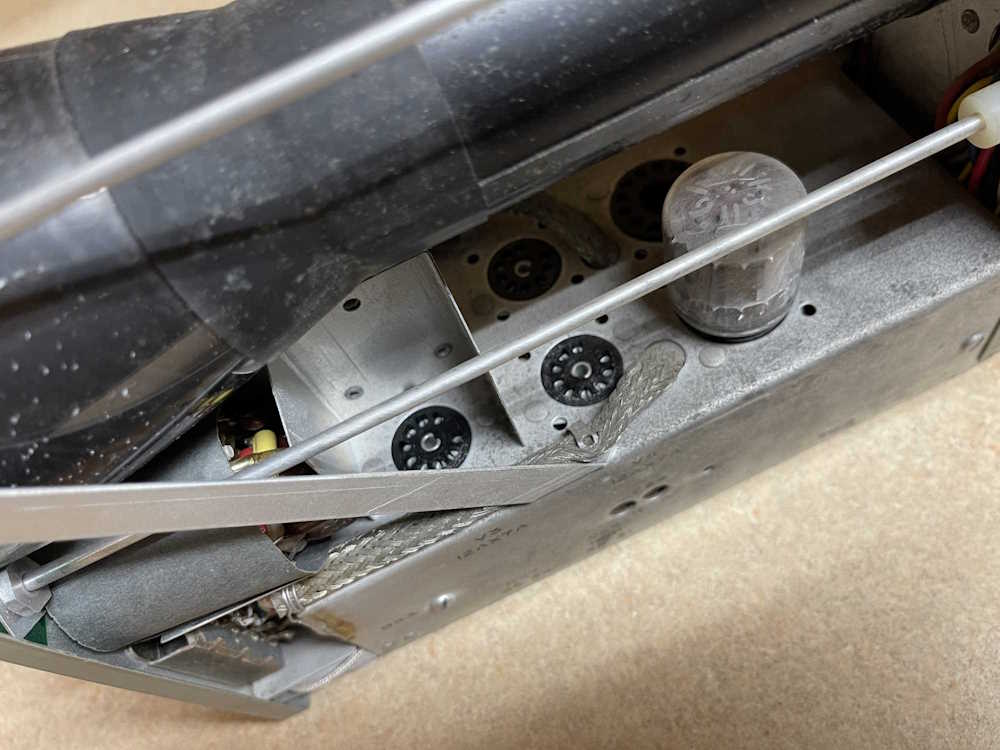
You can clearly see the arc has eaten away the portion between pins 6 and 7, while depositing a lot of carbon and other debris on the phenolic wafer. The bottom wafer is similar:
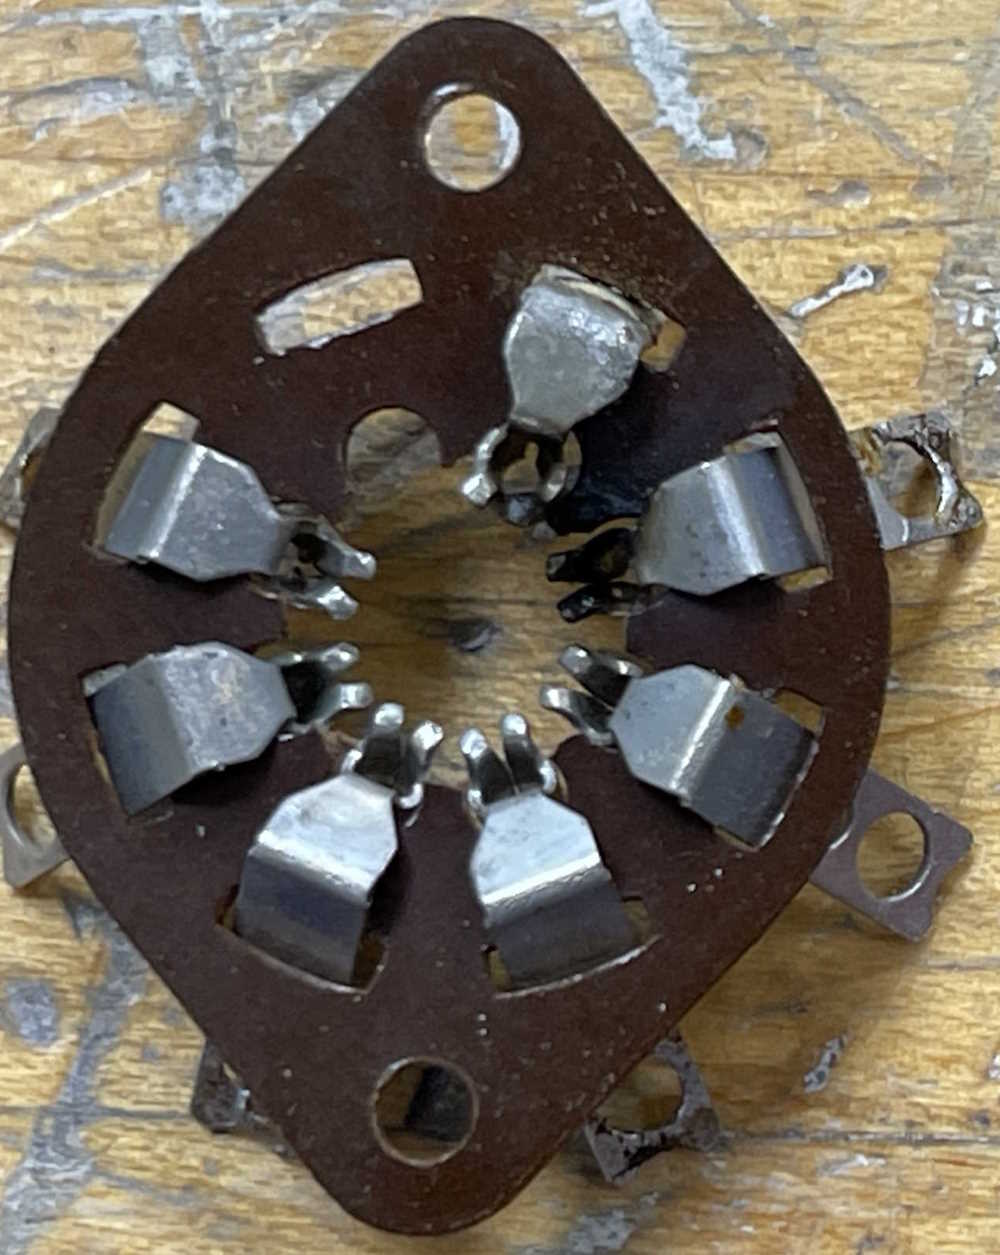
It’s not the easiest thing to see, but there’s a lot of soot on the same two pins, and part of the socket crumbled away as the rivet was being drilled out. I’m surprised this thing didn’t arc as soon as it was turned on - but perhaps this is why the device was retired. Who knows, really.
Regardless, there’s a new socket in it’s place that shouldn’t have this issue, and this one goes in the bin - although I may save a few of the better pins for some later purpose.
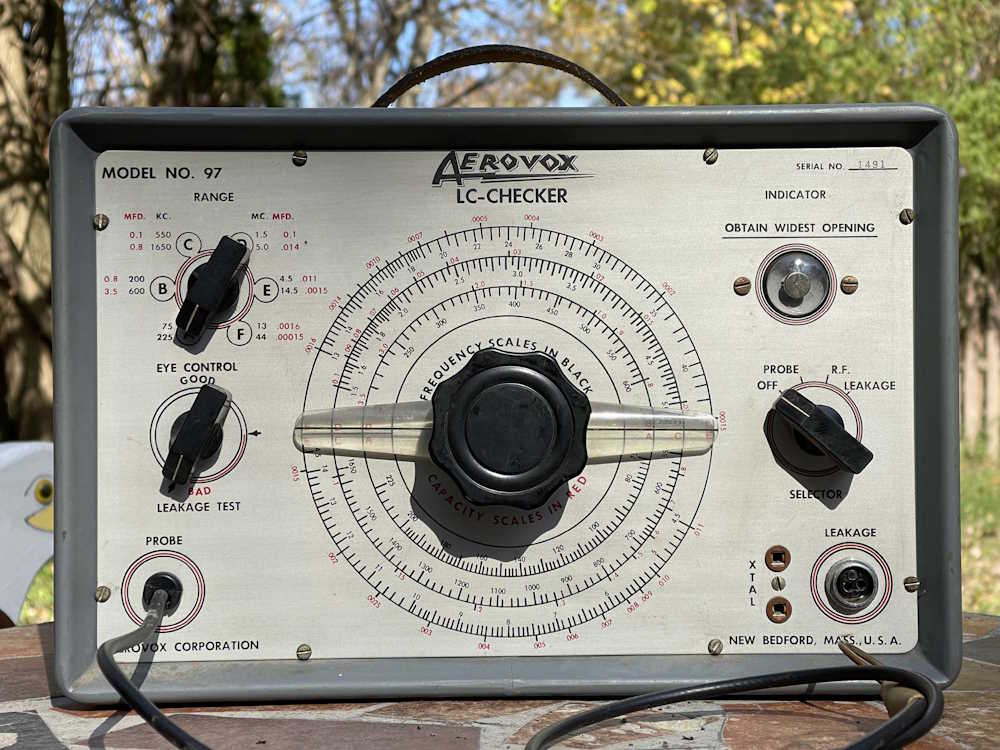
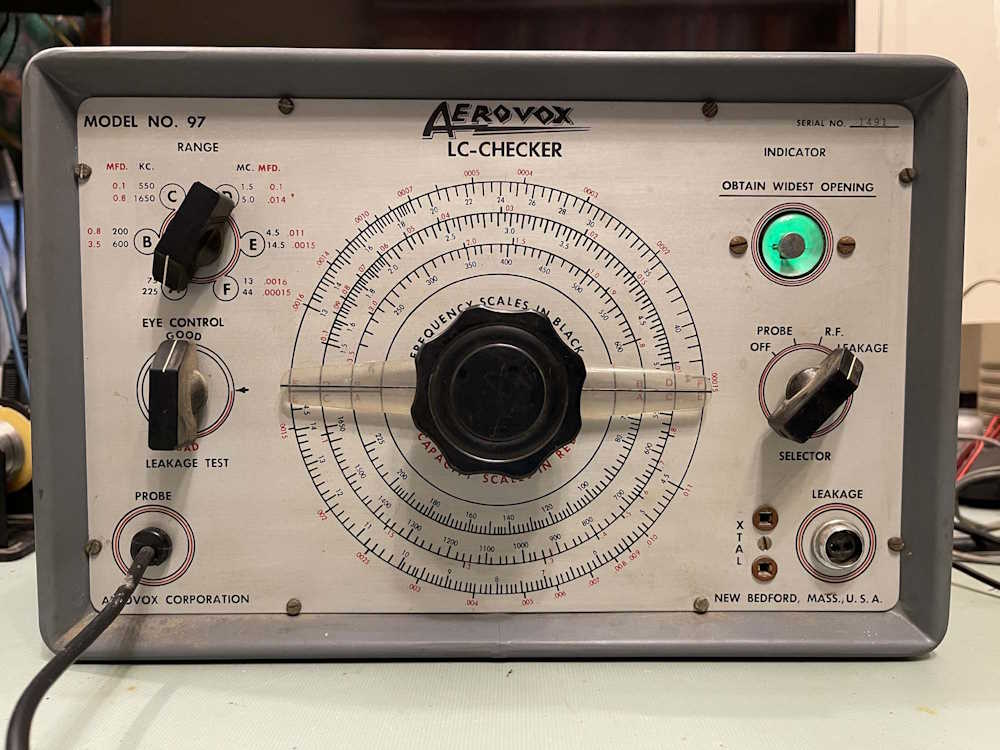
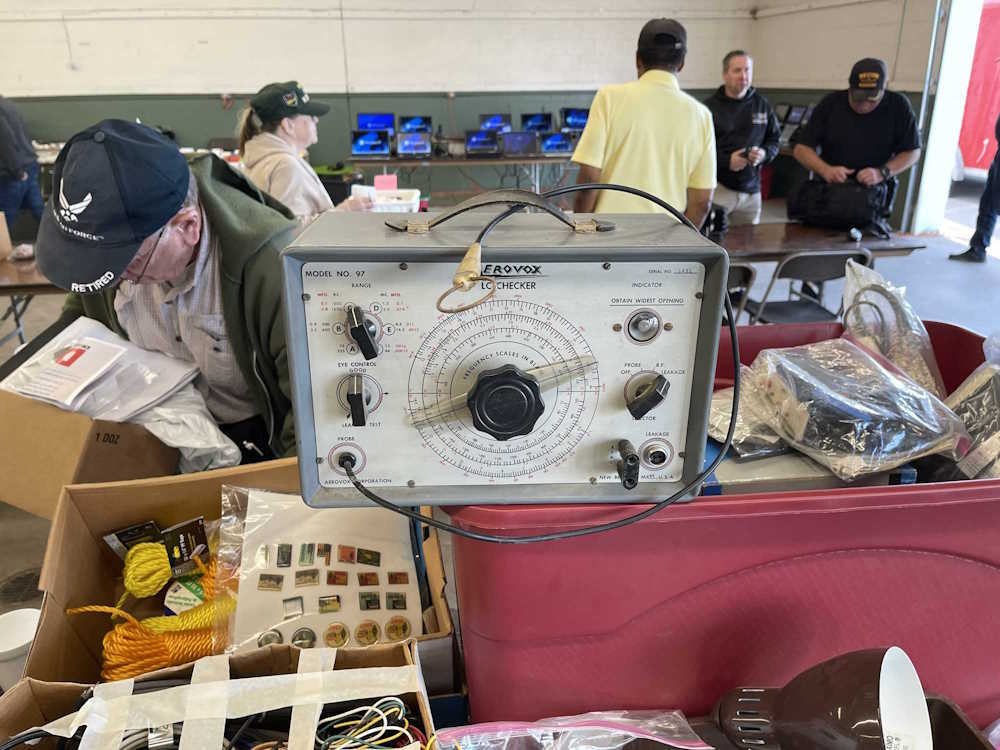
This interesting piece came from the 2024 Cleveland Hamfest for $5. The vendor was selling an estate - that seems to be happening a lot lately - and was just looking to return some cash to the estate itself. He knew nothing about the unit, but I took a chance and picked it up.
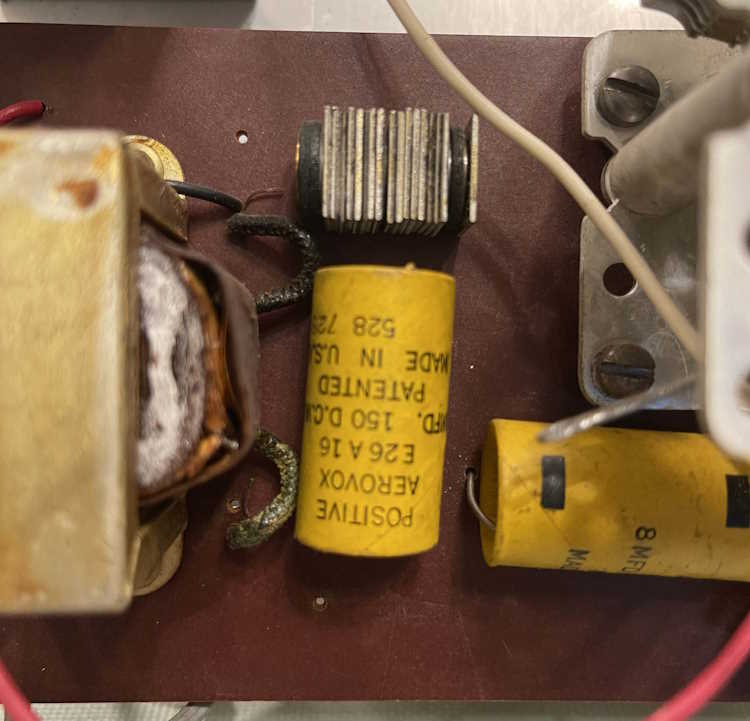
Aerovox, of course, is a name you’ll probably see on capacitors in older devices. The name Aerovox is still out there, but it seems to be more of an industrial player instead of a consumer devices company.
The device seems to be fairly standard at first glance, with your normal ranges and dial to tune to the unit under test.
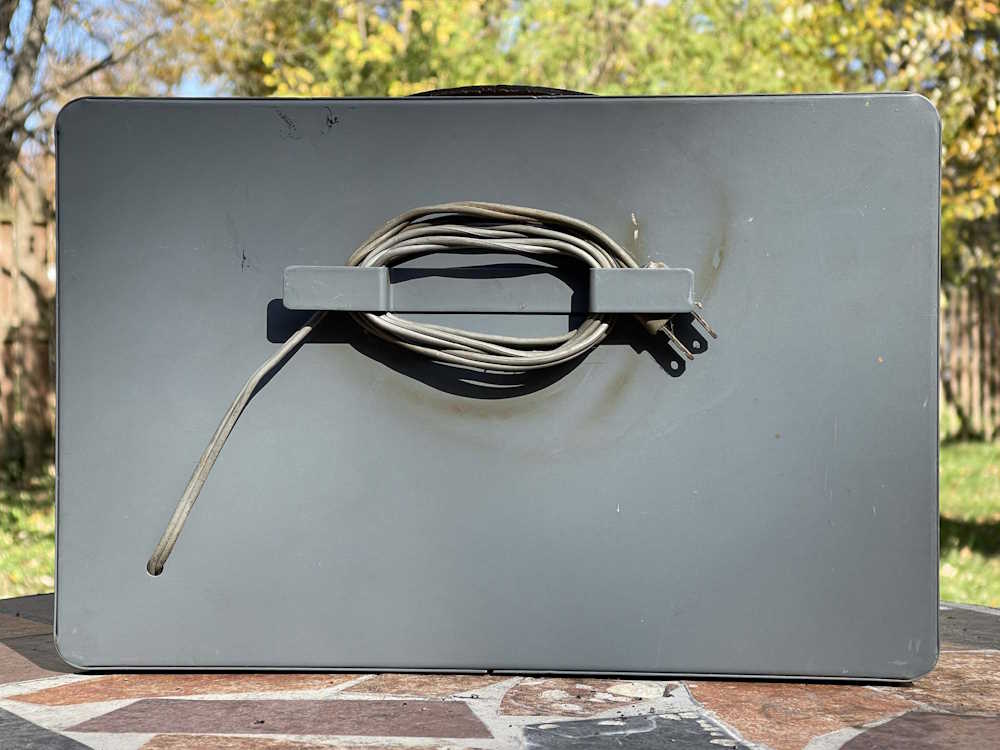
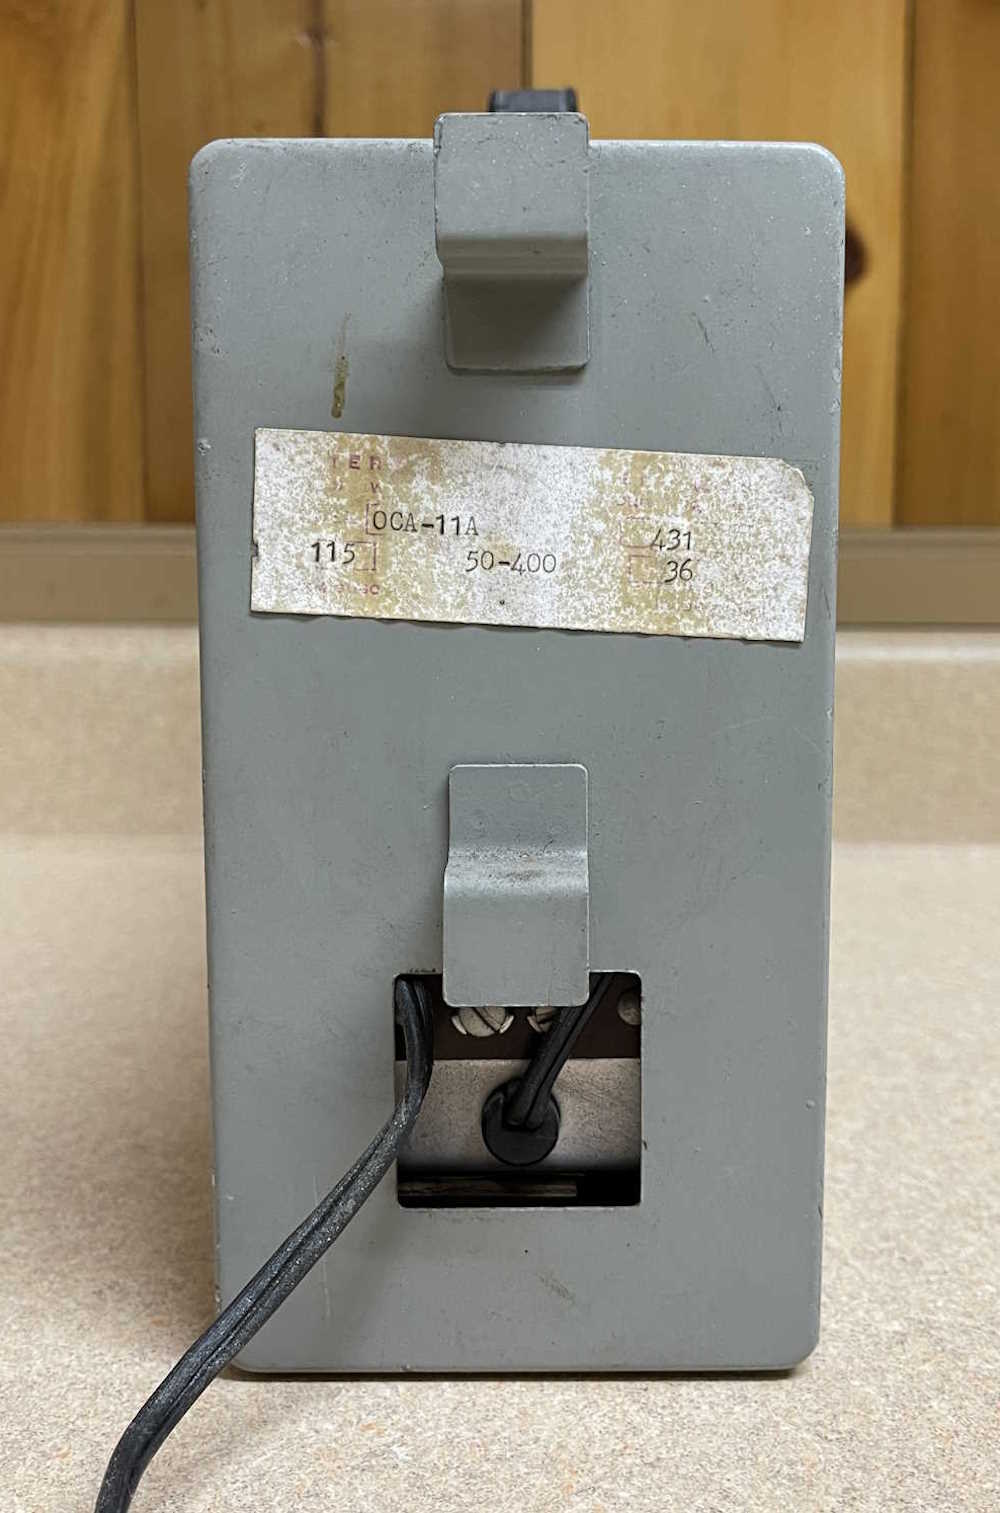
Nothing special about the case.
The back does have a nice cord wrap area, and the cord seems to be still soft.
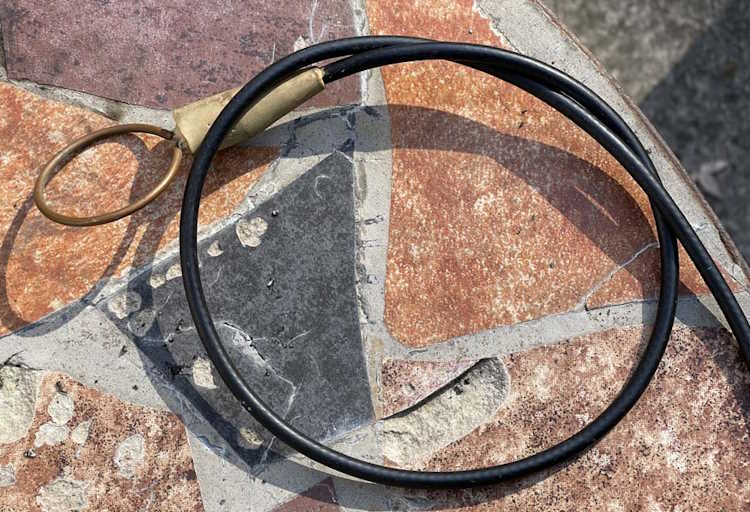
The probe is the most unusual part of this device, and is a deal-breaker for using the thing.
Its an inductive probe - there was another piece that went inside this loop of copper, so you could make a part connection without actually connecting the electronics of the tester to the part itself. This is kind of cool because it avoids hitting a live or charged device, but it’s also missing the business end of the probe, so the device can’t read anything. I’m sure it could be modified to work, but I have enough checkers already…
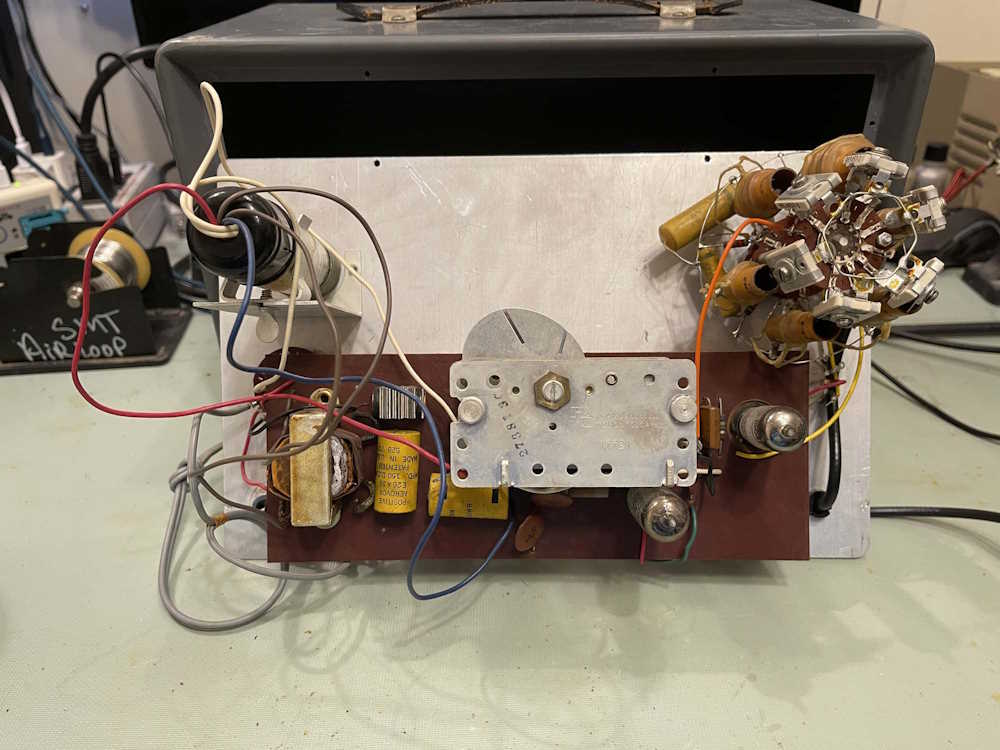
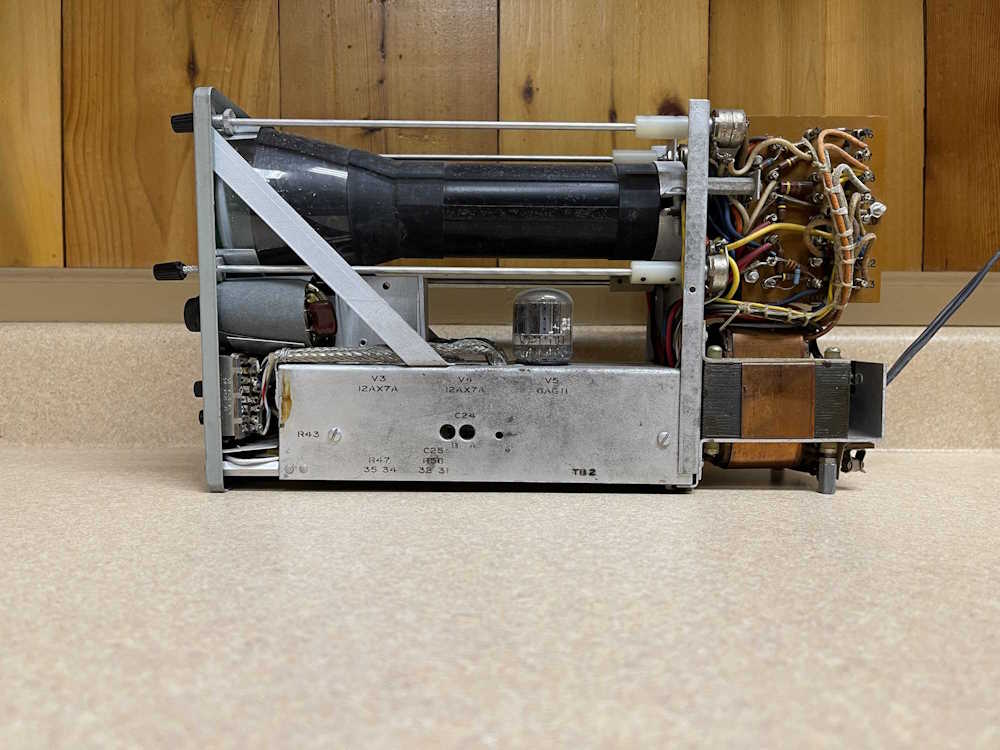
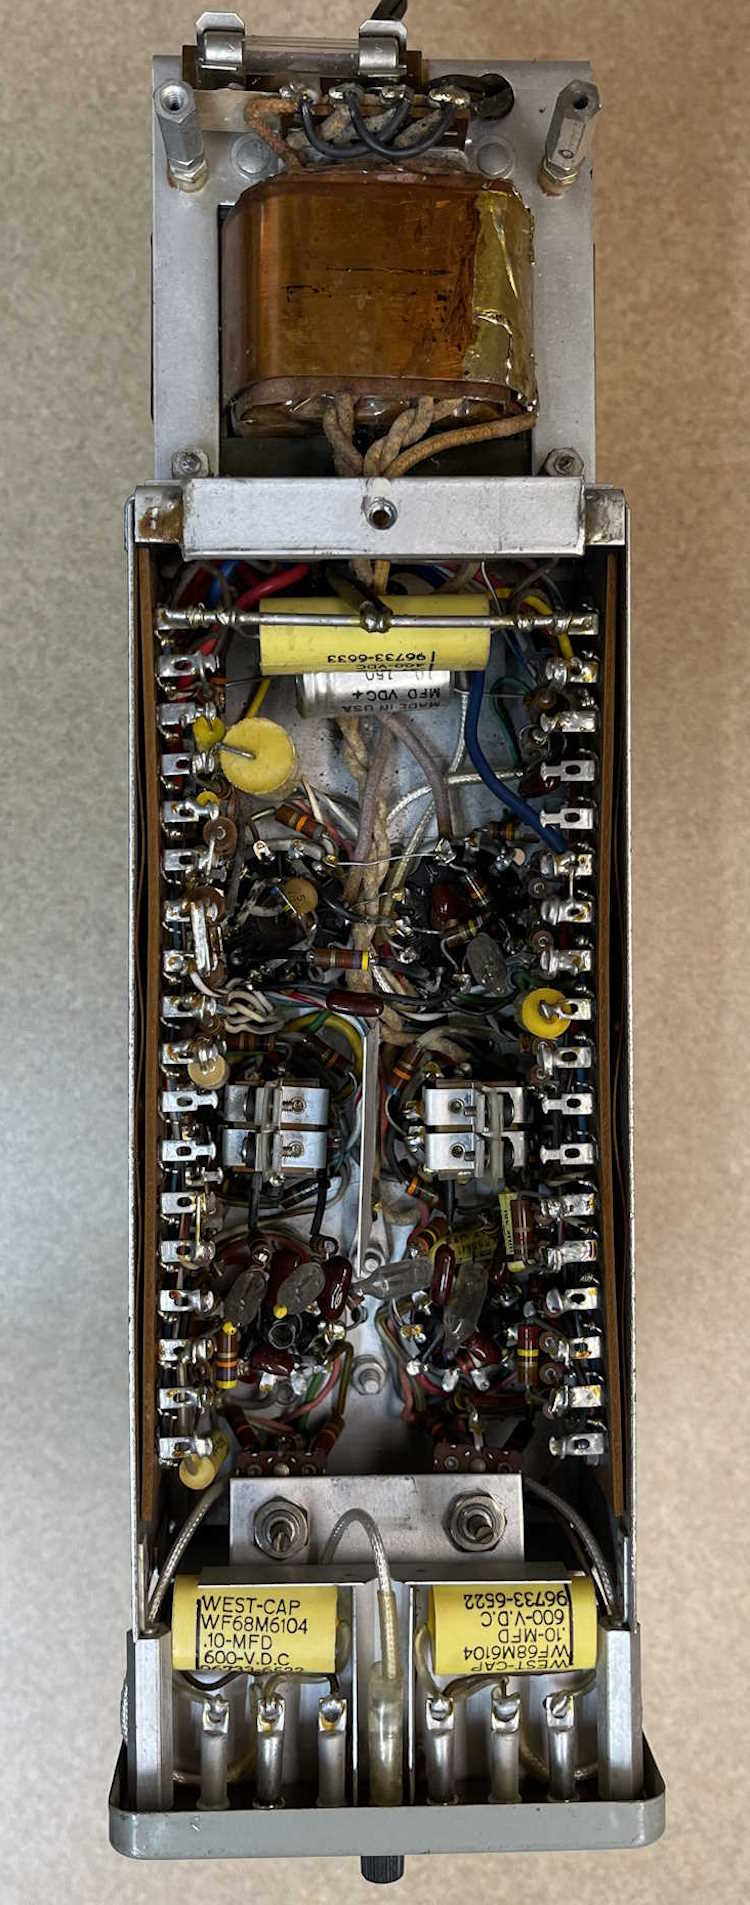
The inside is pretty sparse. A big selenium stack, some capacitors, and the oscillator section for actually checking parts. The big banana slicer in the middle dominates everything.
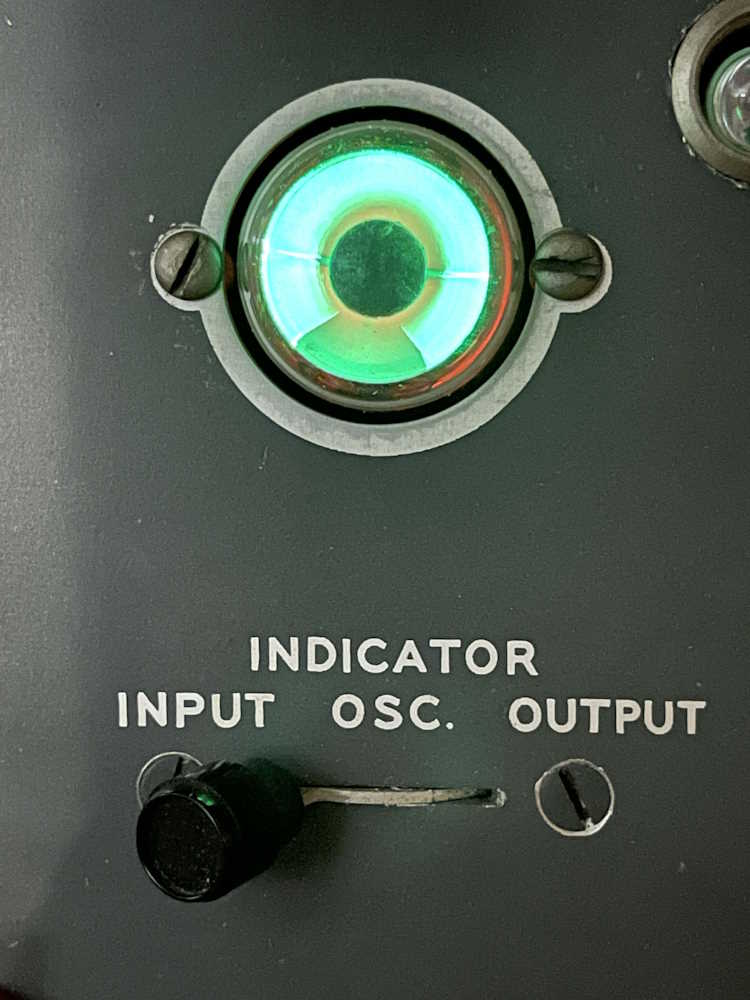
The device does come alive, and switching things makes the eye open and close.
But…that’s about it. Without the probe, it’s nothing more than a shelf queen - or parts. Fortunately, I have someone who would like a display piece, so it goes to them instead of the parts bin.
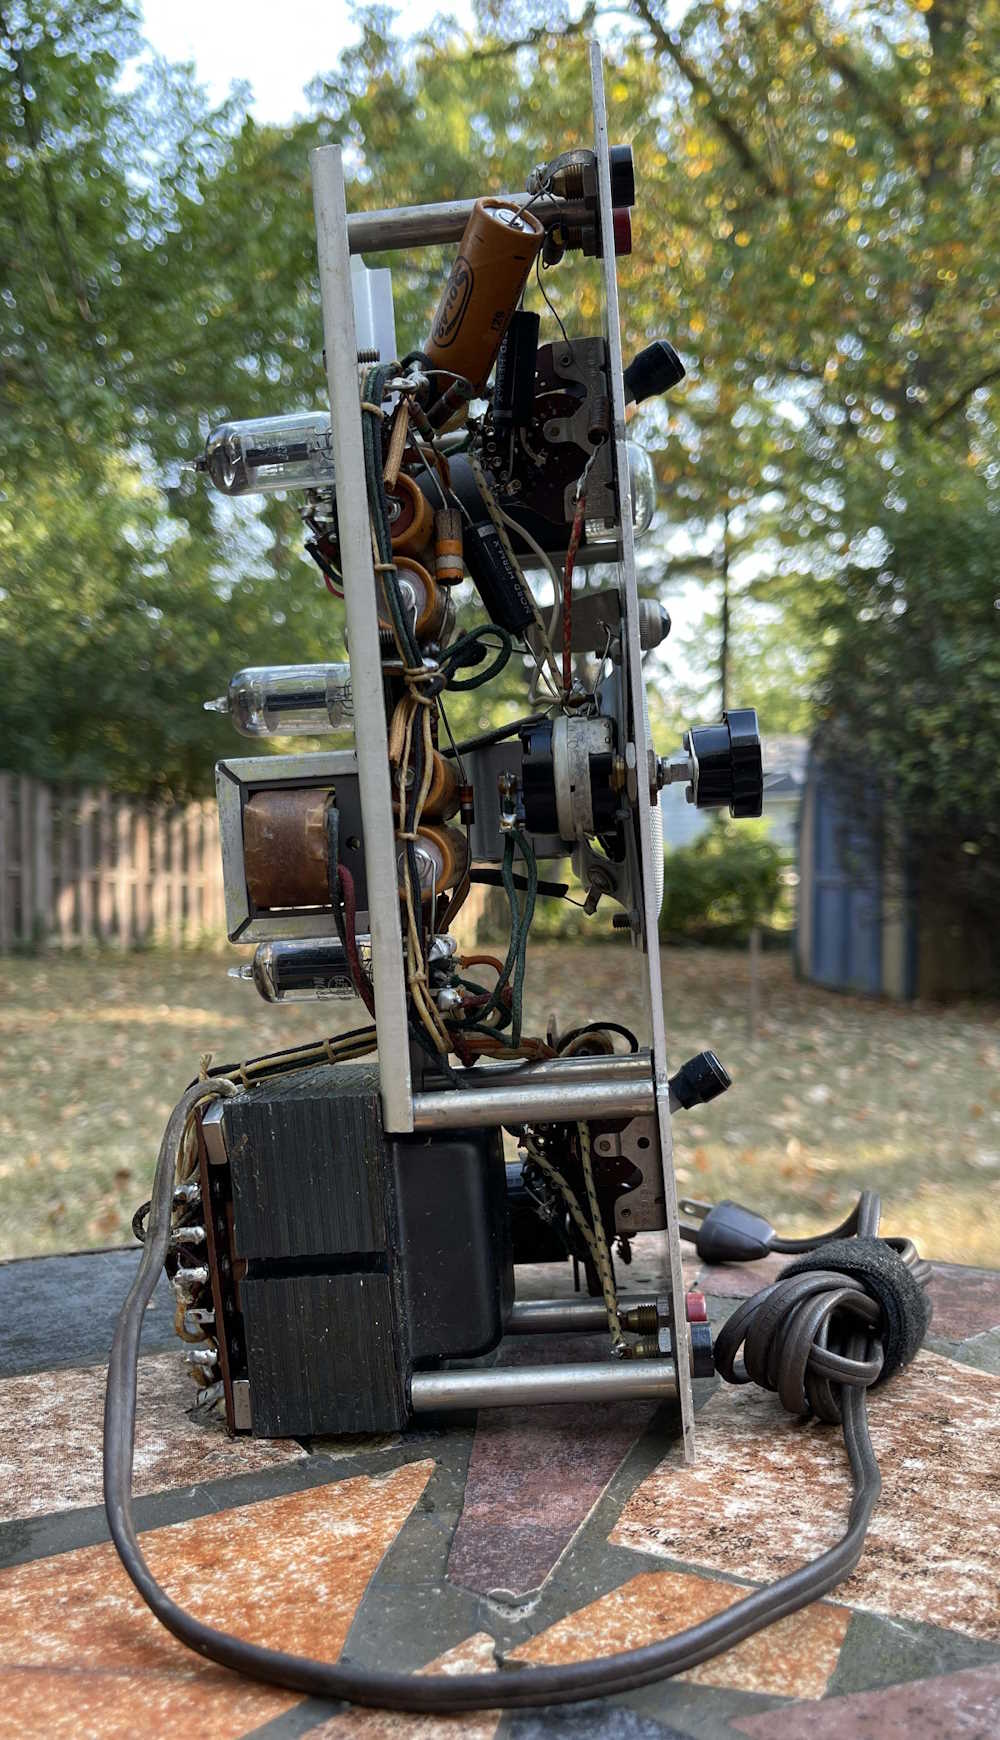
This little scope came from the recent MARC hamfest, and was sold as not working - the previous owner stated that someone had removed tubes, and all he did was verify the heater in the CRT was lighting up. He was right, someone removed all of the 12AX7 tubes as well as a 6U10 compactron, leaving only a 6AG11 compactron in place. All of these devices are triode amplifiers, with the 6AG11 having two diodes in addition to the triodes.
The device appears to have a solid-state power supply with solitary diode. There’s some small evidence of repairs being made over the years, but for the most part it seems to be fairly original.
The device is capable of operating on 50-400Hz @ 115VAC
The front offers all the controls, and uses pin jacks for input on a strip at the bottom. That’s kind of unusual. The metal under the paint appears to be oxidized, and the enamel with the lettering is flaking off. The potentiometers are brought out to the front by long internal shafts, some of which are bent. This could be an easy fix, as they’re just connected internally with nylon unions.
The back offers a cord wrap and some screw terminals, presumably for grounds. It also offers a badly exiting cord from the previous owner.
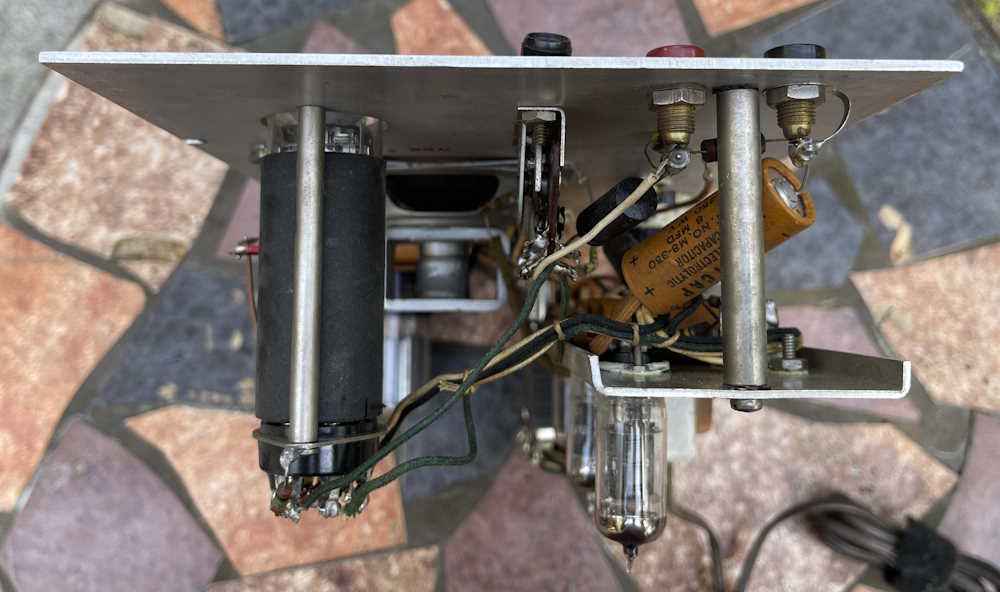
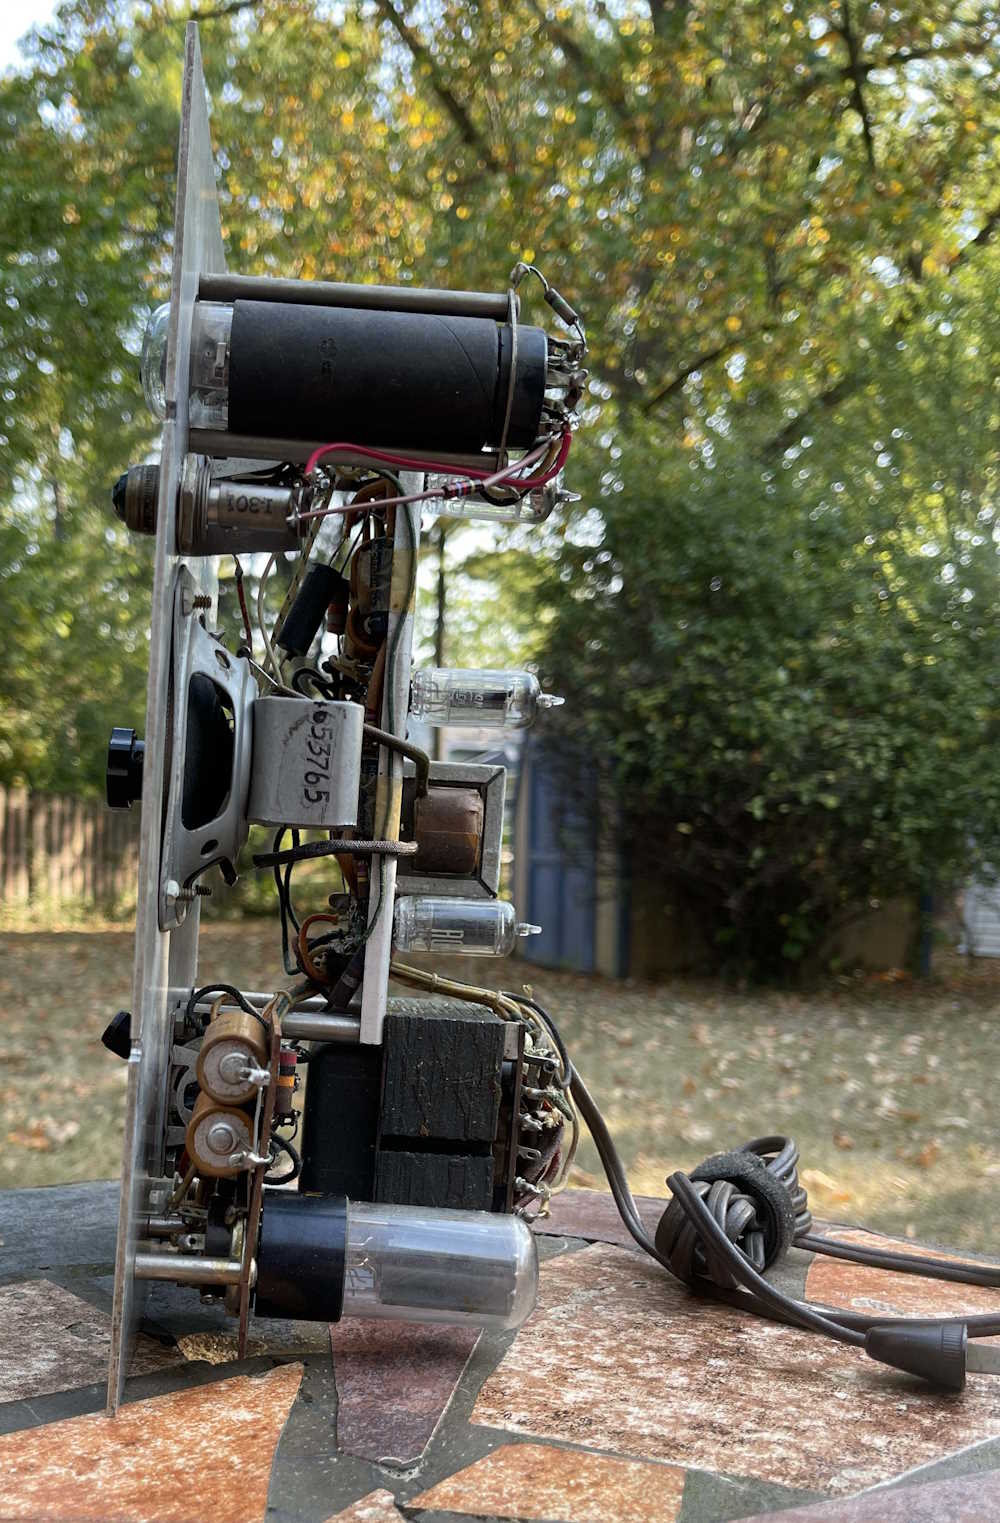
The device is relatively clean inside with the transformer, power supply, and high voltage all riding in the back.
The bottom is well packed, but there’s no wax paper stuff as far as I can see. Looks like films and other decent capacitors, but I bet some of those carbon comp resistors are drifting. There’s an electrolytic that’s probably baked out, and some neon bulbs of unknown type probably being used as regulators that would need to be replaced, but that’s about it.
You can see where the previous owner removed all of the “good” tubes. The 6AG11 is also a triode pair, so I’m not sure why they didn’t remove it as well. Fortunately, if you’re not concerned about the make of the tubes, all of them can be relatively cheap - there’s about $25 worth needed for this device.
It’s an interesting little scope, and would be perfect for a benchtop radio repair station - tube scope with tube inputs doesn’t care if you hit B+ for a second.
I think I may give it a shot and see if it will live again. If someone out there has a schematic for this unit, I’d appreciate a copy.
This is a show that I’d never been to, but it was a double treat. The show itself had a decent array of vendors and stuff, and the show was being held at the Military Air Preservation Society hanger, so we were able to tour the grounds as part of our show admission.
I highly suggest you check out the air museum portion, there’s a lot to see. Pictures of that coming soon.
We browsed the aisles for a couple hours, wandering through a few times. I brought home a few books and a small scope, my friend brought home some older high-end audio gear. There were a few other things that caught my eye, but I’ve got enough anchors working right now that I’m good - and the few remaining ones I’d like didn’t show up here.
Regardless, we had a good time and will probably come back next year, time and circumstances permitting.
An old Rat Shack reverb device that uses a BBD chip.
A friend wanted to know how much they were asking for the bomber.
An older CountyComm radio amidst the parts.
These will be available forever, I think.
A video filter, I thought it was an 8-track with BNCs at first.
A bunch of monitorradios and a novelty device.
An old Jerrold cable television analyzer device.
These are slowly vanishing from the scene.
A Papst metal fan. This thing had some heft!
Looks like someone was copying VIZ.
There is one monitor scope for every person on Earth.
The requisite boxes of parts.
Radio Shack stuff was pretty decent, TBH.
Another “Not a sig gen, a big gen!” For FM work.
Just stuff. It's what we go to shows for.
Some unusual electronics trainer kits.
A stack of radios. Go figure…
The tuner and CD player went home with a friend.
An old WEN soldering gun.
Begone ye demon of the past!
I think we saw this one before.
Zenith made this chassis forever.
.
Next (and last hamfest of the year) show is Fort Wayne on the 16th of November. See you there!
If you’ve ever opened an audio generator from the tube era, chances are you’ve seen one of these in the circuit.
That’s a GE type 11098 - 3S6/5 - a 3W, 115V lamp. It’s used as a balance element for the oscillator in those devices. It acts like a PTC resistor.
The generator I picked up recently at the Piketon Hamfest has a slightly unbalanced output, with the bottom of the signal being flattened. While I assume there are probably some capacitors in there that are bad, it was suggested that I try this lamp. (Maybe…I did find a post where one of these simply needed new tubes and a tune-up.)
They seem to be widely available, as they’re some sort of emergency lighting bulb. I’m planning on ordering some and will give it a try - stay tuned for results!
I grabbed a friend and headed down to this show earlier today. It was a pretty small event, but that’s the kind of thing I like to go to - you never know what you’re going to find. We even stopped at (the last?) Rax on the way home.
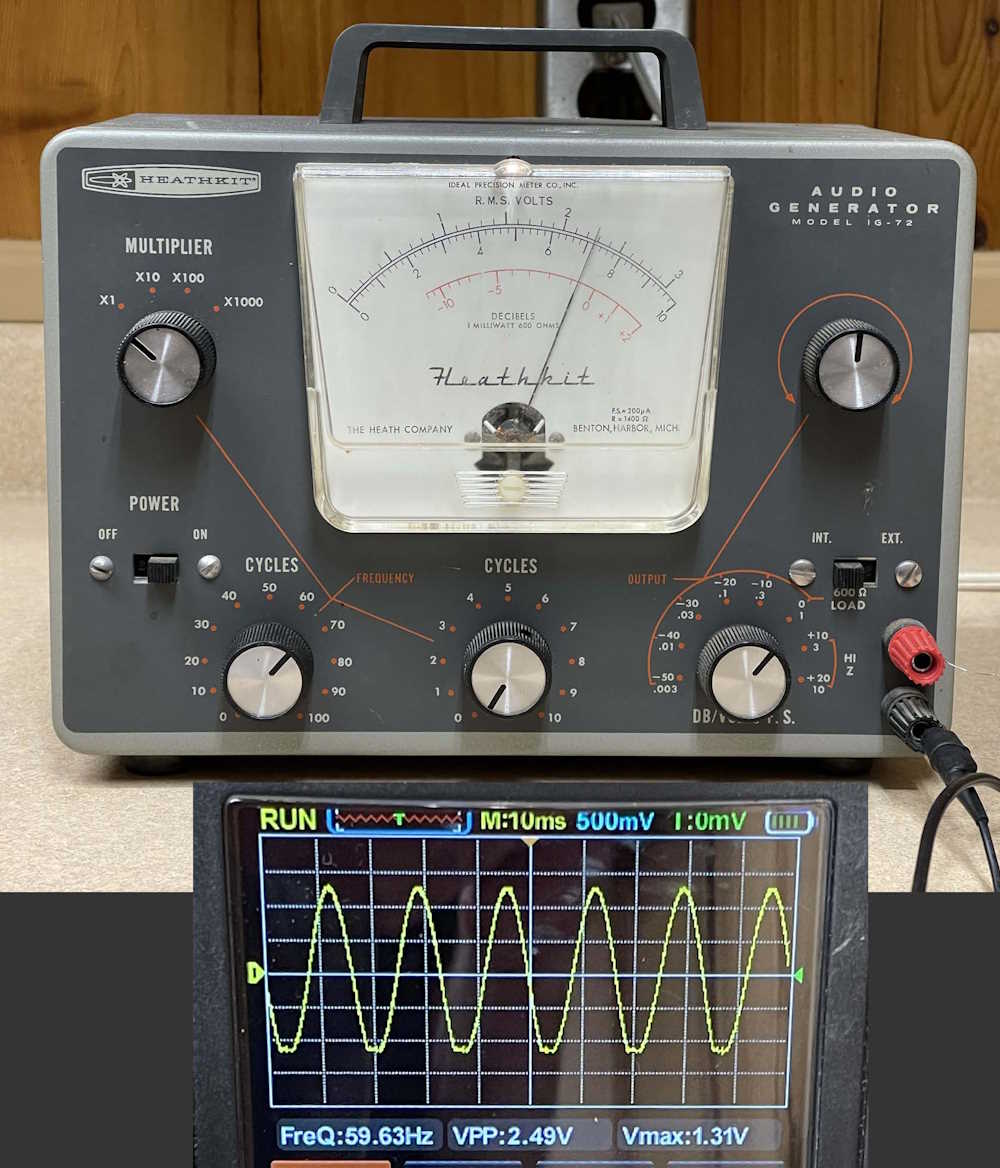
I didn’t pick up much - some books, some parts, and this Heathkit Audio generator with a parts donor unit.
I’m asking it for 60Hz, and getting 59.7. That’s pretty good for a piece of 50 year old equipment. It’s a simple capacitive oscillator, so there’s not much to go wrong - exactly what you need for your bench. It’s certainly in need of service, but what do you expect?
Pictures from the event are on the way, so stay tuned!
One of the things I picked up at the Cleveland Hamfest was the Aerovox Model 97 from this picture:
It was cheap, it was from a Silent Key estate that a friend was cleaning up, and it had a functioning eye tube - the primary reason I picked this one up. Those aren’t exactly the easiest thing to come by these days, so having a few laying around is probably a good idea.
This is kind of an oddball unit as far as checkers go - most simply use a pair of leads you put across an unknown part. This one is a bit different in that it has an inductively coupled loop that acts as the probe for the device. You place a coil with probe ends across your part and that couples back to the checker - no direct connections are made, so you save the device if the part is charged.
Unfortunately, the probe coil was not present with the device - it may have been buried somewhere in the box it was stored in, but who knows…I don’t have it, and seeing as how this is a very low capacity device, it doesn’t bother me. Any one of the Eico or Heath devices is a bit more useful in this regard.
It did include a manual, which I will enter into the wereboar archives. You can download a copy here (this link is hosted on my webhost provider’s service):
No, this doesn’t help you keep your digimon in check. At least, I don’t think it does…
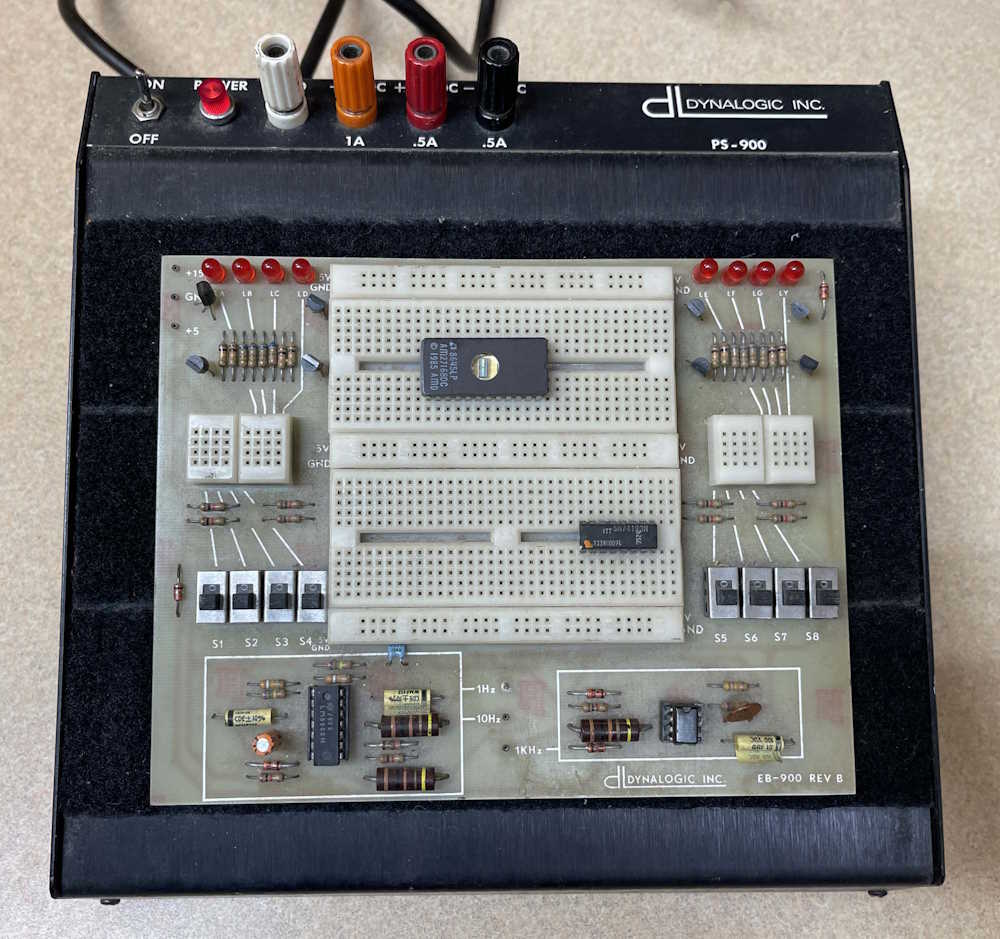
I picked this interesting digital trainer device up at the recent Cleveland hamfest. Why? I’ve been getting back into experimenting now that I have a bit more time, and I don’t really have something like it. Sure, I have breadboards and things, but this has some amenities like indicators, switches, and a couple of clocks onboard, as well as power supplies. It’s made by a company called Dynalogic, and they specialize in modular breadboard systems for schools - this one even has “University of Toledo” (Ohio) on the bottom.
(Dynalogic has a website, but the last date is 2010. Not sure if they’re still in business or if they just don’t update often.)
It looks like a piece of late 1970s kit with the black case.
The power supplies, while operational, are a little low. 5V was 4.82, and both 15s were 14.4. Probably some bad caps in there, which wouldn’t be surprising for the age. I’ll open it up this winter and give it a check.
Dynalogic’s breadboards are made to be modular, and this one is no different. The black material under the board isn’t static foam, it’s velcro. You buy the base, then put whatever board you want on it - including stuff you make yourself. It’s really an interesting way of doing it, because there’s no special things needed - just put a couple spots of hook on the back and drop it on the box.
This unit appears to require the +5 and +15 volts, which is input at the little jacks on the top left- you’re supposed to run a standard breadboard wire down to them. This gives you a metal contact to tap from and run the rest of the devices on the board. As stated before, it features 8 indicators, 8 switches, 3 clocks, and some prototyping space (the chips on the breadboard were there when purchased and have no relation to the board.) Pretty simple in all, this is enough to do basic circuitry and give you some I/O. Nothing on here except some 555s.
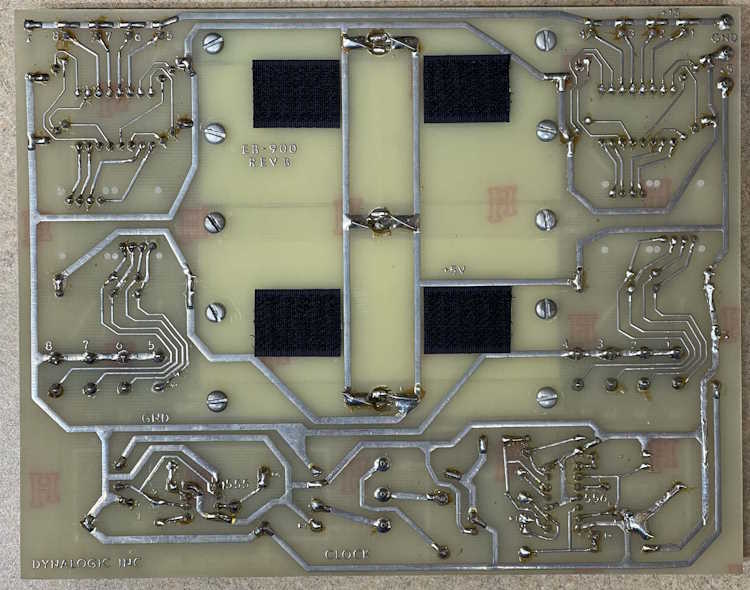
The back of the board indicates that it’s hand soldered. Whether this was from Dynalogic or by a student, I don’t know. But in wasn’t wave soldered, that’s all I can tell you. You can see the velcro hooks.
Overall? This is a nice piece for the few bucks I gave for it, and it was drawing a lot of interest when I took it with me. I think, after cleaning up the supplies, that it will find a nice home on the bench.
As stated earlier, this was my first time attending this show, and I didn’t leave unhappy. It consisted of about 4 rows of vendors in the parking lot, and a small building mostly full of vendors. There was certainly plenty to look at, and prices were generally very reasonable. Everyone was willing to deal, so I’ll blame that for my haul.
The fairgrounds are tucked behind some houses, so we had to make a go-round and get back to the entrance, having turned the wrong direction the first time. But no big deal, we arrived at 8:15 and spent about three hours browsing the warm, sunlit aisles of stuff.
The trip home warranted a stop in Coshocton for lunch and a brew at Wooly Pig, a place I highly suggest you check out if you are in to that sort of thing
Here’s what you’re waiting for, all of the things I saw at the show.
An Aerovox capacitor tester - missing the rest of it's oddball probe.
Random audio gear and an old SW radio.
I love those old Bearcat scanners and their 1970s colors.
Books. I took home his small collection of crystal radio stuff.
A butt set. Not a collection of behinds, but a telephone test handset.
A device to exercise a CDC disk system. There was a stack 'o disks on the ground.
The guy had boxes of chips. I took home some unusual dot matrix displays.
A nice example of a CT455. It needs a little work on the radio, but plays well.
A digital trainer doesn't always work with digimon.
You don't see a lot of those HP lunchboxes these days.
A nice National Radio in National grey-blue.
A test device marked Philco-Ford.
Power strips for 30 amps. A friend took this home.
Just some random things.
Random radios. The Zenith portable was kind of cool.
A reel-to-reel player. For reels. Of tape. On reels.
Those little rat shack speakers weren't bad for the day.
A baby Tek scope holding the ground down.
Not sure, but I heard the word “SONAR” mentioned.
Staple guns. I took the hand brad nailer in the middle home.
A lot of tube testers at this show.
150 watts to measure a voltage - if you dare!
The bakelite Zenith was in awesome shape, especially for $35.
One of the things I like to do before closing up a device (permanently, or for a while) is to do a good photo retrospective showing layouts, parts, etc. It usually will be submitted to someplace for posterity, and displayed here for your enjoyment. You can also check out Radiomuseum, who accepted a number of pictures for their exhibit on the device.
I had to resize these - they were simply too large and were causing some issues.
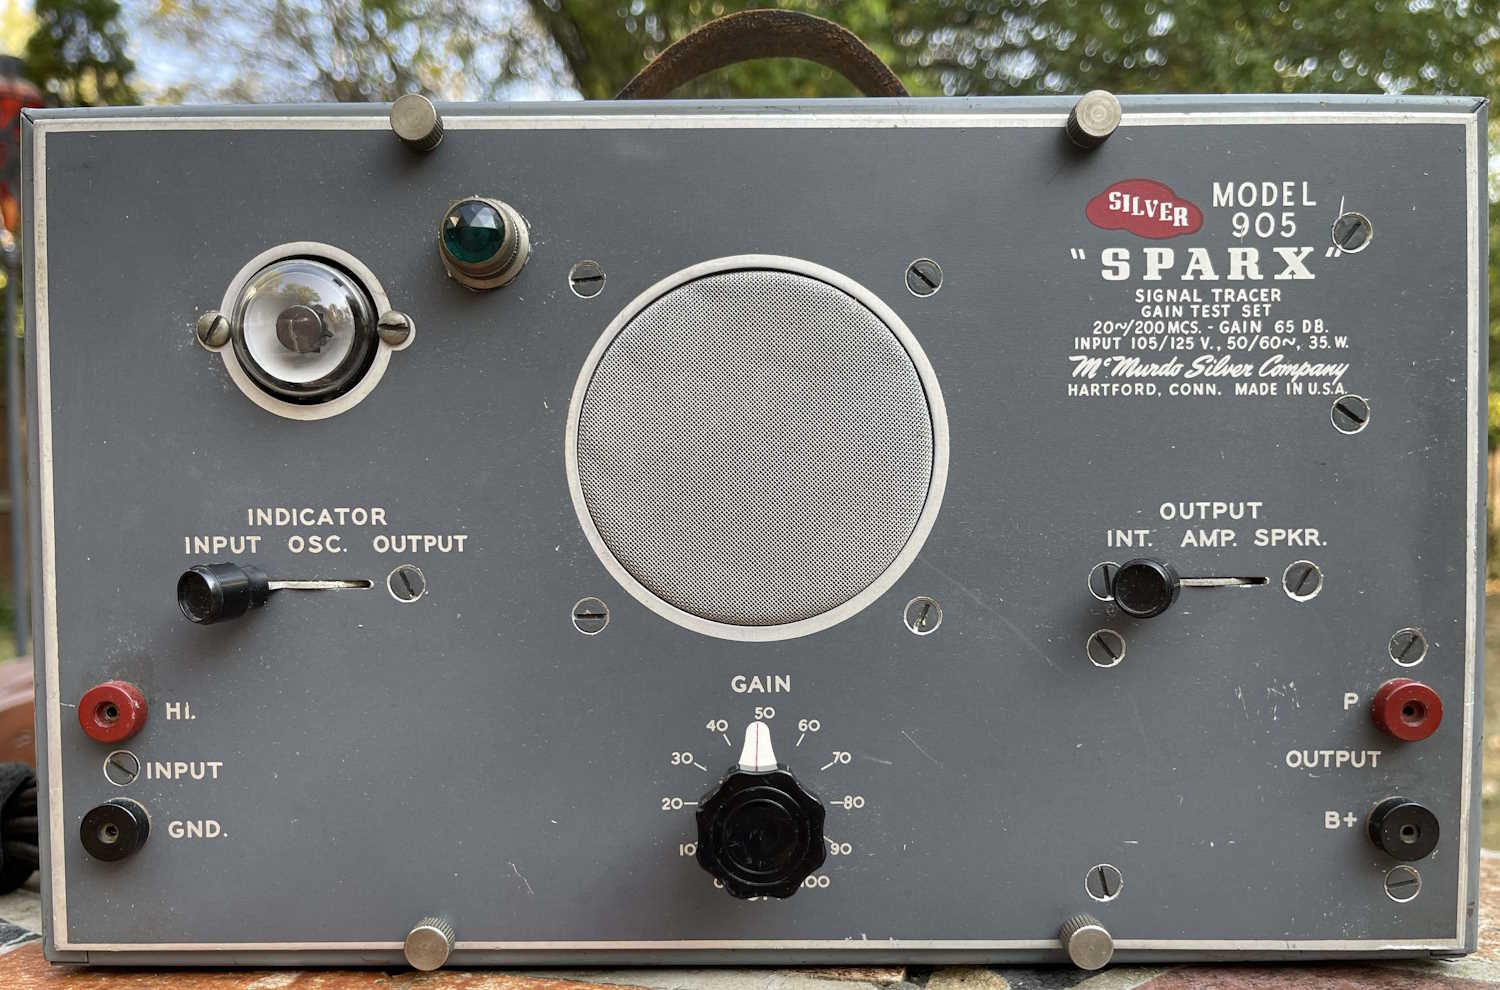
The 905 tracer is going on display for the moment, so here are some photos of all the goodies inside:
The front of the unit. The pilot lamp was not original on this unit, and this one received a nice LED bulb. I pulled the screen out and knocked the dents out as best I could, you can still see a little wrinkling there.
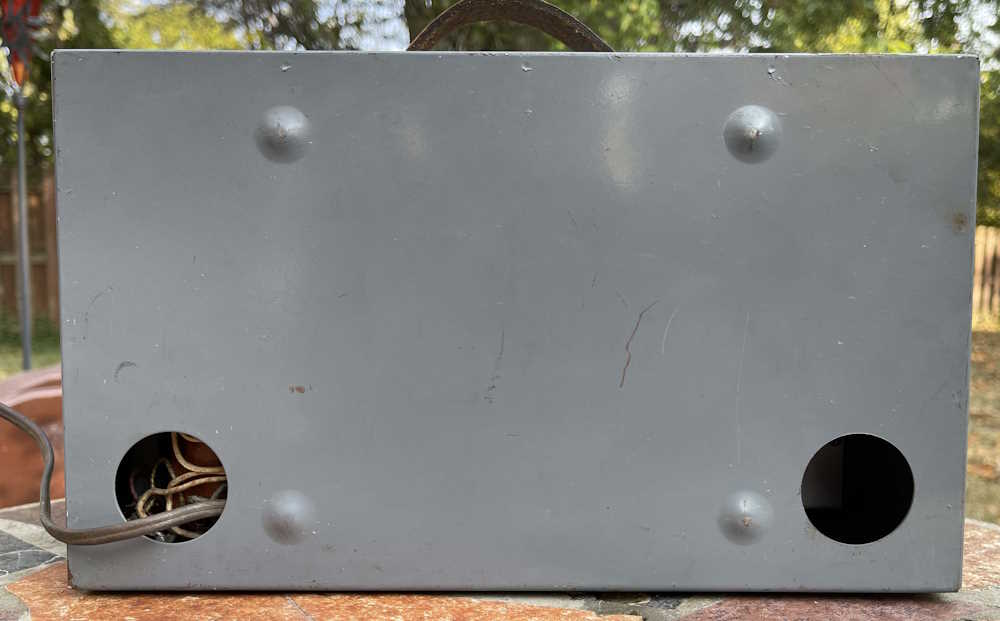
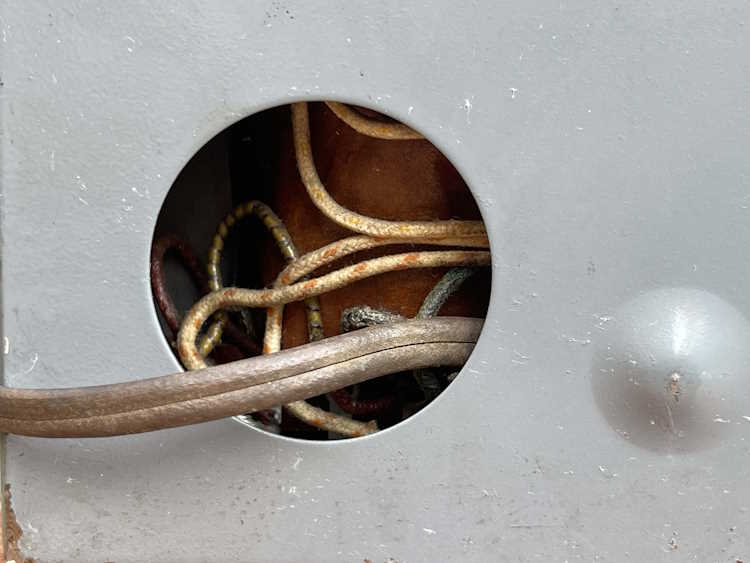
Here’s the back. Note the big holes for cables at the bottom, this one only has a power cord.
You can reach in and touch the transformer taps. Designed for those who have some sense.
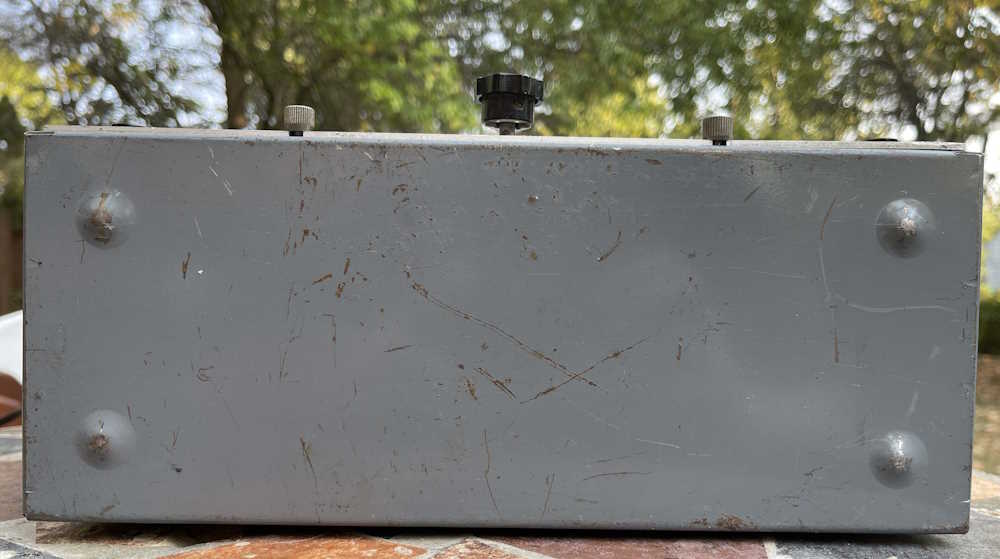
This unit has little dimples for the feet, so no crushed rubber.
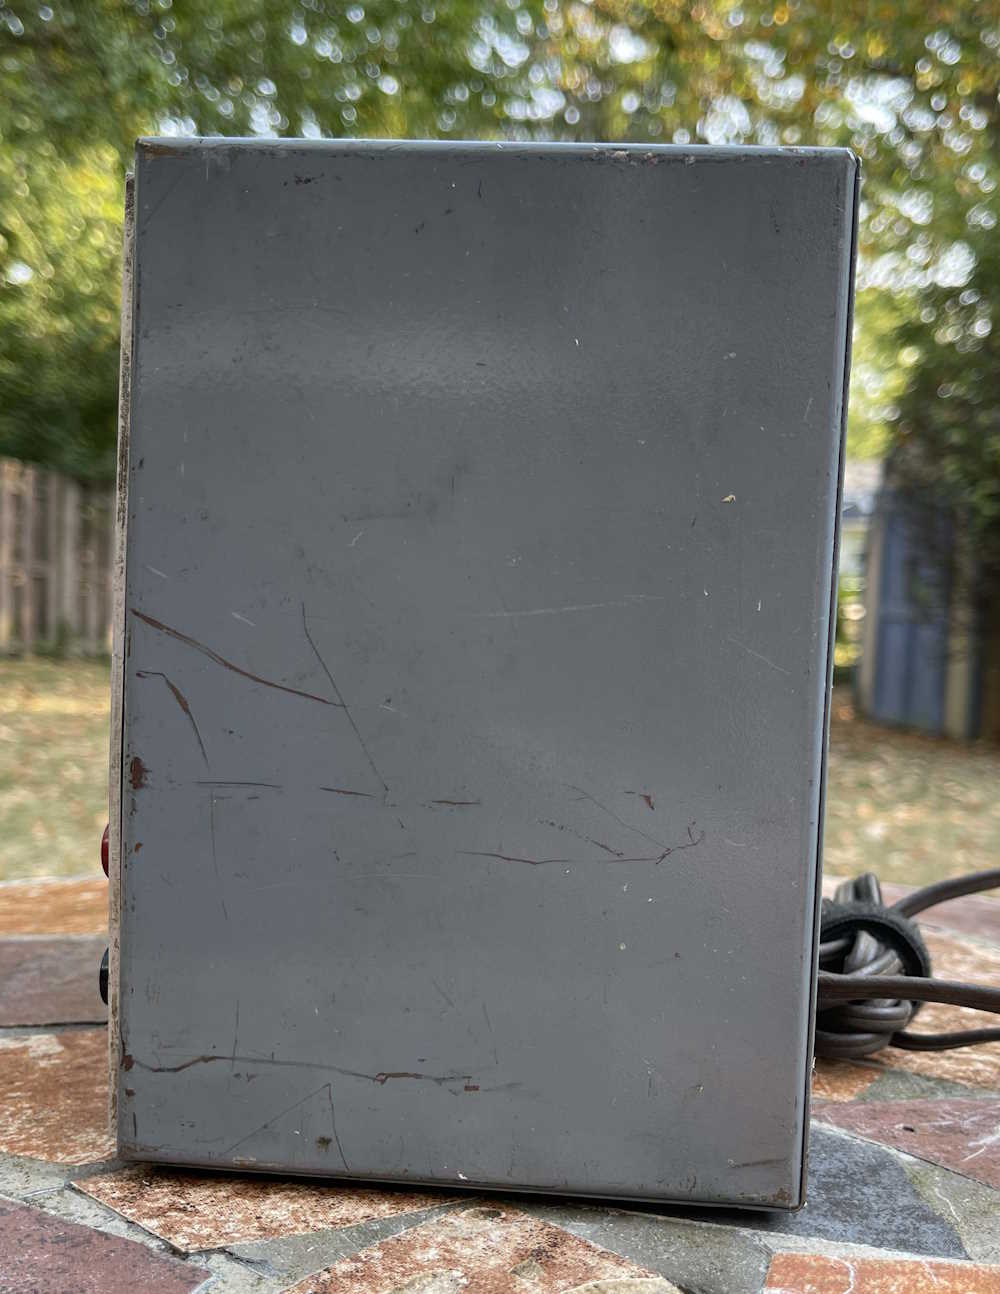
The side. It’s…the side.
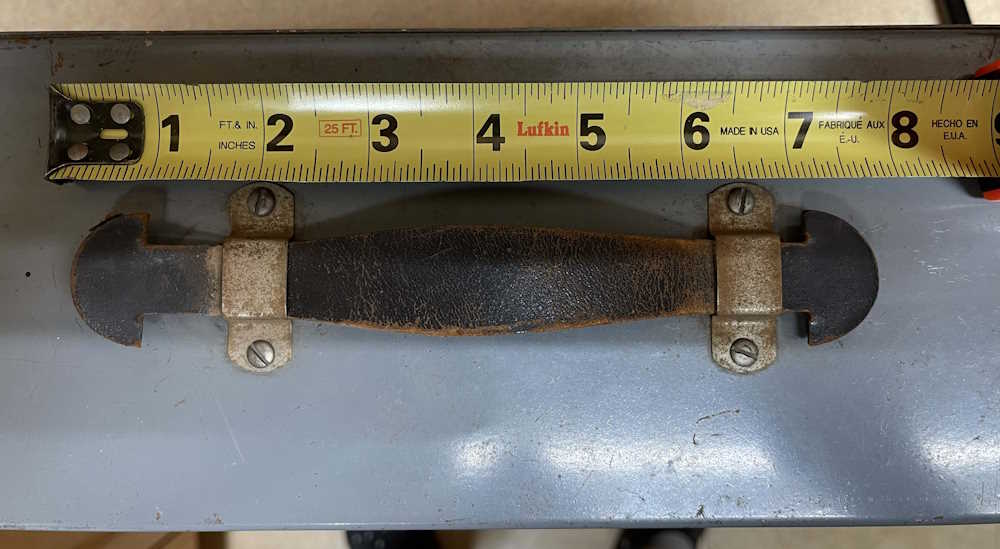
The device uses a leather handle. It’s still intact, but I’ve tried not to use it.
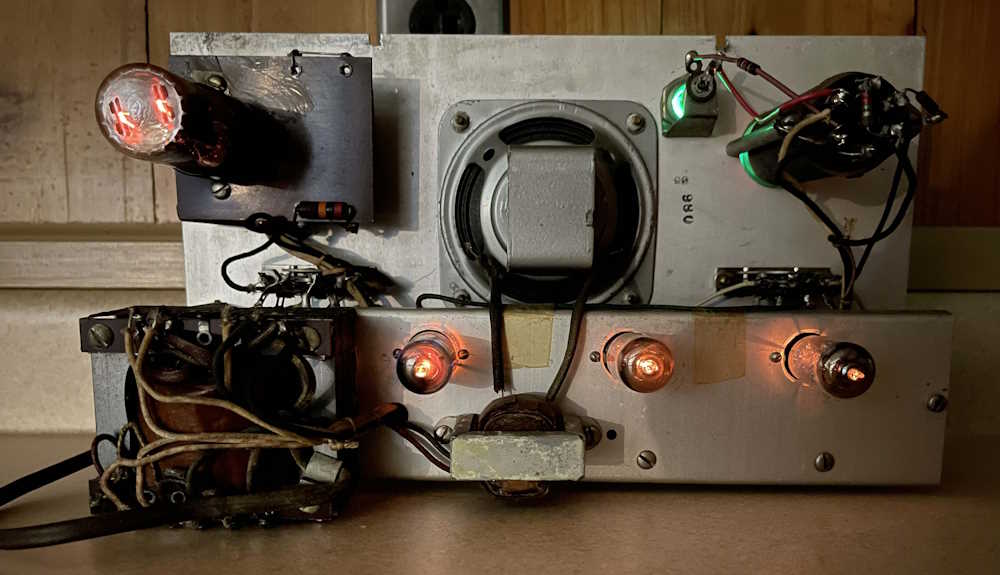
Here’s some shots of the chassis:
The best part - the tubes are all lit up:
In all, this is a pretty cool device and doesn’t have a lot of things other than it’s basic function of amplifying sound. For now, it’s going to be a showpiece - but eventually it will be used as a small amp in my main room, as I already have a tracer I’m working on rebuilding. I am planning on replacing filters and other electrolytics on this at some point, so stay tuned!