This was a short one, and only has two parts. Link for the first part is at the bottom of the post.
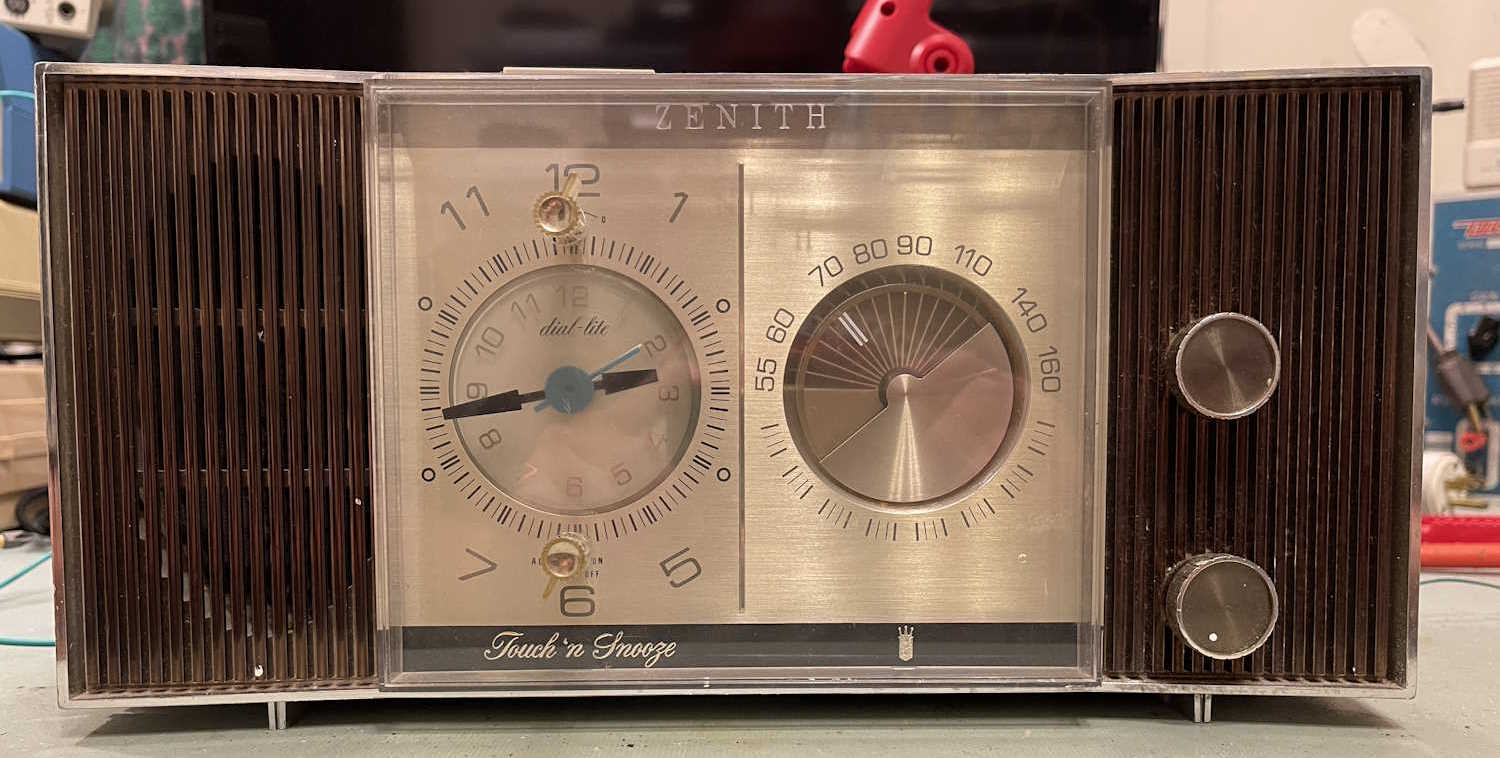
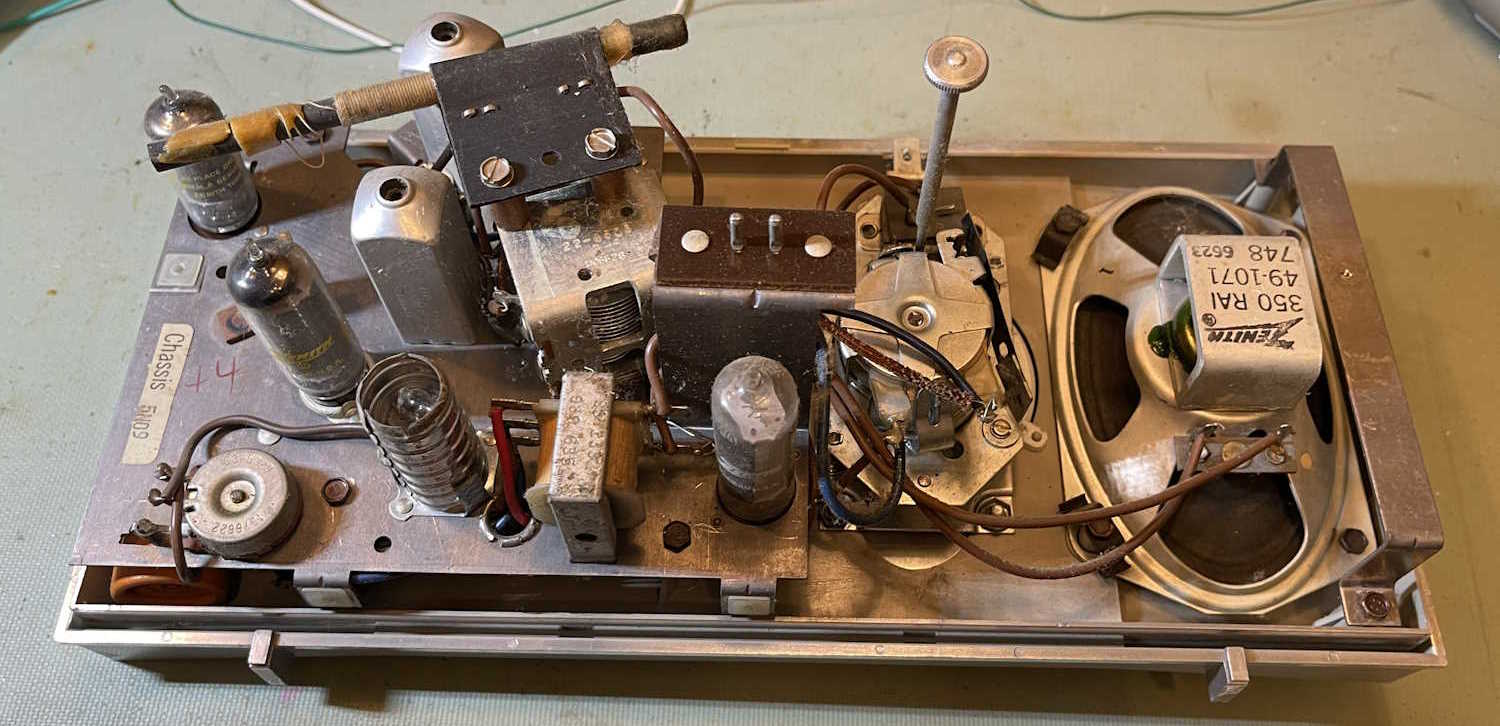
The Zenith X184 doesn’t require much repair, just your typical old radio problems. So…first step is to gather the parts we need to do the repair. In this case, a 47μF and 100μF capacitor to replace the 40μF/80μF part, a neon bulb, and a 100kΩ dropping resistor for the neon bulb.
The 47μF is a part that was originally slated to go into the Hallicrafters S-38C I did a while back, but some goofball soldered it in backwards and had to remove it. Thus, the shorter than expected leads…
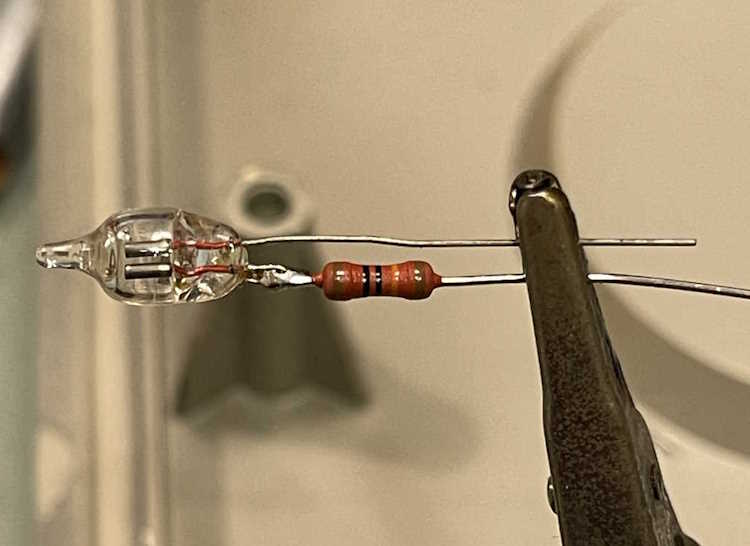
Anyway, first thing is to make the neon assembly:
Normally, you’d use a lot lower value dropping resistor - probably 68kΩ or some such value. I’m popping it up to 100kΩ so the bulb lasts longer.
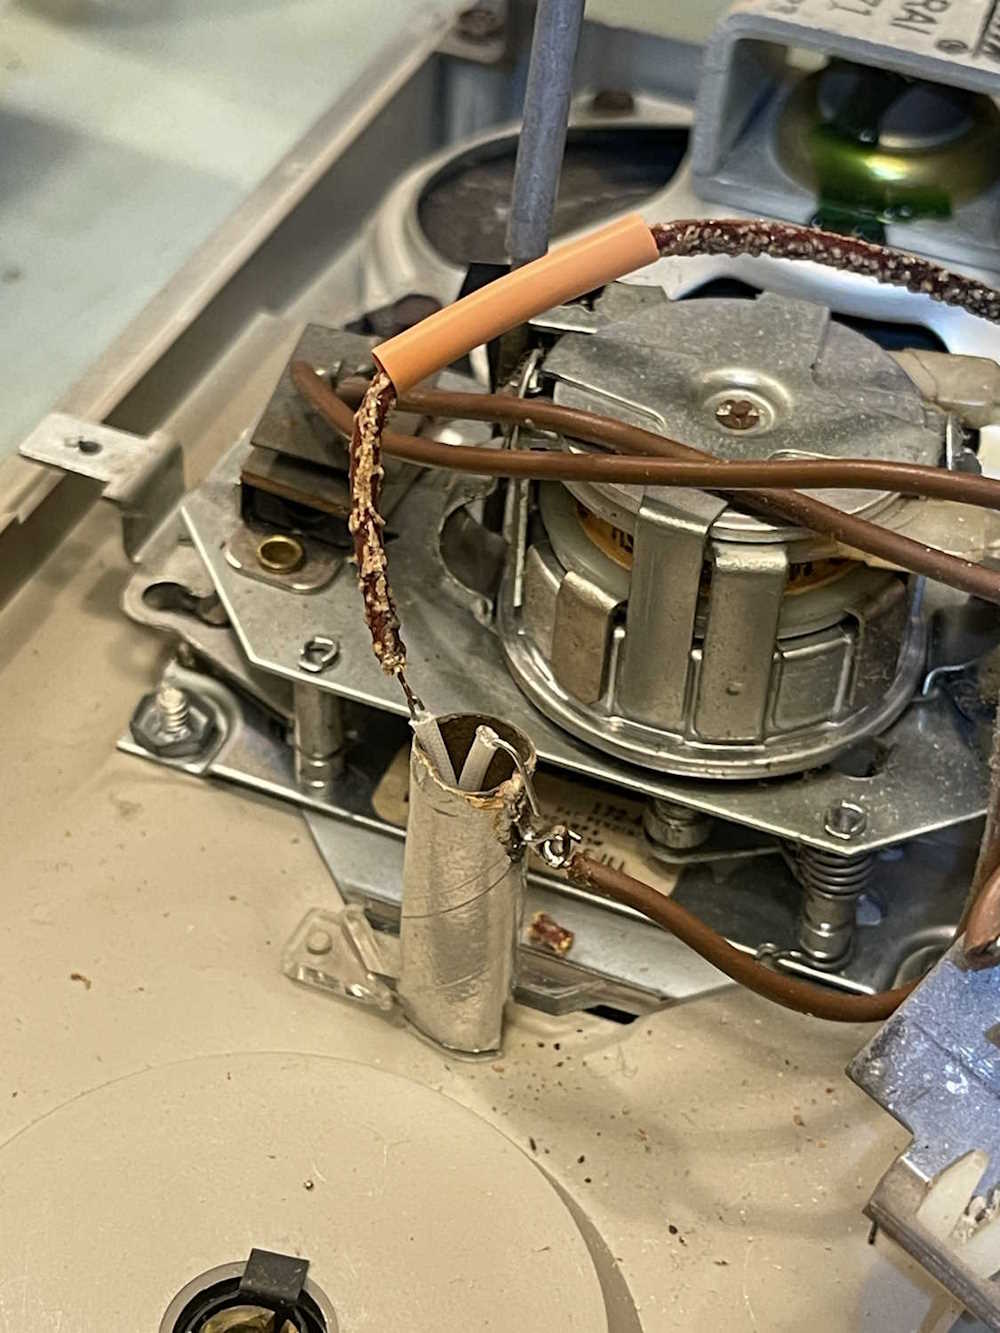
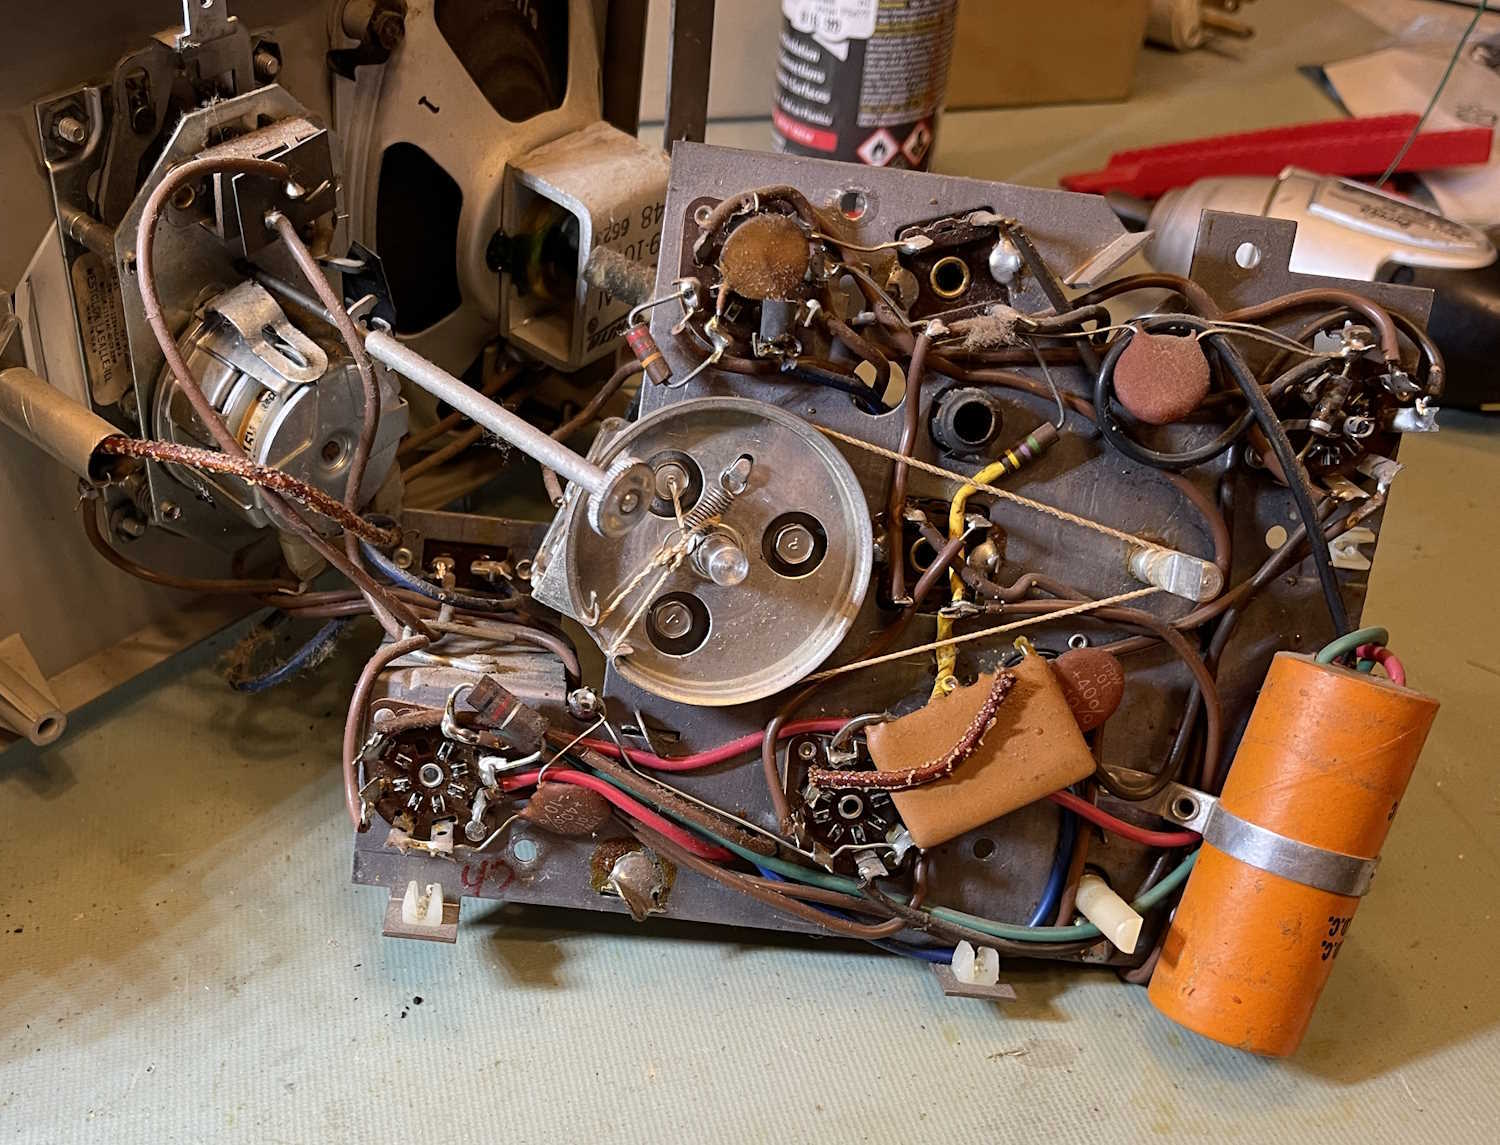
Next is to put the capacitor(s) in place. This is mostly just cutting out the old one and installing new. I decided to just leave them float on their wires since you’d have to throw the thing to bend the metal chassis. They’re tied together and tied to a cable bundle, so they aren’t going anywhere, and the electrons don’t care. Chassis is ground on this one, so even if it did go somewhere it would simply burn out the filament of the 35W4 which acts like a fuse.
The original capacitor was essentially open. I got a few pF on the capacitor checker.
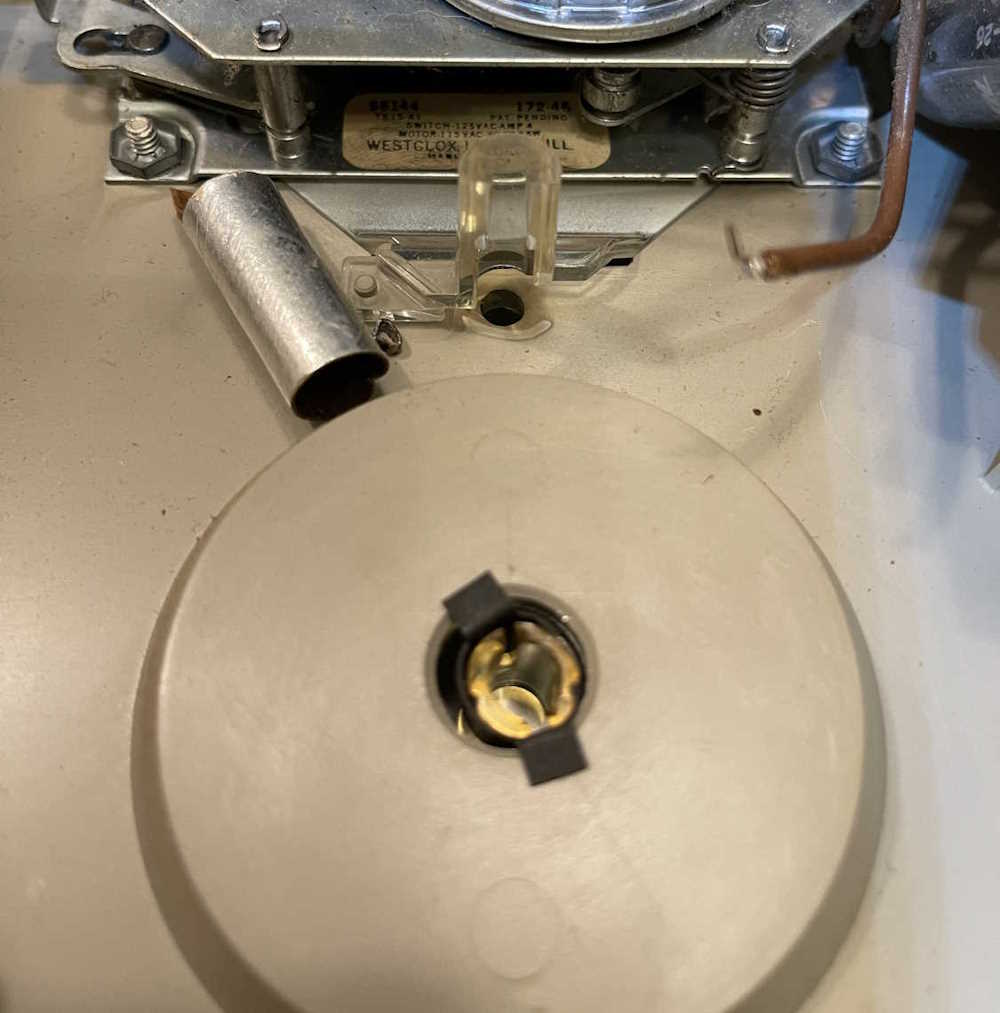
Next is to install the neon bulb. This is inserted into a clear plastic piece that acts like a lightpipe for the dial face. This part wasn’t meant to be replaced - I had to carefully unsolder the brown wire from the tab and pull it off the pipe. The neon fits into a recess at the bottom, so you kind of have to tape the new one in place so it doesn’t fall down on to the metal faceplate. I added some electric spaghetti to help protect the leads from shorts, and soldered it and the two connections (including the salty pretzel wire!) and finished with some heatshrink.
So, it’s time to button up. Does it work? Yep…and the first thing it says after an extended sleep is a commercial for the drug-o-the-day. Sorry radio, things have changed since you were here last.
(The camera exaggerates the light, but you’d be able to see this in a completely dark room no problem.)
That’s all for this one, these AA5s are easy to repair for the most part. Next up is a rebuild on the Heathkit AG-7.
I received some new tubes for the Heathkit AG-7, and that did nothing - so the unit is probably going to need most (if not all) of the parts replaced.
In the previous part, the oscillator just quit. I discovered a part in the power supply was radically out of tolerance, but replacing that did nothing. As I was troubleshooting, the lamp in the oscillator circuit that’s used as the PTC resistor started glowing red and flickering, indicating high current draw. The output would jitter in time to this flickering, like the oscillator was trying to start, but couldn’t. This is a symptom of wien bridge oscillators, they require a balanced diet of feedback and amplification to start and oscillate properly.
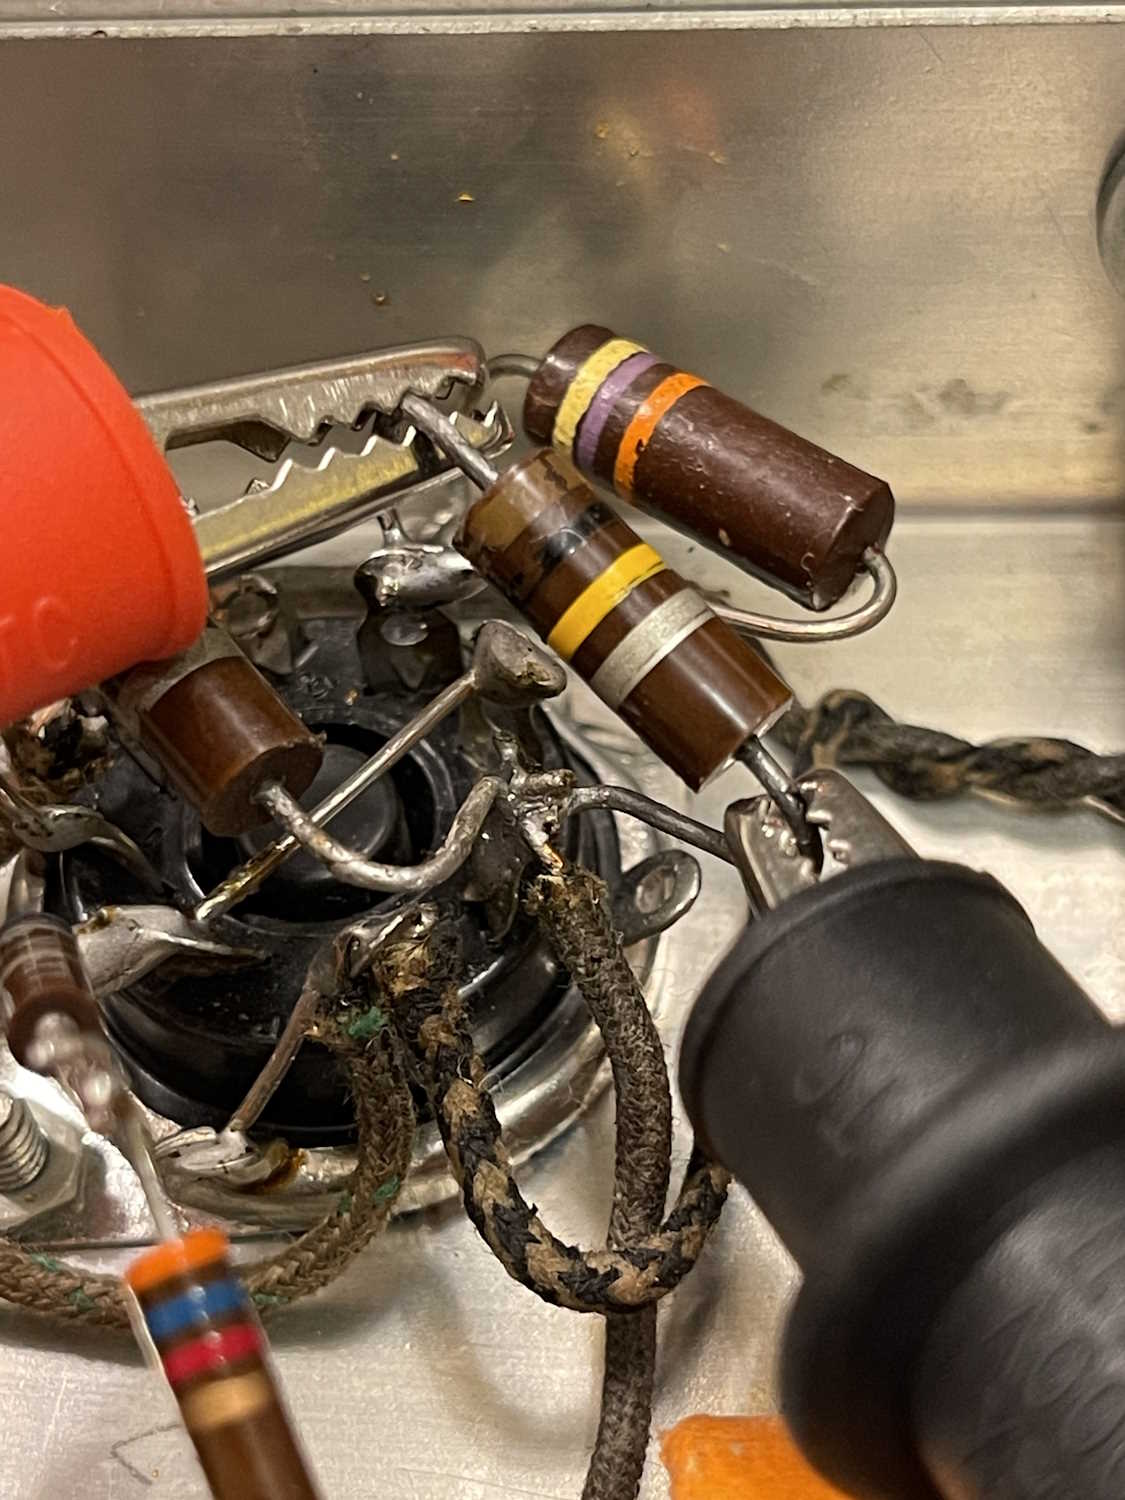
Then the smoke started. Ok, there’s something seriously wrong here, so off it goes and discharge the filters. I decided to start checking the parts in the circuit that were isolated enough to give me a reading without something in parallel interfering. I found some good ones. Case in point, this 100kΩ resistor:
But as you can see, the meter tells me that this is actually closer to 700kΩ. Not surprising for a high-value carbon, and a spot check of other components revealed a similar story.
Now, you’re going to be saying that checking directly across a resistor in a circuit shouldn’t give a higher value, and you’re correct - at best, it should be it’s marked value but may be lower due to the effects of parallel resistance. That this part reads nearly 7 times it’s listed value says that it’s indeed very much bad.
I’d say this thing had a lot of repairs over the years, as there are plenty of mixed component types. So…it gets entirely rebuilt, because it’s going to need it. Stay tuned, I’m going to do this one in stages.
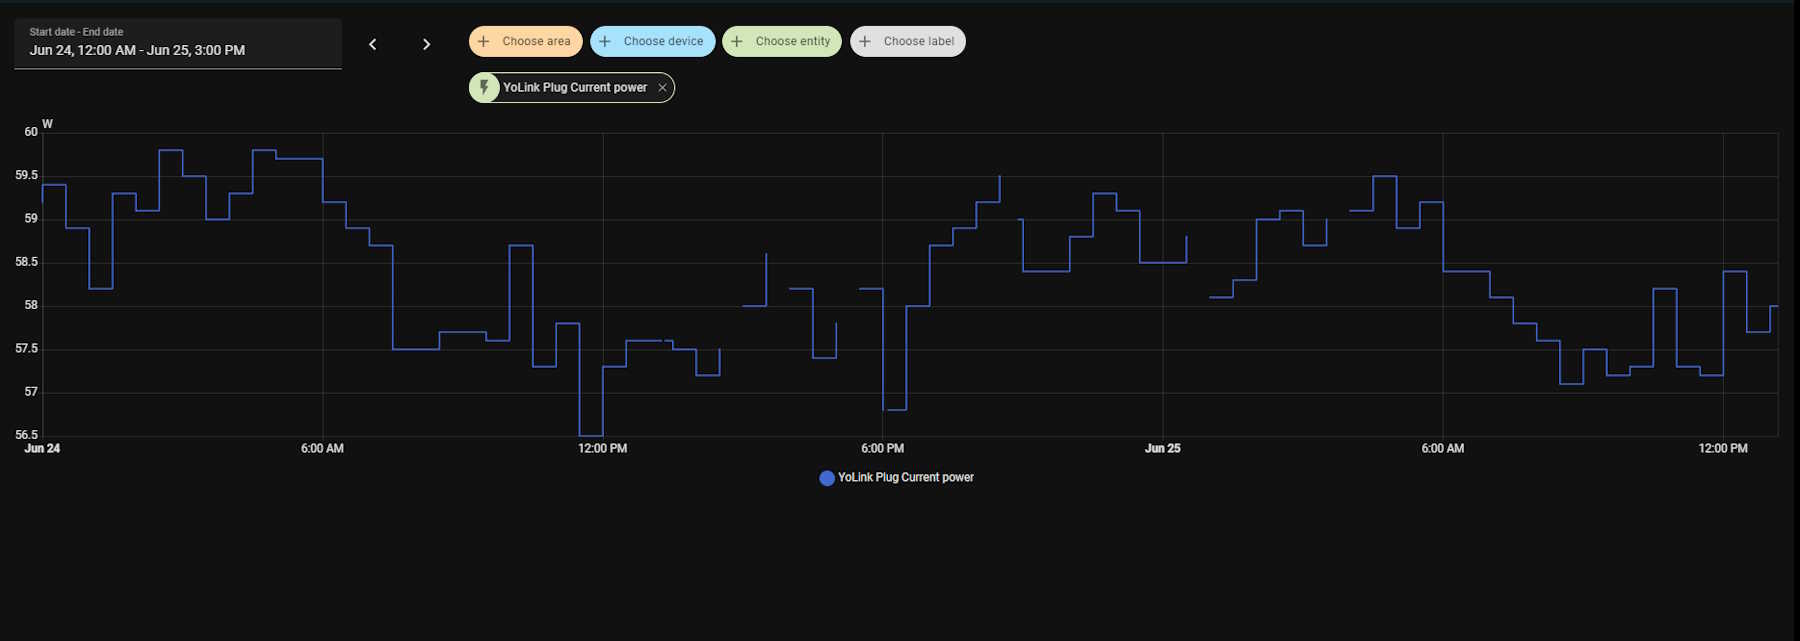
One of the things I noticed almost immediately after setting up the HA Green unit I purchased was that anything that required Internet - weather cards, electricity useage, devices integration, even logging in - was very flaky and had a lot of dropouts. I wasn’t sure what was going on, but it got to the point where any Internet-enabled integrations were basically unreliable.
This chart is from a YoLink device - HA talks to the YoLink service, and populates data based on what it receives. Notice all the missing data in the middle?
That’s time when the card wasn’t available in the overview. This also was corresponding to time when the weather cards and other stuff was not available. Checking the logs, I saw that there was a number of messages about being unable to resolve addresses and failed DNS lookups.
After doing some research on this, I find that the HA container seems to get it’s DNS resolution from a service built in to the HA system itself. It then uses this to populate /etc/resolv.conf with the proper nameservers.
In order to get to that service, you need to access the actual shell of the HA system. You can do this by adding the “Terminal & SSH” add-on from the store. Once that’s installed and started, launch it from the Web UI and type the following:
Theoretically, it should get DNS from the router (192.168.1.1) like any good device should. But it doesn’t seem to, and this has been broken for a long time from what I can tell.
To insert DNS servers into this file, you’ll need to enter a couple of commands:
ha dns reset
ha dns options --servers dns://8.8.8.8 --servers dns://8.8.4.4
ha dns restart
(I think it should go without saying that you’ll need to be admin or owner to do this.)
Enter as many DNS servers as you like. The example shows Google DNS. Google is Evil in a box, but their DNS does work well, and you’ll probably only need that. I entered a couple more as well just to have some redundancy.
I did do a reboot on the system, just to make sure. After that, /etc/resolv.conf now showed my new DNS servers, where none had existed before. You can check that by going back to the terminal and entering:
cat /etc/resolv.conf
You should see your new DNS servers.
This took care of all of the problems for me - HA now returned the UI much quicker, and no cards are going offline. Will this persist through an upgrade? I don’t know, but my system is in a known state and unless I need some of the new features, I’m not planning on updating with every new version that comes along.
It does seem to persist through a core upgrade. Not sure about an OS upgrade yet! It does persist through OS upgrades.
As a note: Some have reported that this did not work for them, so there are certainly other issues at play here. YMMV!
Home Assistant does (now) offer the ability to add DNS from the GUI, so you may want to check that out first. I used this solution because it was the first one I ran across that seemed to have positive results.
In the last post, something went bad in the oscillator portion of the Heathkit AG-7.
There were other things wrong as well, if they were caused by or were pre-existing to this failure, I don’t know. But one of those was easy to fix, that of the 10kΩ resistor in the power supply. This resistor decided it was going to be about ~300Ω or so, and had to go. Fortunately, I had some spare 2W units from a previous rebuild project, and put one in.
That, unfortunately, didn’t fix the issue. Since everything else seems to be mostly ok, I have to assume that I damaged the tube(s) during my testing of the device, or the incorrect power supply voltages damaged the tubes and it was just coincidence that it failed when it did.
Therefore, this unit gets set aside until I can replace the two oscillator tubes, verify it works, and rebuild the unit.
In the meantime, here’s the 10kΩ that was removed.
It looks pretty crusty at this point. Not sure what cause it to short.
But short (relatively) it did:
This one goes in my bin of oddball parts for later fun.
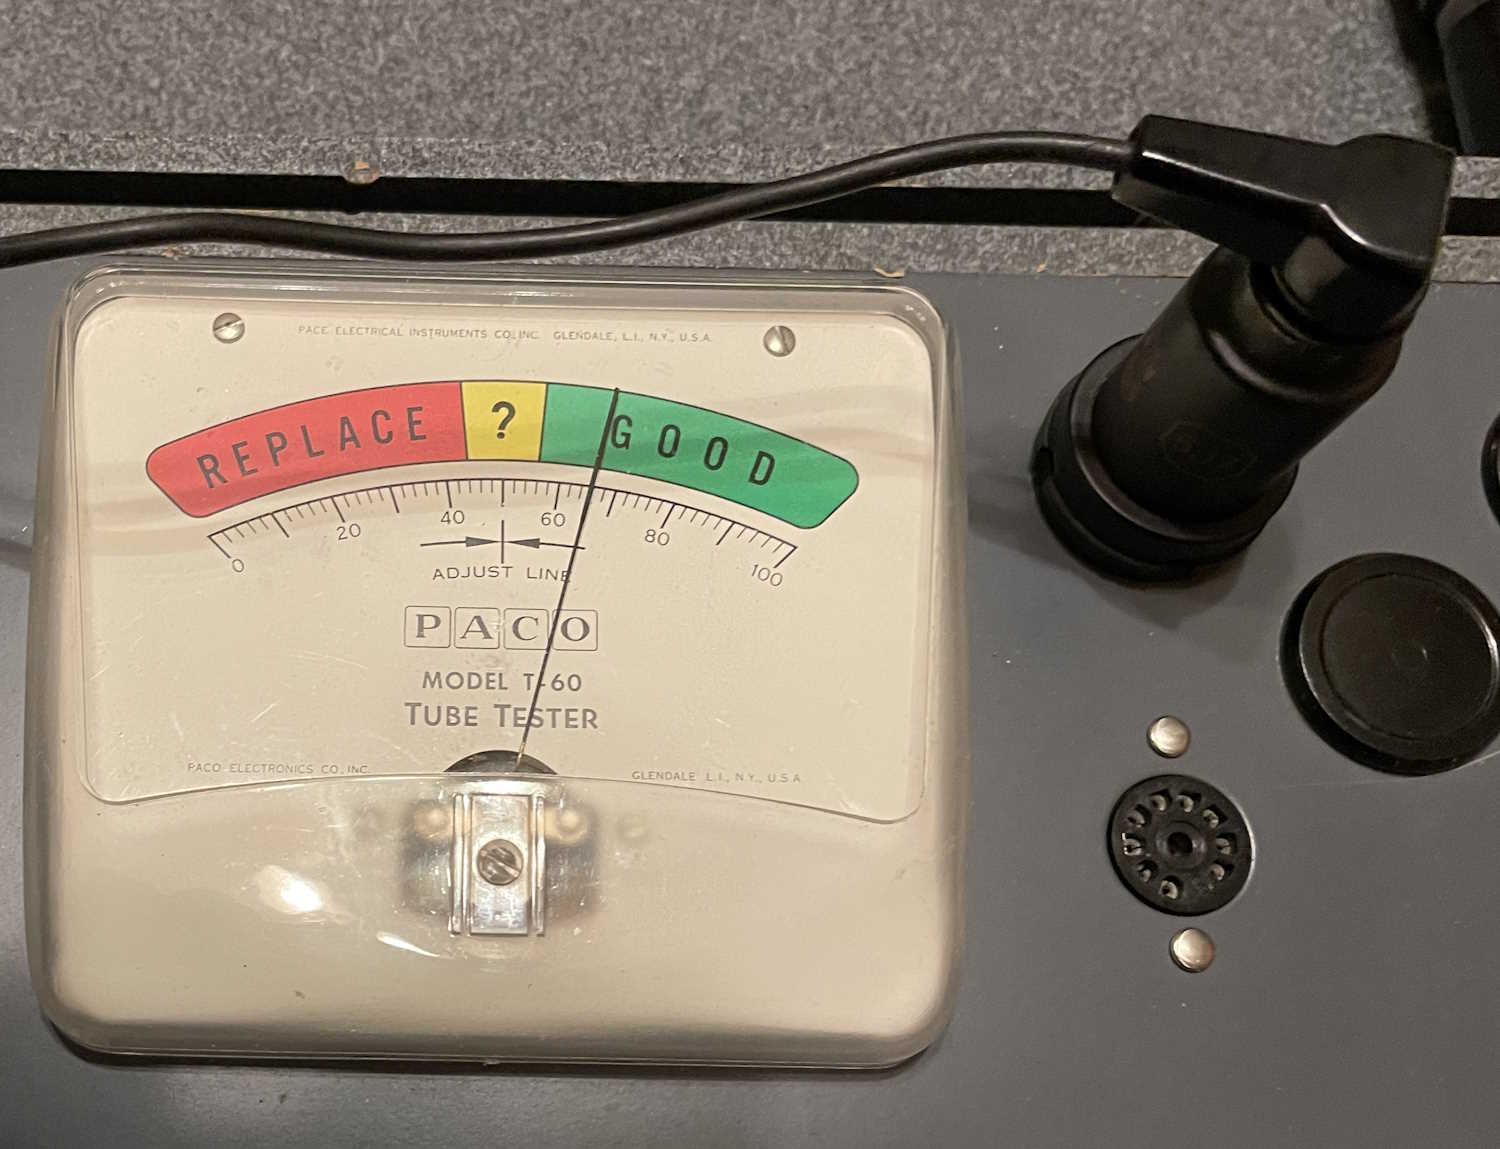
When the AG-7 quit, I wasn’t really sure what caused it except that the oscillator now won’t. Tubes check fine on my cheapie tester, so I decided to start doing some measurements around the 6J7.
These didn’t seem right, much higher than they should be, but the individual components were (mostly) within tolerance after disconnecting from the circuit. It still didn’t seem right, things were bouncing around like there was another path to the filters.
I disconnected the line from the filter and that all went away. Ok…do I have a bad filter capacitor now? No, it checks ok, but that’s with the 10kΩ resistor across the filter disconnected.
And there it is. (Future me: there ONE of the “it” is. There’s going to be a lot of them!) The 10kΩ resistor that goes from triangle to dash on the filter is bad. It’s not open, or high resistance, it’s 295Ω. Confirmed this with two meters…what? I’ve never had one of these old carbons short like this, but I suppose it’s completely plausible. It is 70ish years old at this point.
I have plenty of 10k resistors laying around to test with, so I’ll take some time and see if that gets me back to a semi-working condition so I can complete my troubleshooting from the last problem. I suspect this is going to need a complete rebuild in order to be functional with any kind of reliability…
In the last post, we determined that this device was mostly operational, but had one of the problems you see with wien bridge oscillators - one side of the output signal was clipped. That can be an issue with not enough or too much drive in the feedback circuit, so I decided to do some tests.
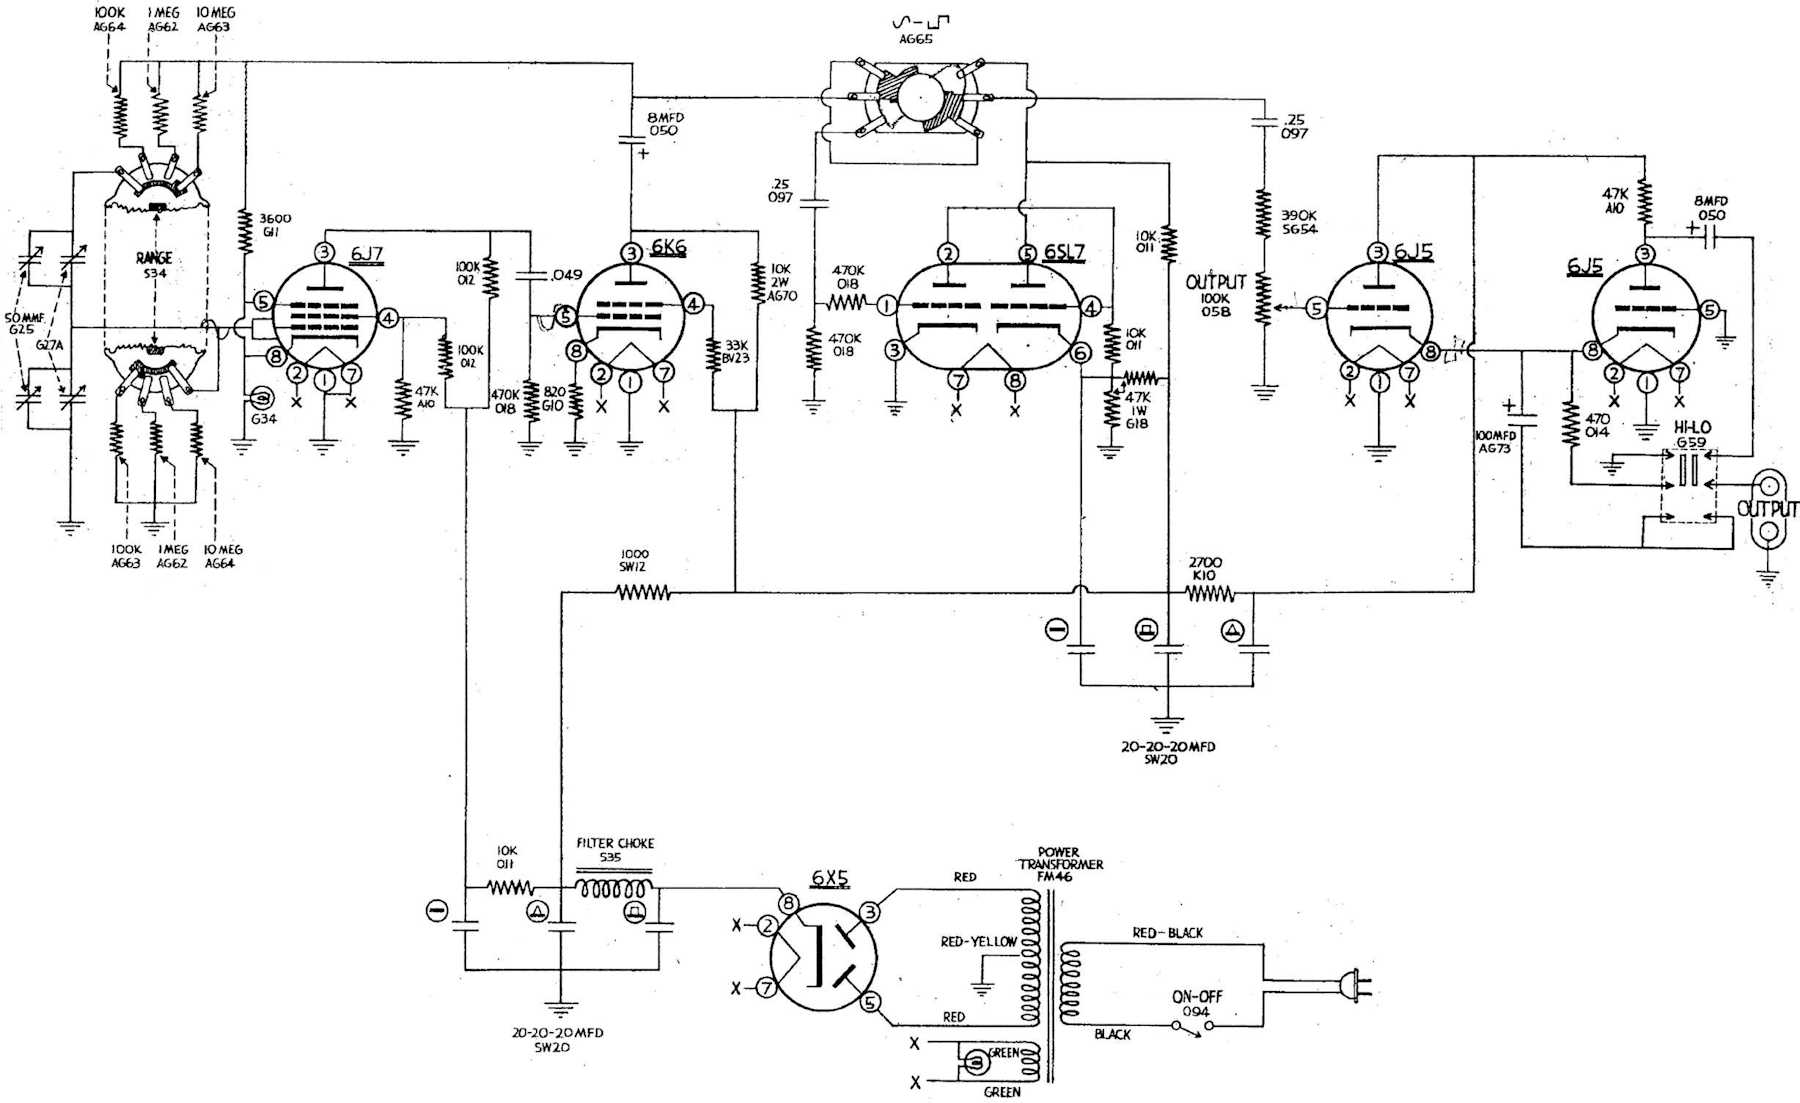
Here’s the schematic for this device:
An oscillator is an amplifier that provides it’s own input. You’ve probably run across that with feedback on a public address system - that’s the amplifier becoming an oscillator.
In this case, it’s controlled oscillations that we’re looking for. To do this, this particular oscillator model provides two kinds of feedback. Positive feedback, which is the actual oscillator drive and is controlled by the frequency selection capacitors and resistors. And, negative (servo mechanism) feedback that is provided by a lamp used as a positive temperature coefficient resistor - that is, the more current the circuit tries to draw, the more the lamp resists that and tries to keep the gain stable.
The reason you need the servo mechanism is because the oscillator will continue to draw more current until it reaches the limit it can draw from the supply - and probably clip and/or destroy things. The lamp is a quick and easy way to stop that, and was used in almost all oscillators of this type. Later ones used an FET or other current control method, and modern DDS generation doesn’t need this.
Before I tried anything, I swapped the bulb with a new one. No change there.
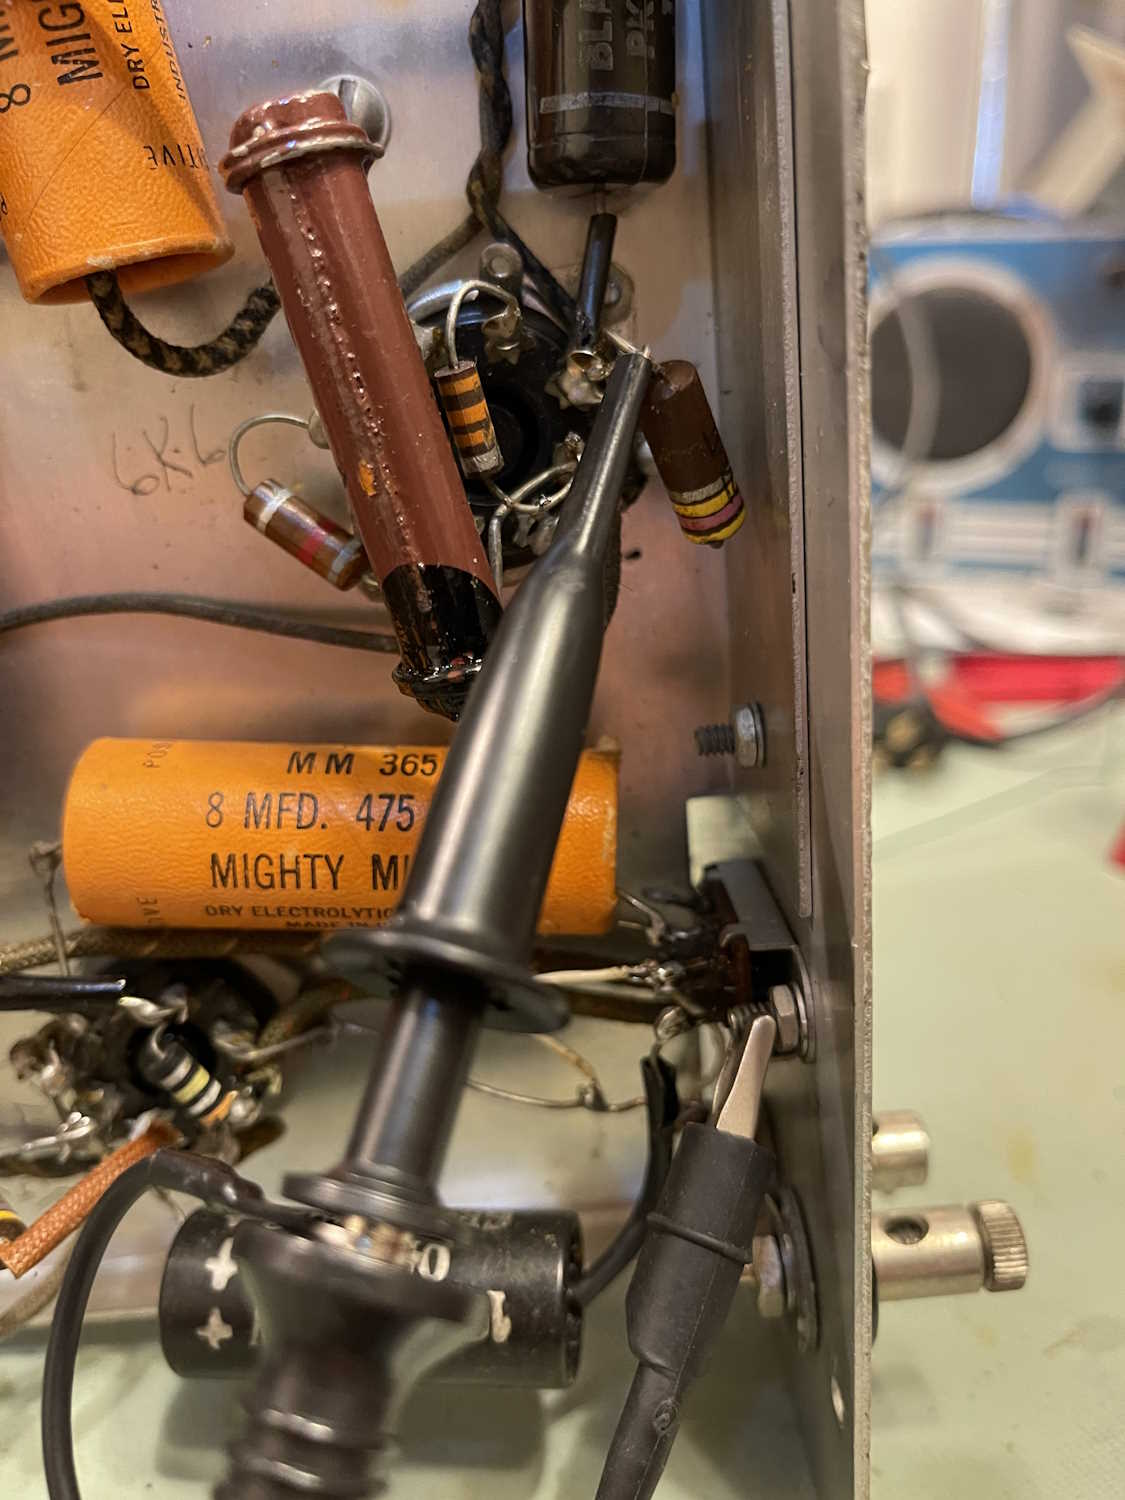
I’m going to start with checking the oscillator and feedback loop to see if the distortion is present in the oscillator. Pin 3 of the 6k6 Pentode is the output amplifier for this part of the circuit, so checking on Pin 3 should reveal most of what we need to know:
And the distortion is there, so we can probably assume that it’s present in the whole circuit.
(The schematic doesn’t show the suppressor grid - Grid 3 - on the 6K6, but it’s there. It’s tied to the cathode internally, so some manufacturers didn’t show it since you couldn’t access it.)
So that means the input to the 6J7’s control grid is probably distorted as well.
It is.
So it follows that the input to the 6K6 is also bad.
It is, and it’s quite high - perhaps this needs to be cut down some? (It’s inverted because each stage acts like an inverting amp, so the distortion is at the top now.)
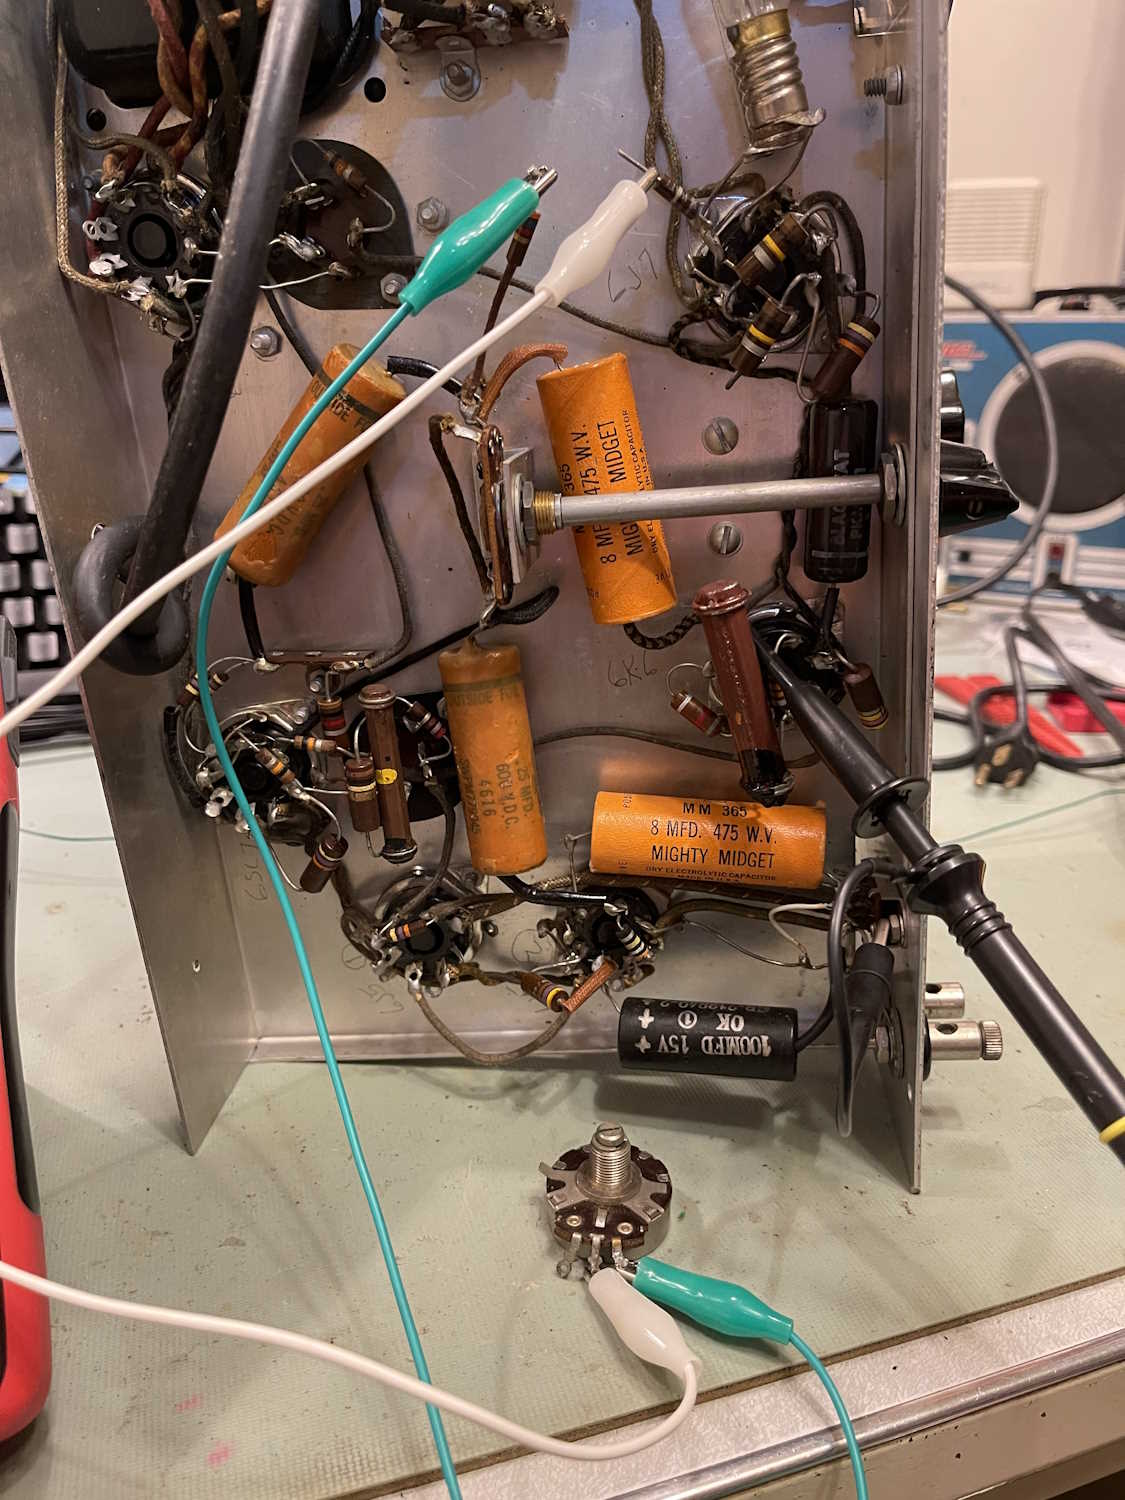
Before moving on to the interconnect between the two stages, I decided to examine the feedback loop. Breaking the two resistors, I put a potentiometer removed from the Heathkit AF-1 in-between the stages.
Interesting - more resistance caused the device to go into severe clipping:
Less resistance did nothing much. One thing I did notice is that too much resistance will cause the oscillator to become unstable - this explains the problems I’m seeing with the BW200 oscillator that was on the bench recently.
I was going to move on to the interconnect between the stages (plate of the 6J7 to the control grid of the 6K6) but something happened. I had no output at all, and I’m not sure what happened. Did something pop, like one of the capacitors? The tubes seem to check good:
I need to do some more checking on this thing before making my decisions about what’s going to happen to it.
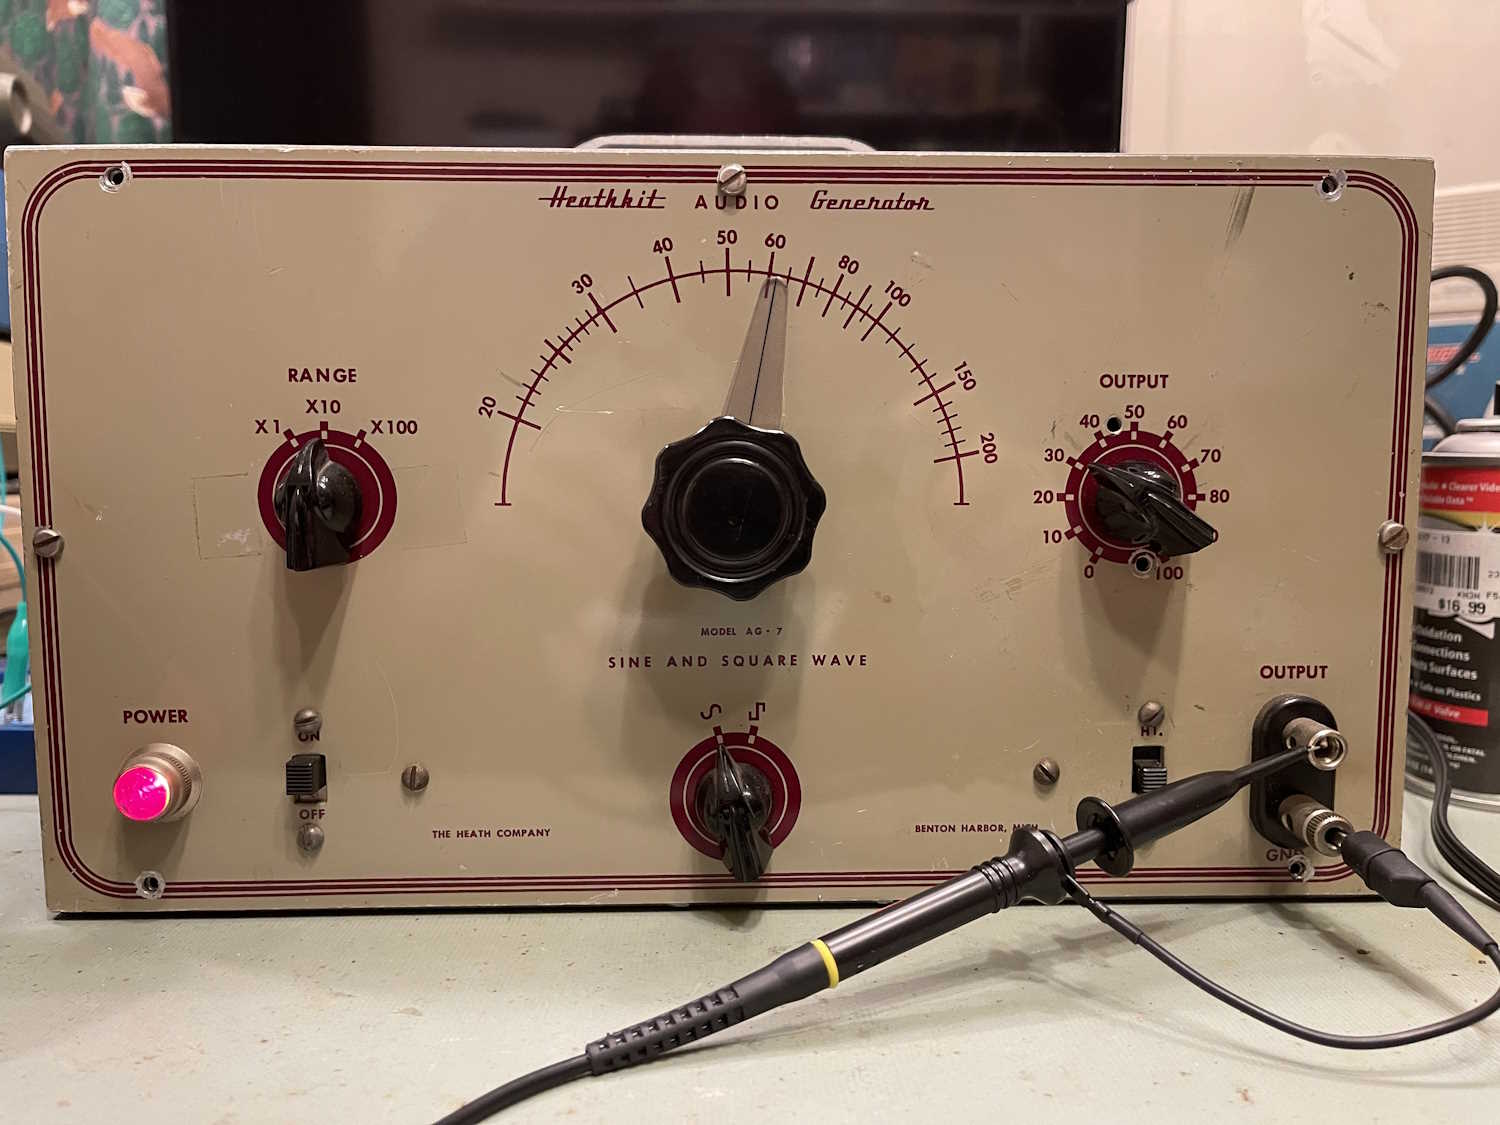
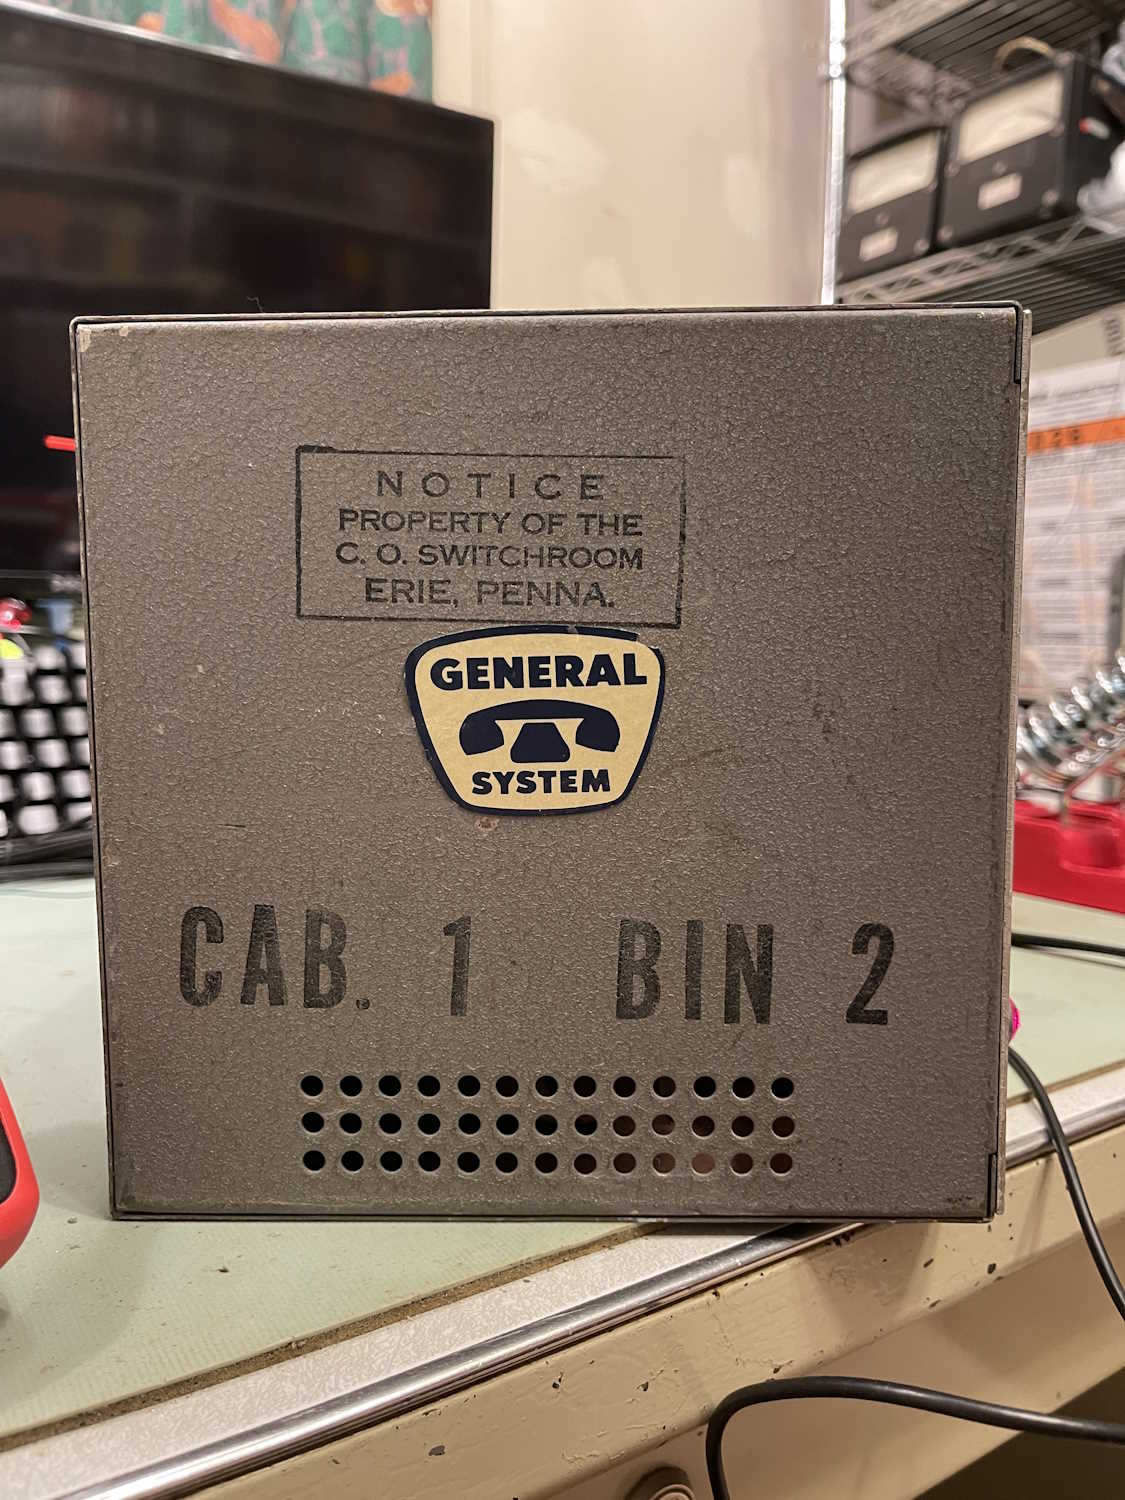
If you’ve been reading this site, you’ve probably seen this guy. It’s a Heathkit AG-7 Audio Generator that was purchased at the Breezeshooters Hamfest in Butler, PA during their 2023 event. It’s not something I needed, but was interesting because it had a decal from General Telephone’s Erie, PA office, and had drill points that looked like it had been set-and-forget. Some sort of tone generator for the telephone switch, perhaps? I’m not sure, save that this device has some interesting history behind it.
Here’s the decal on the side:
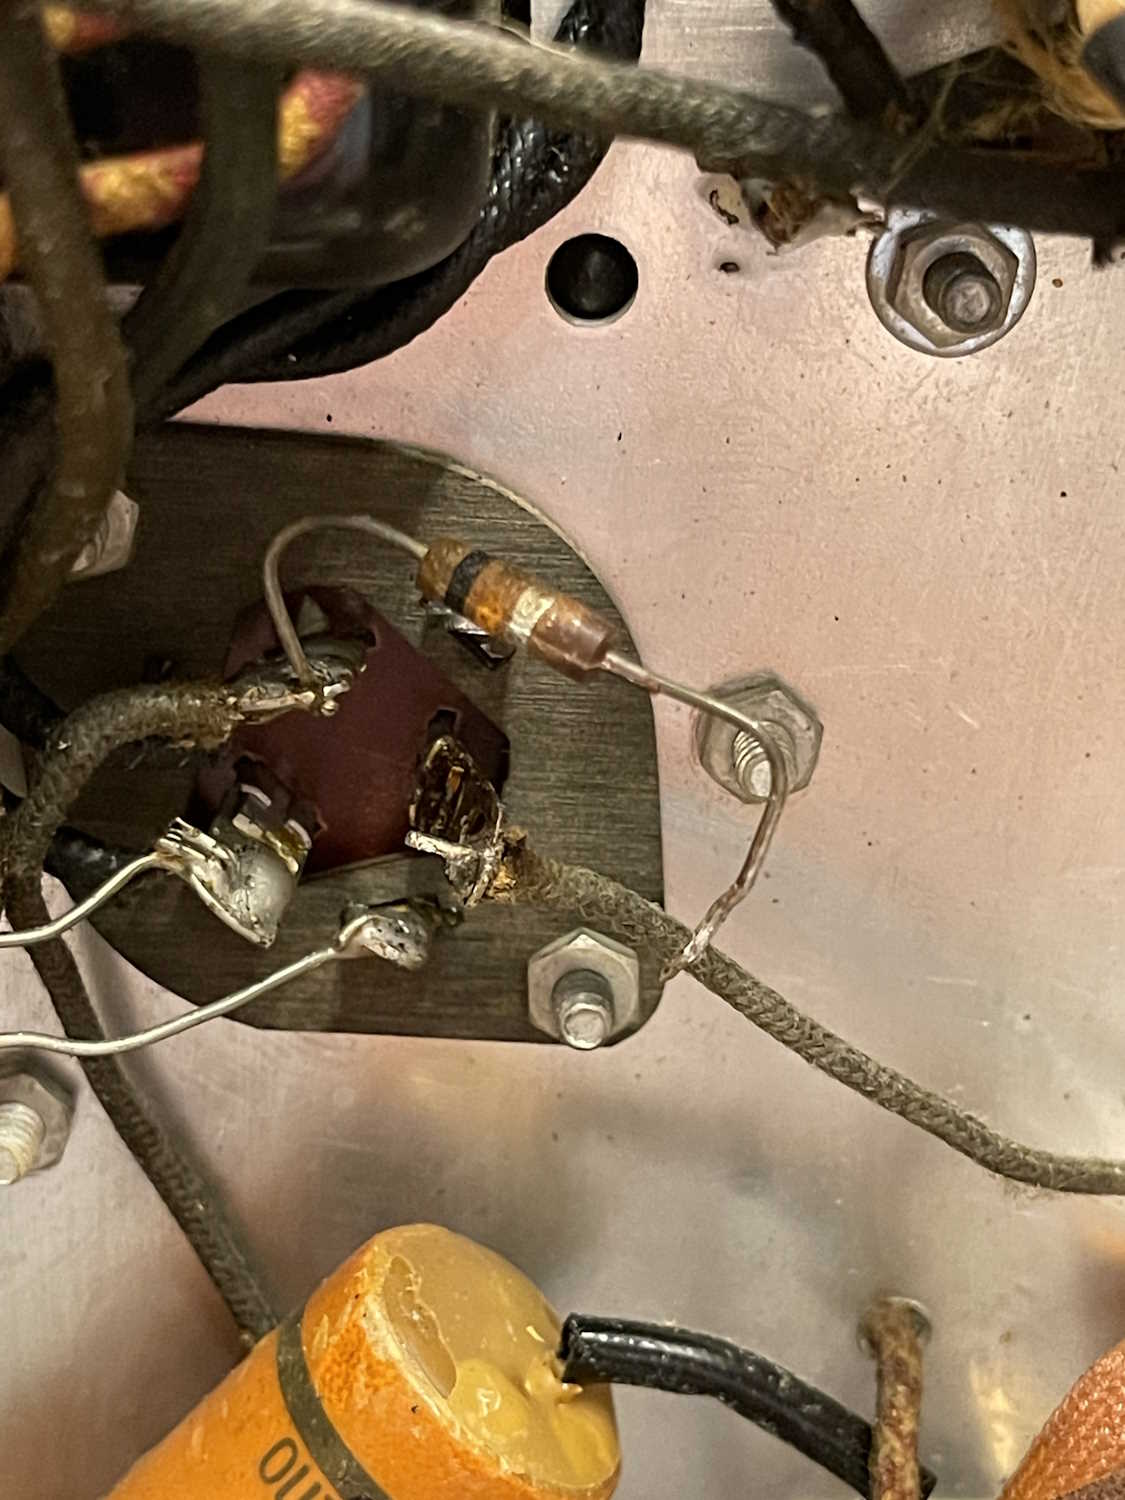
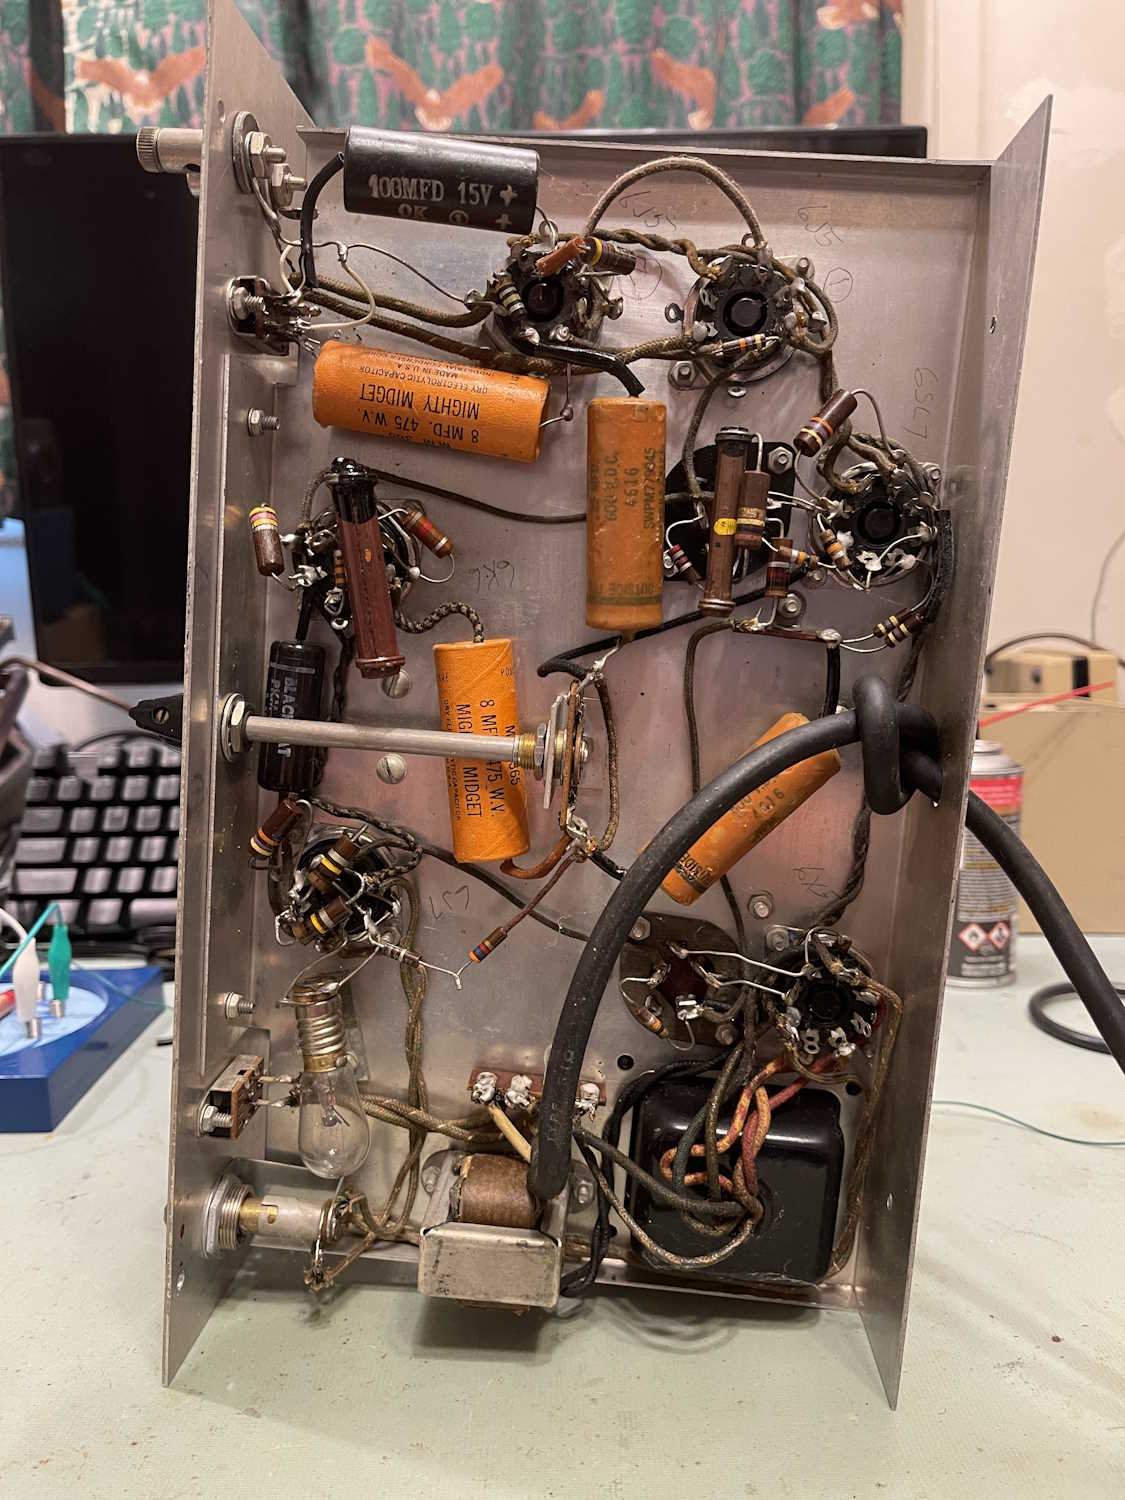
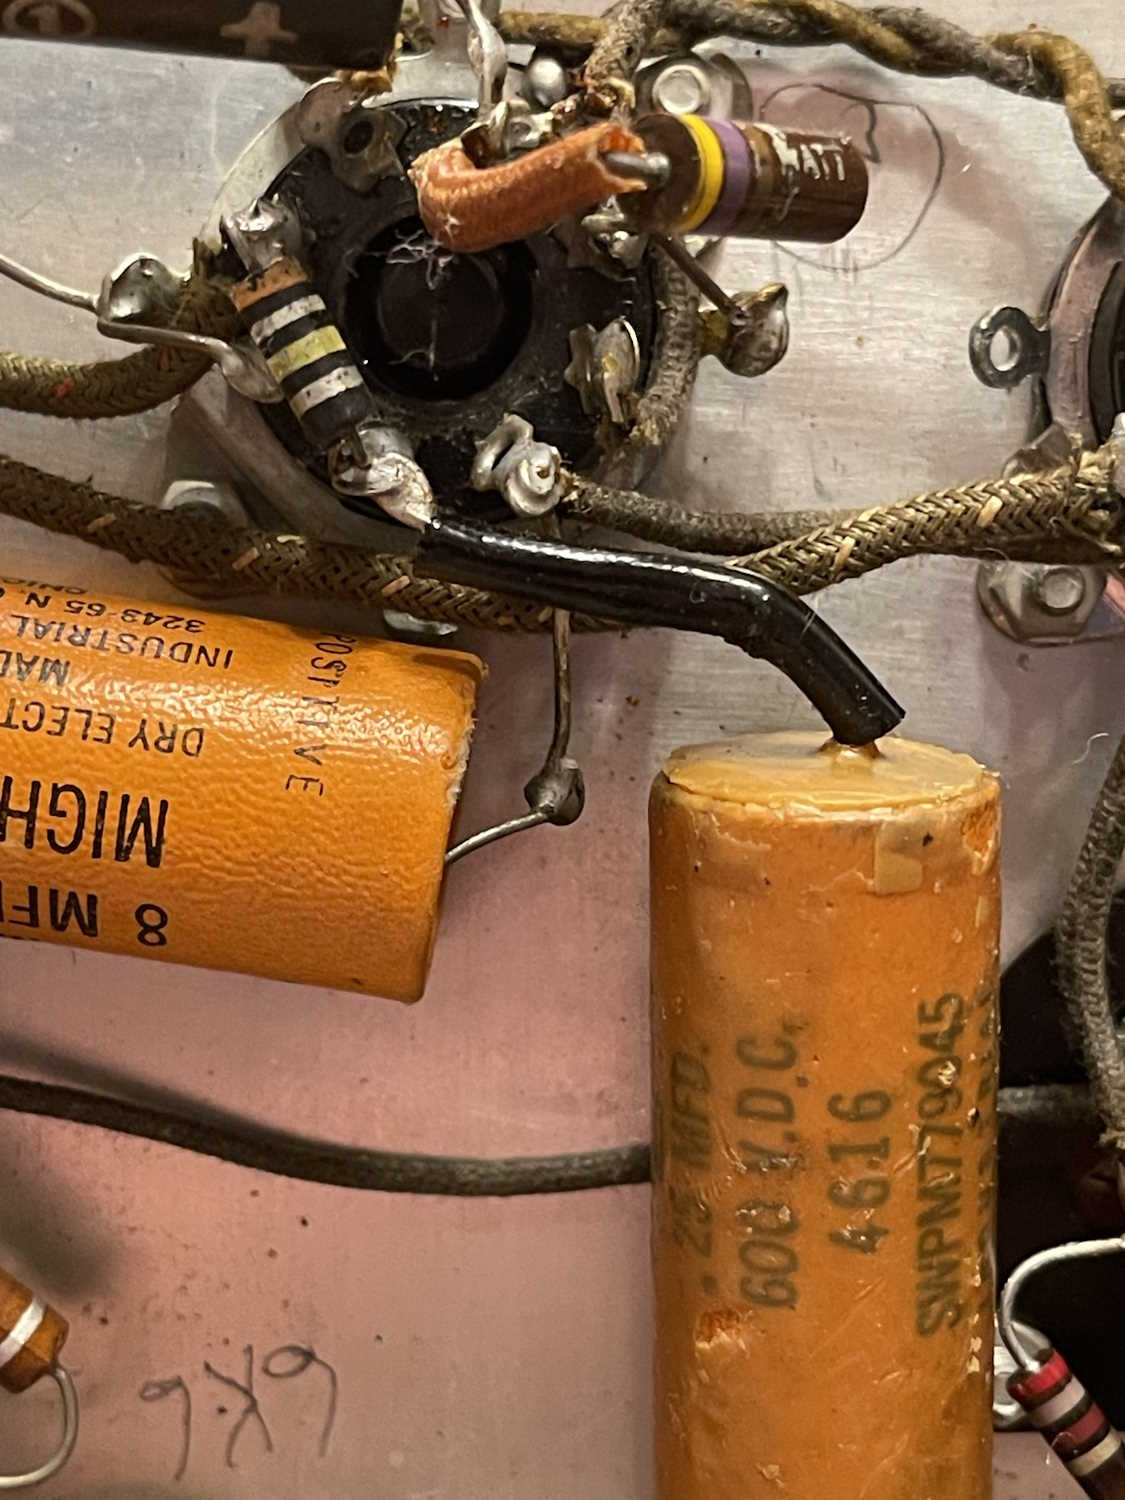
The chassis shows some signs of work over the years. J-hooked parts show someone probably did some investigative repairs, and that resistor pair that’s tied together certainly wasn’t factory…
What’s the initial diagnosis here?
Power supply seems to be working, and filter capacitors aren’t dried out. They’re not getting hot and nothing else is smoking.
The device has an output:
You can see this device has the same issue that a lot of Wien bridge oscillators have - the lower half of the signal is partially cut off. Later devices took care of this by putting adjustments in the oscillator circuit itself, but this one didn’t have that:
So there’s probably some resistors that have drifted in the oscillator circuit itself. No surprise there, and the repairs are going to be the first suspect.
It does have another, less apparent issue - the oscillator will stall and restart when you rapidly change the dial. There are trimmers in the unit to help alleviate this, and an adjustment procedure for them. This isn’t really that big of an issue, so I’m not concerned with it right now. The main thing is going to be figuring out which parts needs to be adjusted to bring this device back to a pure sine wave, at which point a partial or full rebuild may be in order.
Next part of this series will be determining where the sine goes bad. Stay tuned!
Now that the PACO G-30 is working, and is probably in a bit better shape than it was than before I purchased it, it’s time to take a look back on what happened with it.
Analysis and wrap-up.
When I purchased the unit at Findlay 2022, it was sold working. And it was - mostly. I didn’t check the audio portion, but the RF worked fine. The previous owner had removed some of the old capacitors and replaced a few of the carbon composite resistors. He hadn’t replaced them all as they were well within tolerance - surprising for high-value CC resistors. He had replaced the filters with a strange array of electrolytics. But what hadn’t been replaced was the across-the-line capacitors, as well as the selenium rectifier.
The across-the-line cap was of the three-leg type, a device that has two units back to back with a common leg. They’re well known for blowing apart, and that this one hadn’t done so was surprising. The other device was the original selenium rectifier.
Selenium devices were a stop-gap measure between vacuum rectifiers and silicon rectifiers. They worked fine when new, but as they age the forward voltage drop of the device increases. This happens used or unused. Get enough resistance there, you get more voltage drop, more drop means more heat, more heat means that eventually you’re going to wind up with a device that burns open and releases a lot of toxic smoke into your space. You don’t want that, so replacing it is mandatory. Sure, it’s probably still going to work (for a while,) but it’s a case of when, not if it goes bad.
For the most part, this was just a replace the parts that are known to go bad (mostly done,) replace the carbon resistors because they will eventually go bad (mostly done,) and fix some of the issues left by the previous owner. The across-the-line capacitor was easy enough to replace with modern safety caps, and the old line cord was replaced with a new polarized cord.
As stated, the selenium rectifier is a part that was destined to fail from birth. It needs to be replaced, and for a small rectifier like the one in this device, it’s easy to replace with a 1N4007 silicon. I used this type because I have them on hand, but you could use any diode that exceeds the miniscule current rating, and at least 200V. (You should go higher than this for safety margins.)
There are some considerations to look at here. You’ll need to remember that the silicon rectifier drops much less voltage than a selenium, so some sort of dropping resistor will be needed. There was already a 2.2kΩ resistor in the power supply circuit between the two filter capacitors, so changing that was easy. You’ll need to make sure to measure the current to do some basic calculations and see what you need to raise that value to, but in this case I already knew ~3.3kΩ would work as others have taken the time to do the calcs.
Another consideration you’ll need to make is that full peak voltage of the line will appear on the capacitors until the set is warm and drawing current. Therefore, any capacitors you use will need to handle at least this voltage. The old ones may not have been rated for this, but those old paper capacitors could handle surges much better than modern stuff. Modern parts are easier to get with higher voltages, so don’t be afraid to use 300WVDC or 450WVDC capacitors here.
Resistors are the last consideration you need to look at. Remember that you’re working with higher voltages than a battery device - you need resistors rated for at least your maximum B+ voltage, be it the rectified voltage or the Peak voltage that you see on the filters. Most resistors are rated for at least 300WVDC these days, so you’re good for this device - but if you’re working with 400, 800, or higher - your resistors need to be rated for this higher voltage. In carbon resistors, you’ll see ones that are longer than normal and that gives you a clear indication that it’s a high voltage part. Modern parts give you no such indication, so buy your parts from a reputable house.
Resistors also have to be rated for your surge currents. Carbon resistors can handle surges, and that’s especially important here where you have full voltage on your circuit at the start. Rate it small, and your metal film resistor is a fuse. Don’t be afraid to step up the power rating on resistors in power supplies and other areas where you’re going to be supplying current and voltage to the rest of the system.
What did I specifically run into?
First - I forgot how selenium rectifiers work in a vacuum circuit. It’s been far too long since I’ve seen this type of device, so it took some remembering.
When I first turned on the set, I had a 150WVDC capacitor after the dropping resistor. As the entire of the peak line voltage appeared here (180VDC) I went crap and turned it off. It took a while to remember that the rest of the set isn’t hot and wanting current, so the voltage drops in the power supply aren’t there yet. A quick swap with a 450WVDC part and a bit of waiting, and B+ dropped right back to where it should be, which is ~110VDC.
Second - I didn’t have any audio on the audio side. This turned out to be a part the previous owner installed. The grid of the audio oscillator was supposed to have a 100kΩ resistor, The previous owner had a 15kΩ resistor here, which is what I replaced it with as I replaced each component individually with it’s modern equivalent. Once I put the proper value in the circuit and a new tube (the old one didn’t seem to work well) it came right up. It’s a bit off in frequency, but it’s not really of importance as it’s there for you to hear, not compare to the sounds of nature.
This unit is a good example of why you examine devices closely when you’re working with them - especially when someone else has been in there first. A schematic is essential for this, so make sure you have all your docs in order.
That’s about all - other than the wrong part leftover from the former owner, this was a simple “bring it into the modern age” device. Next up is probably an Eico 24x VTVM, but it’s also another “just needs resistors” device. It just needs a lot of resistors as the divider ladders in the measurement circuit are all out of tolerance. Stay tuned!
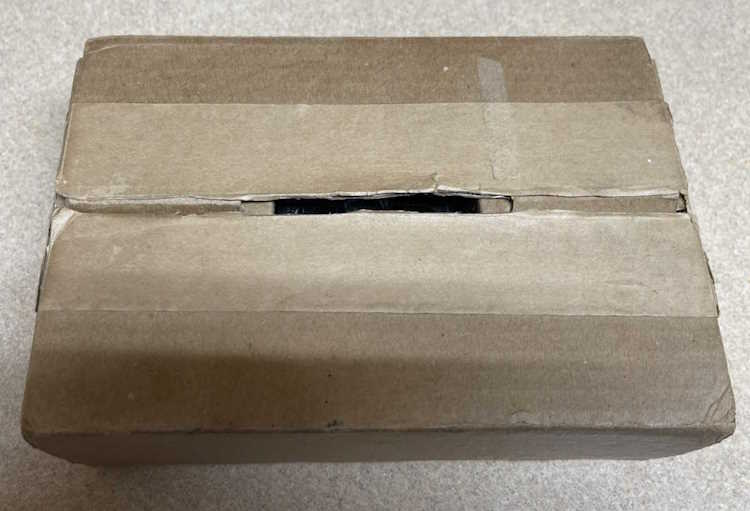
I picked this little gadget up at the ACARA hamfest. Not because I plan on using it, but because it’s an unusual little thing and had a brand new book with it.
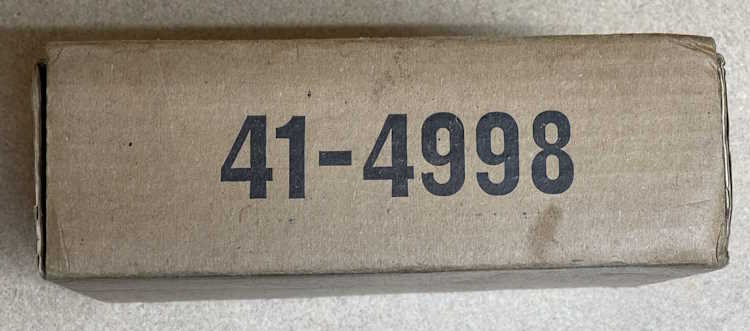
It’s a rather unassuming box with a number on the side.
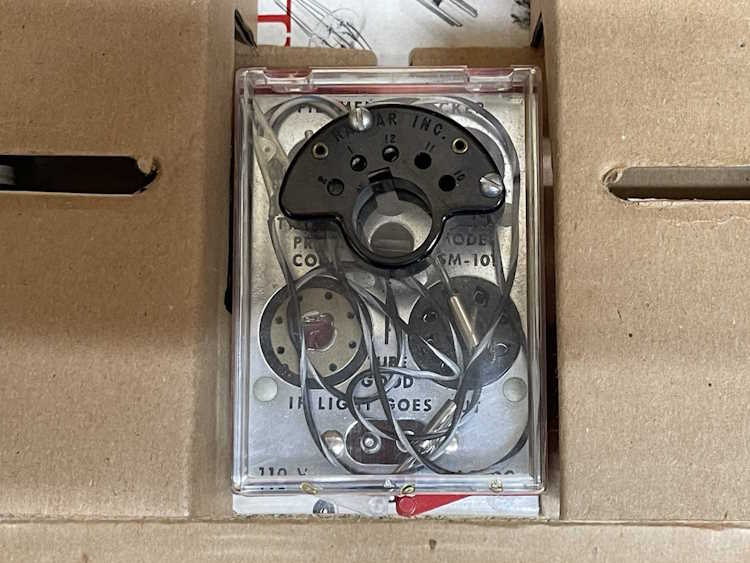
What’s inside is this little gadget, a power cord, and a book. The gadget:
It claims to be a Tricraft Products Corp SM-101 Filament Checker. I’m not sure how it works because there’s no instructions for the device. It appears to be used, but only very little. I can see some wiping on the contacts. The power cord was unrolled and rolled back up with bread ties.
I can’t imagine this was terribly useful, your VOM would have been quicker than getting out a power cord and plugging all kinds of little pins together in an attempt see if the filament was good.
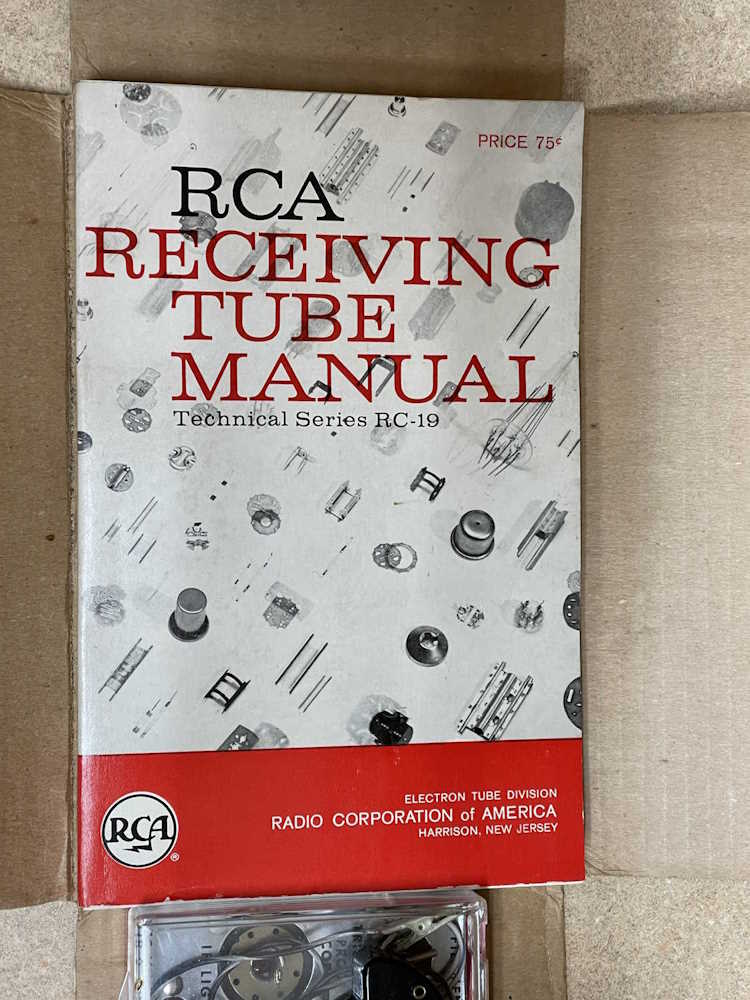
The real gem is the book. The RCA Tube Manual RC-19 from 1959. It appears to be unused, if a little dirty.
That’s worth the few dollars I paid for it right there. The other piece? A cool gimmick gadget for display.