Replacing the filter capacitors in a Hallicrafters S-38C
Wednesday, July 31, 2024 at 07:30:06
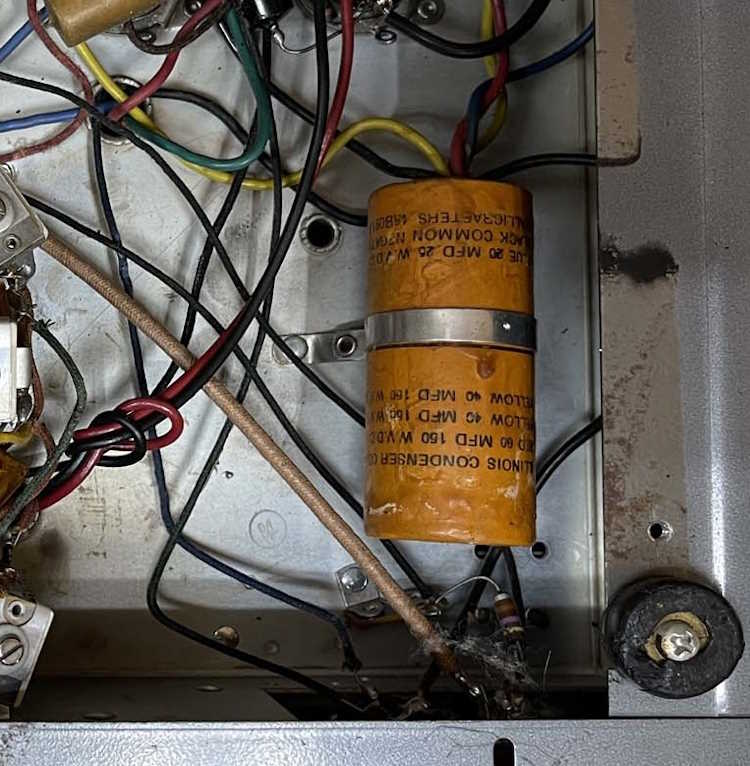
One of the things I picked up at Dayton this year was a really nice example of an S-38C multi-band radio. Completely untouched inside, it of course has bad filters. That’s par for the course for one of these. (It probably also has some silver mica disease, but that’s another day’s problem!)
Replacing them is easy enough, but it all depends on how you want to do it. Some prefer to keep it original, opening up the can on the multi-section device and putting new components inside. Others just wrap capacitors wherever there’s a place to put them. I’m thinking of going a different direction with this one.
Most of Hallicrafters low-end transformerless sets used similar multi-section capacitors and dropping resistors.

(Schematic from the Riders Manual.)
Some, like this one, used a 220Ω and 1kΩ resistor, others (like the S-95) used a 470Ω instead of the 1K.
So…why not create some sort of universal PCB that can drop in and replace all of the filter capacitors, sans the cathode bypass capacitor used in the audio stage of some of the units?
I had thought of using axial devices, but those can get expensive. What’s not expensive, and are compact and readily available? Surface mount parts. A small board could be created with three capacitors and space for the two dropping resistors, pre-assembled (or partially, depending on what you’re trying to fix,) and either double-side taped in or bolted down. The board wouldn’t need to have any through holes, wires could simply lay on pads and be soldered down. 5W resistors and 160V capacitors exceed original specifications, and would be easy to install on the board.
There’s certainly plenty of room in the device once the original can has been removed.
Wow, those feet are in bad shape…need to find some replacements!
I know that idea will offend some purists, but that’s not my concern here. I want to get the device back up and running with good quality parts that fit in the space required, without drilling a lot of holes or simply shooting parts all over the place.
I just need to brush up on my PCB skills, and lay out the board for sizing. Stay tuned!