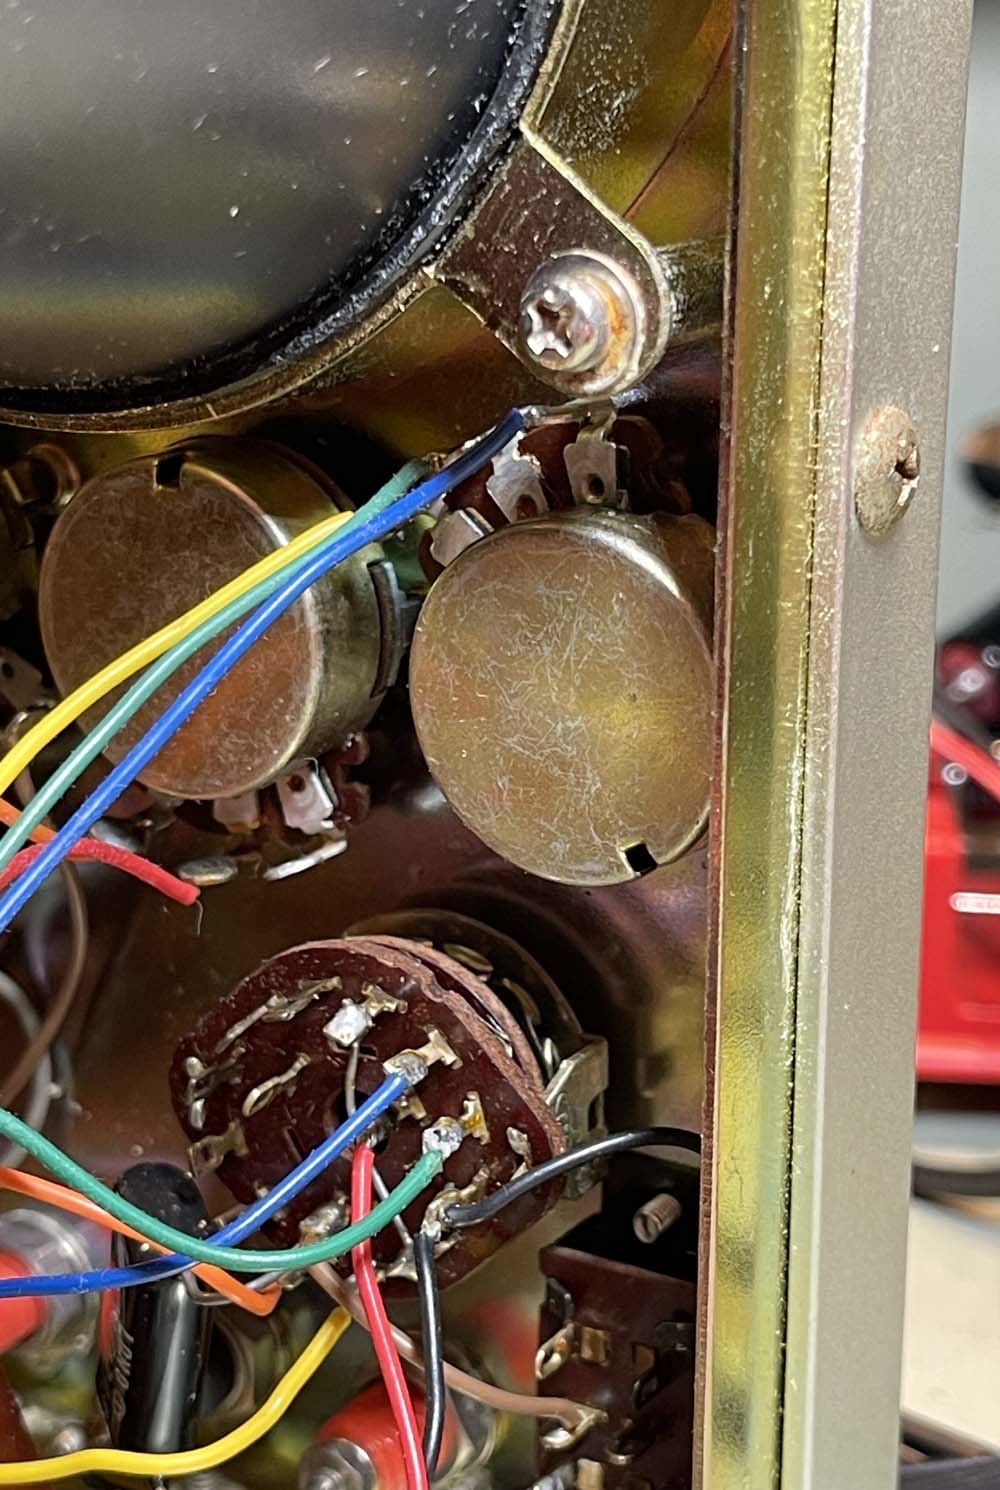
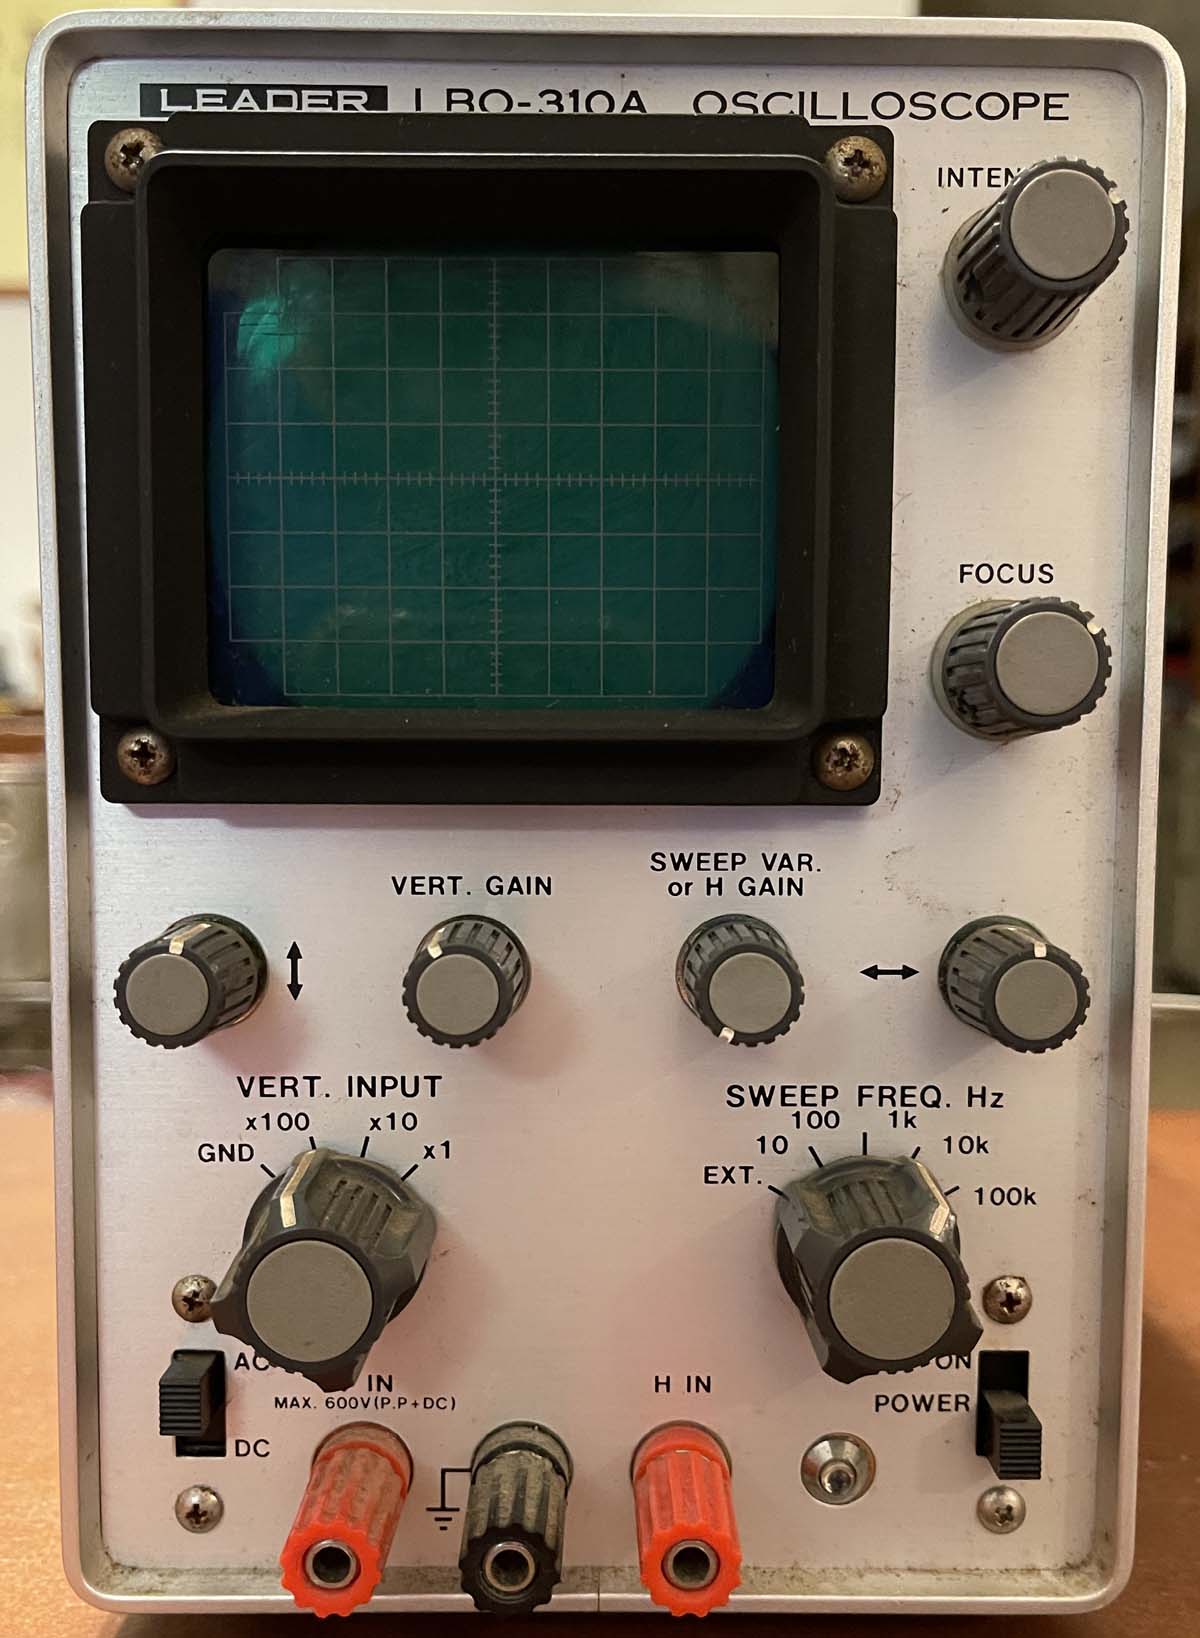
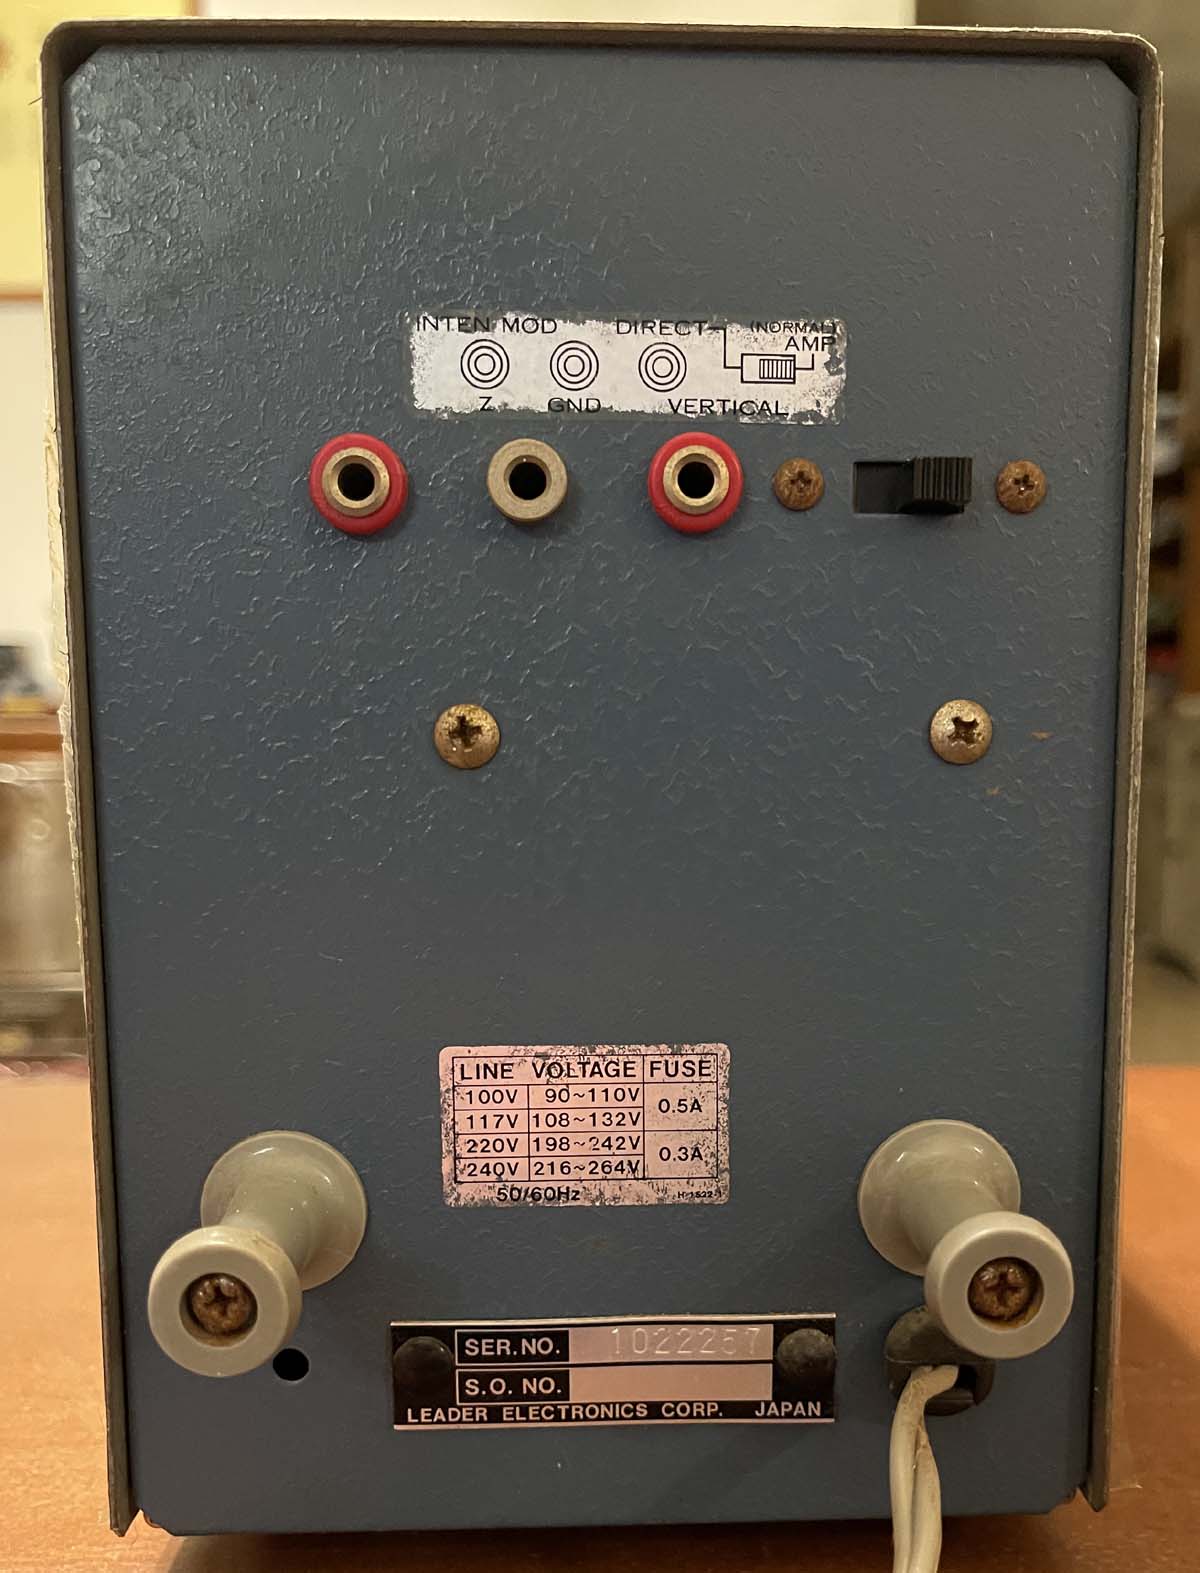
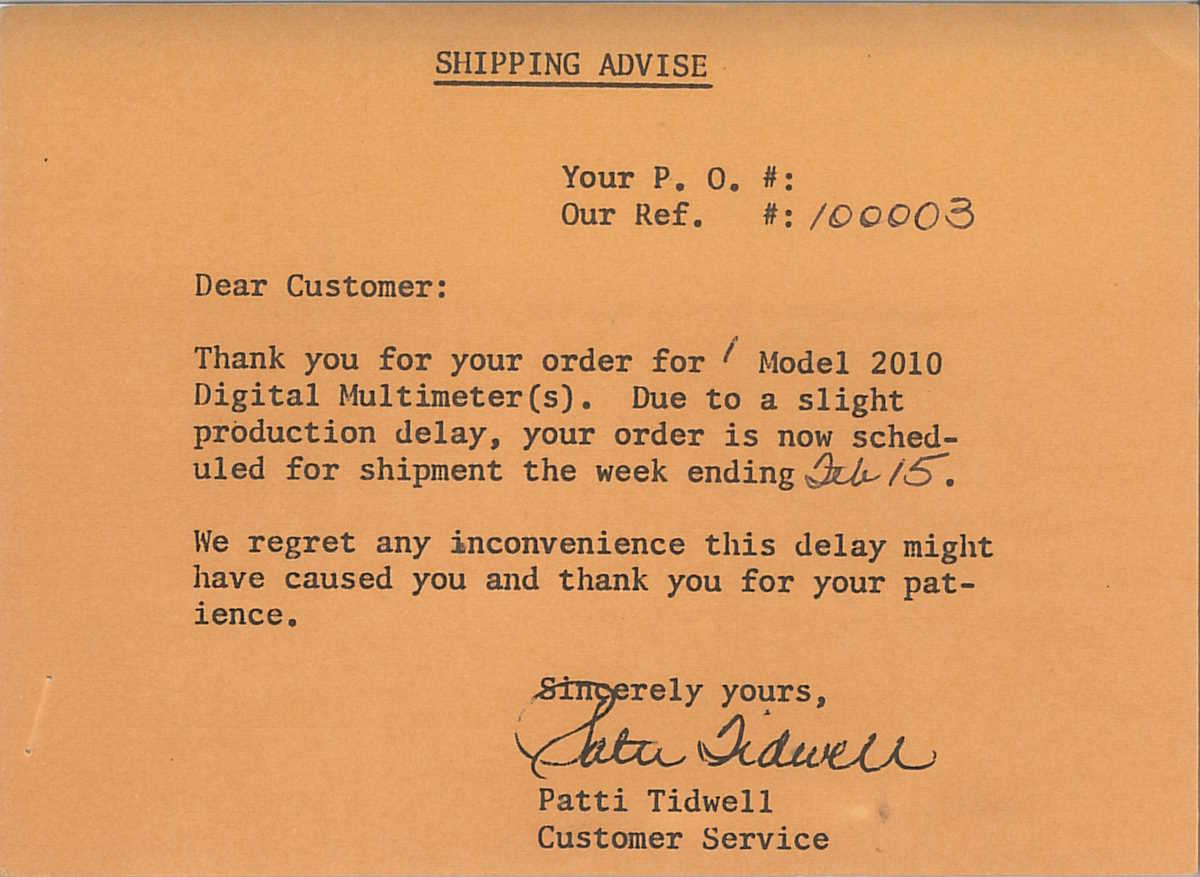
In the first part, we checked out a Leader LBO-310A oscilloscope. It seemed to have a very simple problem, one where the vertical centering wasn’t working. This is due to a bad potentiometer where the carbon ring on the internal wafer is just worn from age. The pot in question is the one closest to the edge in this picture:
I picked up a few parts, but it turns out this one is just a little different. Older Japanese equipment tended to use potentiometers that were just a bit smaller than the ones we used in the USA. 6mm shafts instead of the 0.250” (6.35mm) that we used, with a correspondingly larger mount. So…the ones I bought won’t fit. I could make them fit, but then the knob won’t fit the shaft.
So…
I have some on order that claim to have a 6mm shaft. They’re genuine Alpha pots, so they should. “Should.” If not, hopefully I can just remove the wafer from one of them and swap it out. Otherwise, it’s waiting for a show where I can dig through some junk bins.
I recently undertook a task to clean up and optimize images here on Projects, both for size and content. Some of the images were simply enormous, and some were showing stuff not relevant to the task at hand. You don’t need to have 5MB of image downloaded just to show you my bench with a single part on it. It can be much smaller. I also wanted to name things with a more universal convention.
That has been, more or less, completed. There’s a few images hanging out in hamfest folders that could be touched again, but for the most part they’re fine. And a couple I missed in QA…
Enter part 2.
Flatpress has a plugin that allows the pages to present a set of metadata that makes it more friendly towards searching. I’ve decided to (slowly) go through the pages here, add descriptions and keywords, and hopefully make the site easier to find what you’re looking for. This is probably going to take a while, but you shouldn’t see any interruptions on the front end of the site. I’m going to be working forwards from 2021, with 2026 already fully metadata’d.
Thank you for visiting Projects. I hope you’ve found something of interest here.
Progress:
2026: Done
2025: Done, and found some missing images.
2024: Done, and found some missing images.
2023: Done, and found some missing images.
2022: Done
2021: Done
This project is pretty much done. I’m going to set the search engines loose on the site in the coming weeks, hopefully more links to the site should show up and provide easier searching.
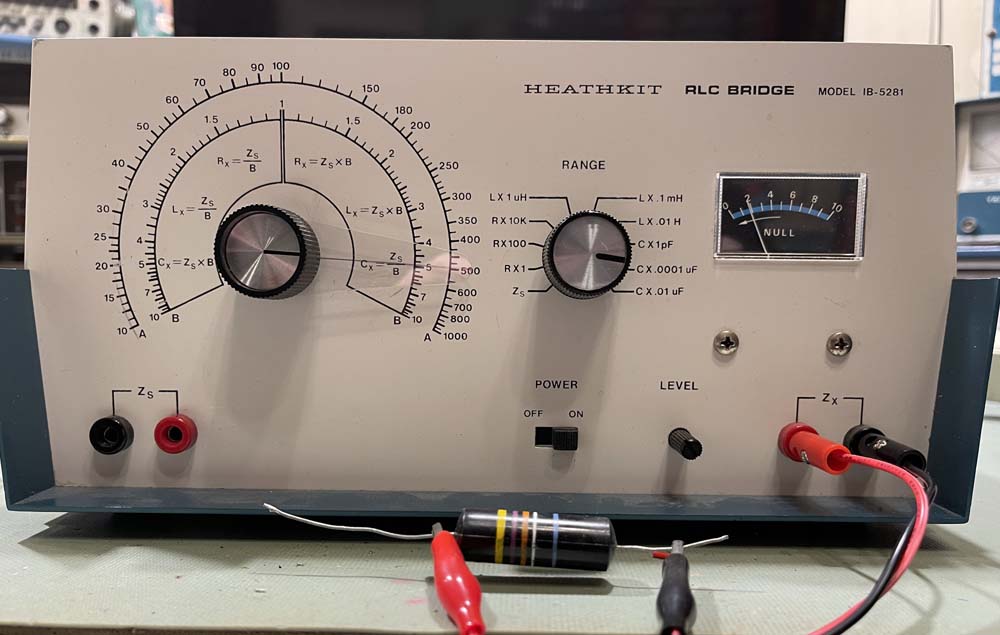
Here’s a device I picked up as part of a stack of stuff - A Heathkit IB-5281 RLC Bridge. This is a “more modern” equivalent of the old eye tube tester, and dates to the late 1970s. This is probably the last gasp of this type of device, as digital capacitance checkers started to become more readily available as the 80s moved on.
There was a whole set of devices in this range including:
AF Generator
RF Generator
RLC Bridge
Signal Tracer
Multimeter
They’re all in giant blue plastic boxes:
The device has a fairly short range of values it can test, and definitely seems to be geared towards the transistor era. One of the neat features is this device can also do matching by comparing the component in Zs with Zx, and dialing the main indicator away from 1.0 to give a determination on how close a match they are.
The top has a handle and a space that pulls up for cable storage:
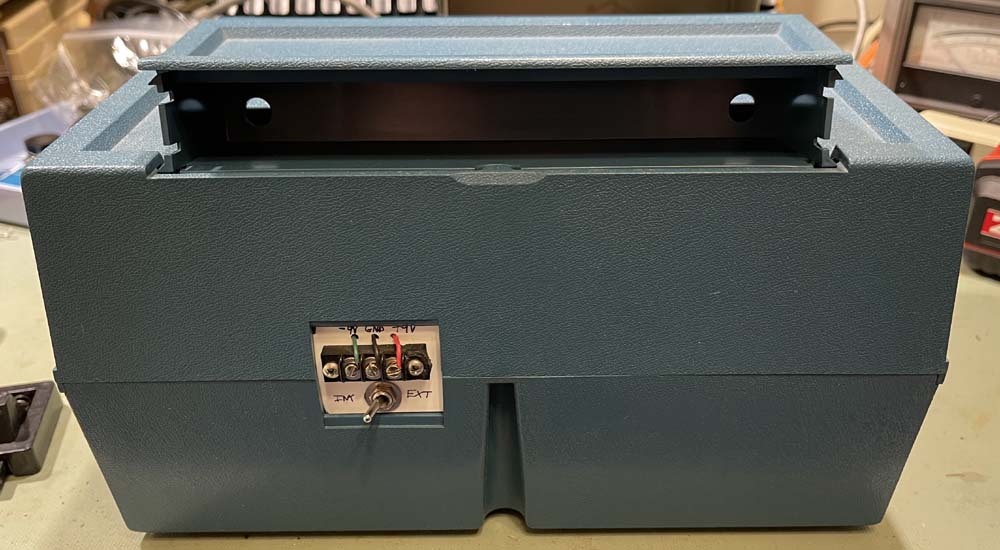
And the back has the power input.
The device requires +/- 9VDC, and can run on either a pair of 9V batteries - which you have to disassemble the case to get at - or an external power supply. Originally, this would have had a molex connector similar to an old floppy drive power input, but the previous owner removed it and added a terminal strip.
Inside of the device is pretty sparse.
A single board with all the components, the mode switch, meter, and value pot. The batteries go in holders at the back, if you choose to use them.
Let’s hook a part up to this and see what it does. I chose a bumblebomb from the Simpson 715 that is currently on the bench. It’s marked 0.047μF but reads about 0.052μF on my digital meter.
Lead length is important here. I tried these cheap long leads, but ended up having to rig up a set of shorter ones to get an accurate reading.
To use this, you:
Connect the unknown.
Set the range switch appropriately.
Turn the value dial as far away from the believed value of the unknown.
Adjust the meter level until it’s “10.”
Turn the value dial to get as close to “0” on the meter as possible.
Adjust the meter level control back up towards “10.”
Re-adjust the value dial to null again.
Repeat the above two steps until you can’t go up and/or null anymore.
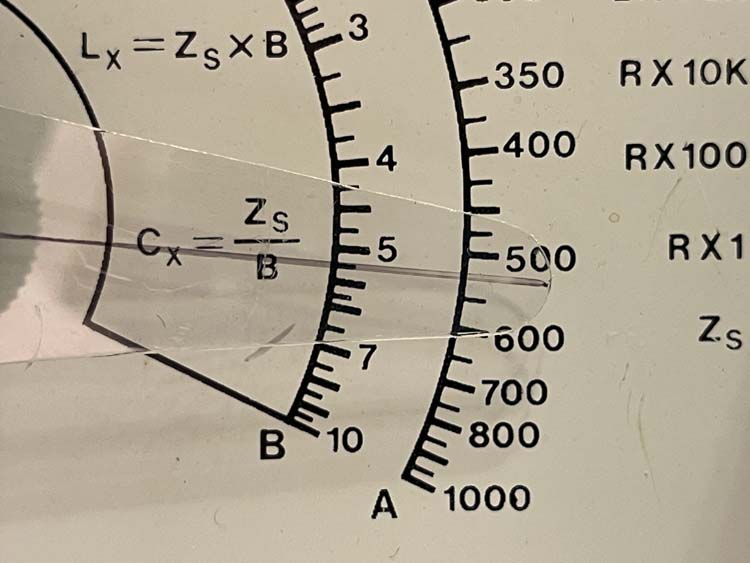
I ended up with this for the part under test:
So…it works as expected, even though I can see the level pot wearing out quick since you’re constantly adjusting it. I have to wonder why that control didn’t get a nice knob - that little plastic shaft is difficult to turn accutrately, especially considering that meter is quite unstable. Who knows.
I’ll probably keep this, just for the novelty, but who knows. You may see it and it’s brothers at a show near you.
In the last part, we started to replace some of the parts that are known problems in older devices. While most of these probably won’t do anything to fix the non-zero issue (and that is probably some other parts out of tolerance) - they will need to be replaced if this meter is going to go into service with any reasonable expectation of working.
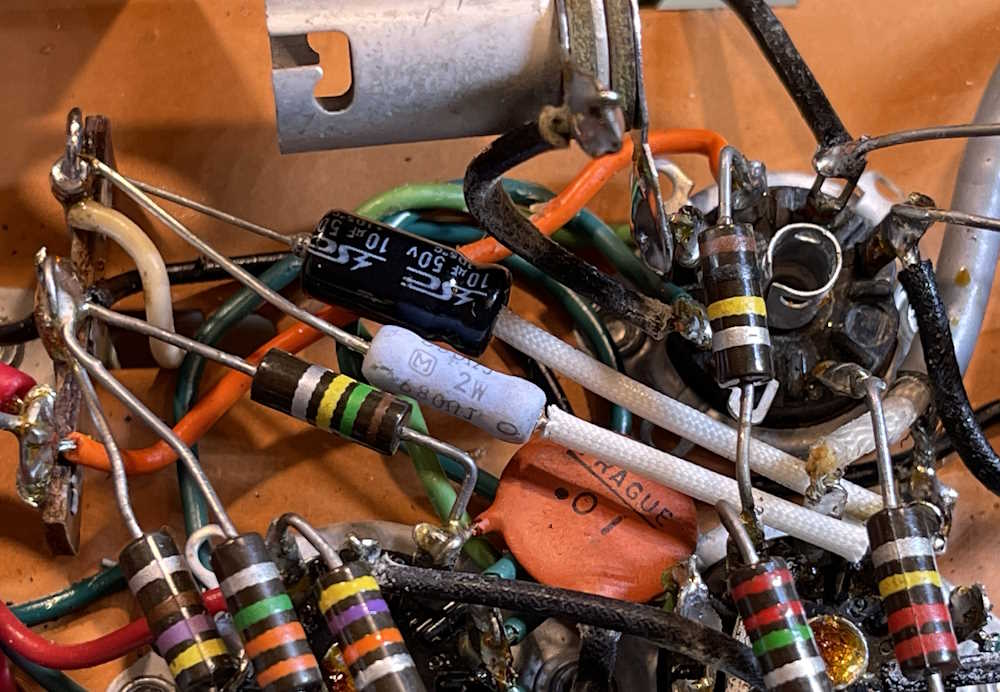
This part sees some of the components in the meter circuit replaced, and takes care of most of the (current) work on the bottom of the device. There’s a capacitor-resistor pair that we’re going to replace, and this is a component directly in the meter circuit. There’s also another resistor on the topside that’s part of this circuit, but that isn’t going to get replaced until later.
Here’s the components we’re working with:
In particular, the capacitor and the 2W 680Ω power resistor are being replaced. The 30Ω resistor is for later. The capacitor and resistor mentioned are soldered across one another, so removing the capacitor means the resistor gets removed as well.
I didn’t need to use a 2W part here, but that’s what I had on hand. It’s pretty much the same size as the old 1/2W carbon comp, so why not.
Here’s what we’re going to replace:
This part attaches to a terminal strip that carries a wire up to the meter board, and snakes down to a tube socket on the other side. They unsoldered fairly easily, and I was able to bend leads and remove the parts intact for later testing.
The new parts don’t need to go in the same way, they are small enough that they can simply run directly to the connection points with a little bit of ‘lectric sketti.
That was much easier than I expected, and I took the time to remove the filter capacitors as well. That’s next.
The old part was pretty much +100% at 1.4Ω ESR, so it’s getting tired.
Next up is the filters, then the meter board goes back on with some parts attached to it. Stay tuned!
While still about 4 months away, there’s no better time to get your ticket as you can get the early boar price of $26, mailed to you at no extra charge. This is good for all three days - May 15th, 16th and 17th.
Ticket prices increase March 1st, so there’s no time like the present to get one if you plan on attending. Get your ticket here: https://hamvention.org/purchase-tickets/
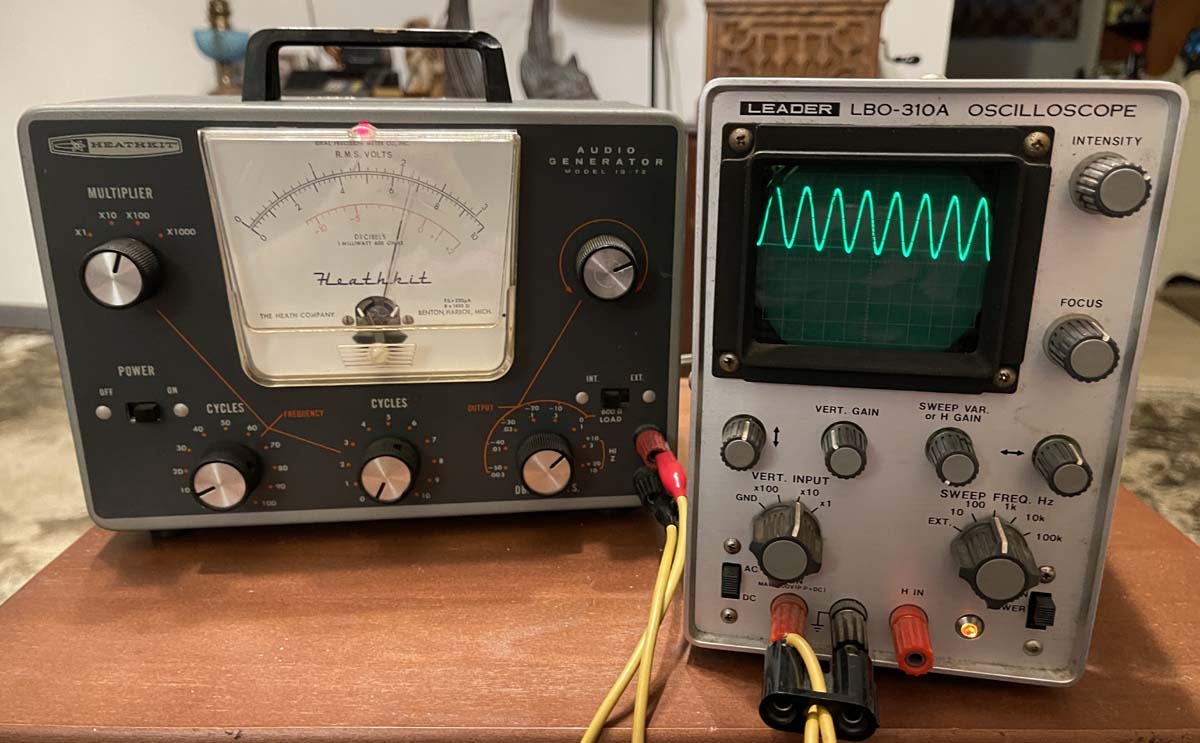
A friend picked this cute little scope up for me cheap because I’ve been looking for a small, actual CRT scope.
The Leader LBO-310A is a simple 4MHz scope that dates to about 1976. It doesn’t offer much except scope. Let’s take a look.
The device itself is pretty clean, both inside and out. The outer shell still has the plastic covering on the metal, so essentially underneath of this cover it’s brand new. Inside, there’s a little bit of the white corrosion that you get with this vintage of Japanese equipment, but nothing major. This scope was used, but not abused.
Even the cord is still good on this thing. This is one of the few devices that’s come across my bench that doesn’t need a new power cord.
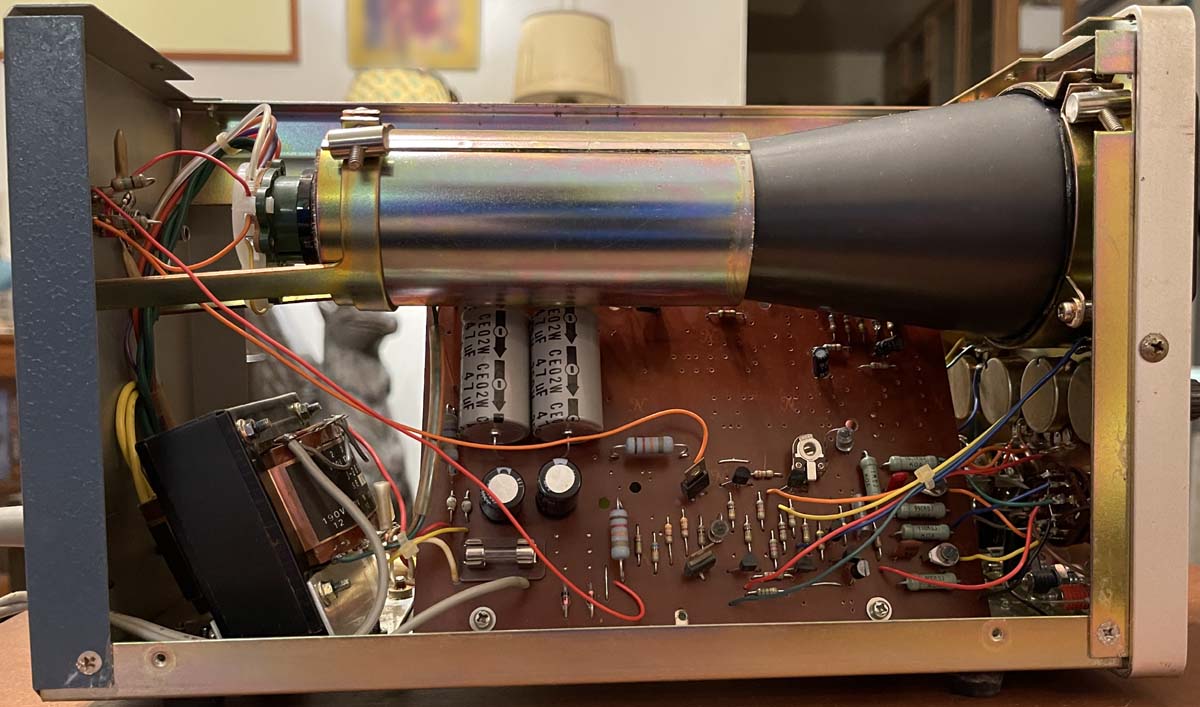
Inside is pretty sparse. This guy is transistorized, so no vacuum fire bottles except for the CRT:
There’s a lot of places for extra components, so this probably was used in other things, or had options that this unit doesn’t have. There is another board behind this one, that’s a power supply board - it’s not really visible unless removed from the unit - there will most likely be some better shots of that later.
So - does it work? It does, that was demonstrated in the ad, but let’s try it out and see if it actually responds. First thing I notice is the pots are gooey and touchy, so it gets some Deoxit…in particular the vertical position pot is very touchy. More on this later.
I’m using a signal generator I picked up at Fort Wayne, a Heathkit IG-72 that I recently did a checkout post on. It needs a little adjustment but will work for this purpose. And yes, the device responds nicely.
The CRT is nice and bright, and the trace sharp. It does need a little rotation, so I’ll pull the manual and see which one of the internal adjustments does that for us.
The vertical position pot does have an issue - right about where it would be set for the trace to be in the middle of the screen, it’s dead. That’s not surprising, that’s probably where it sat most of it’s life, and I believe this unit came from a shop. That’s not a big deal, it looks about like one of those cheap Alpha pots that ratshack used to sell. I’m sure I can pic something up that will work here without issue, and I’ve ordered a couple of devices that should go in here without issue.
Stay tuned for the replacement!
In the meantime, here’s an operator’s manual, service manual, and a catalog page. The operator manual is in barely readable shape, but it’s there. https://wereboar.com … 0A%20Manuals.pdf.zip
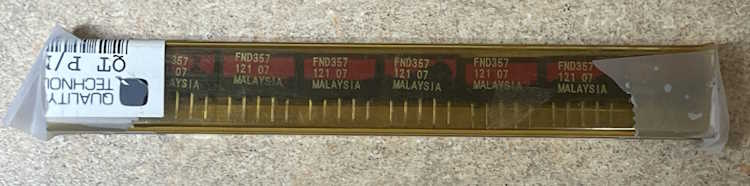
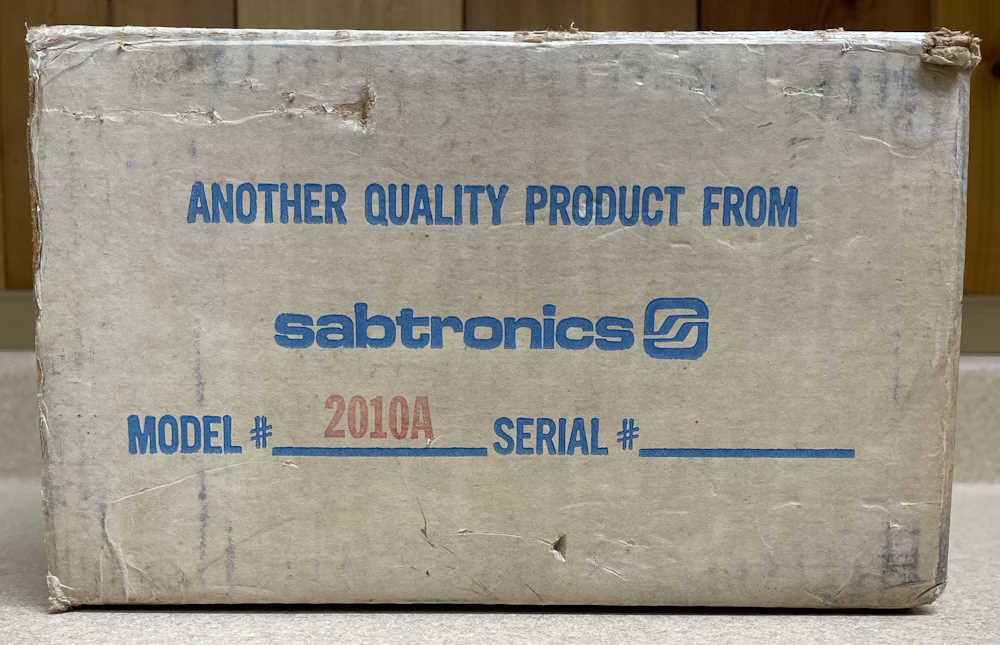
The Sabtronics 2010A DVM presented earlier is fully operational, sans a bad display element. Those displays, The Fairchild FND357, are generally only available as old stock - but they are available. I found a seller with some reasonable prices online and made a purchase:
I bought a handful just in case. These will be stored with the unit while I finish up some other things.
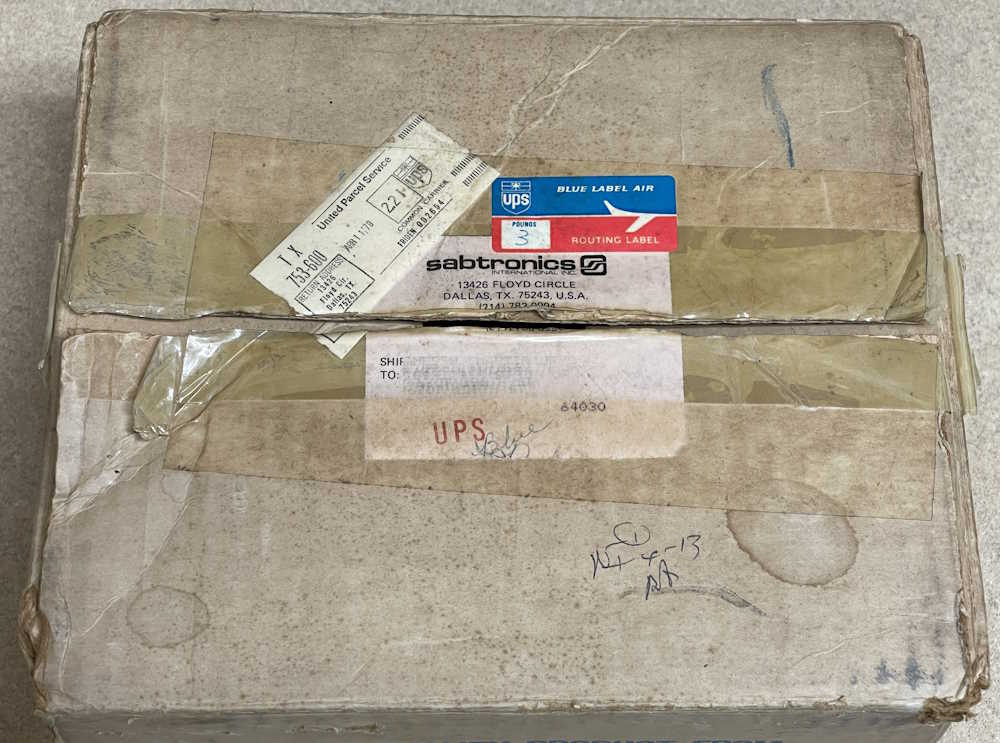
In the meantime, I dug the original shipping box and literature out of storage. While it looks like some of the literature is just looseleaf copied from a different model, I do have the original manual for the 2010A. I’ve scanned some of the documentation, and will scan the actual manual when I have the chance. Here’s the docs - they look like information for an earlier device: https://wereboar.com … 0Information.pdf.zip. These are also included in the January 2026 archive zip, if you’ve downloaded that.
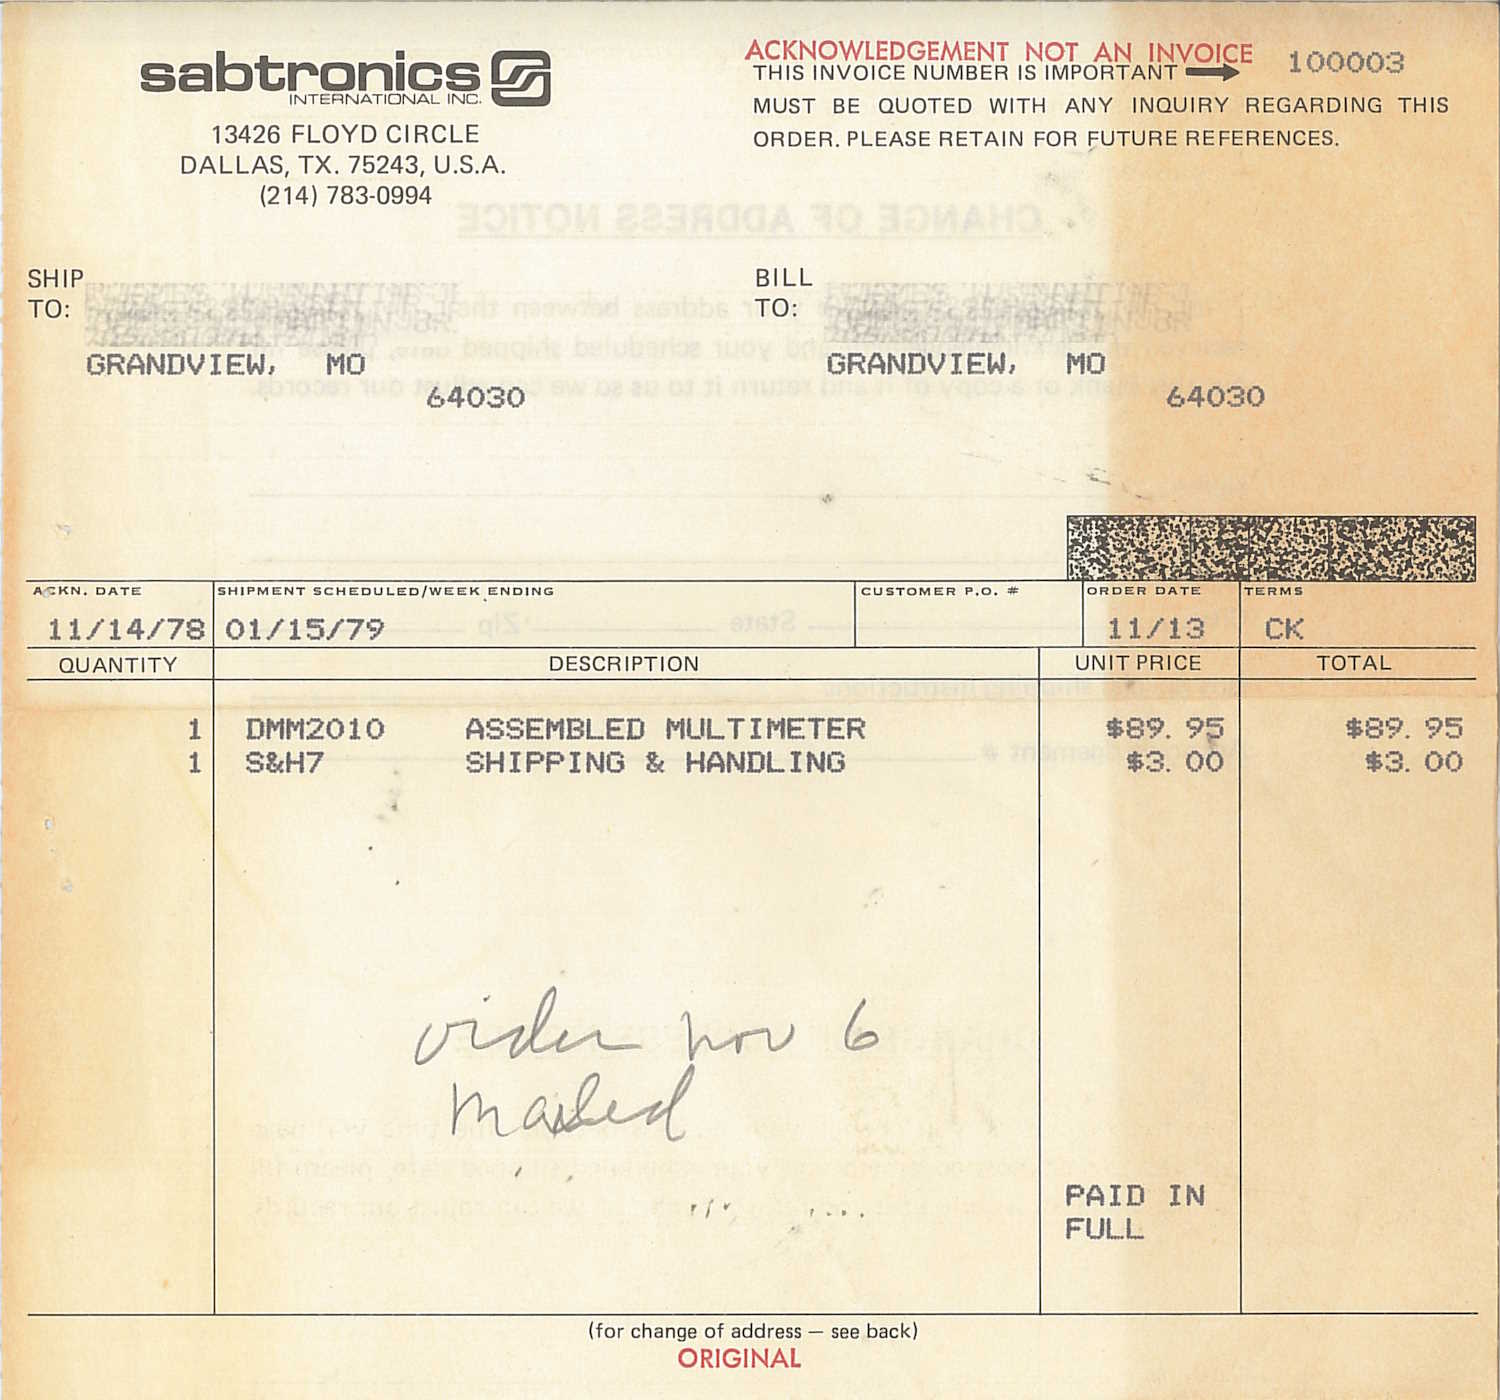
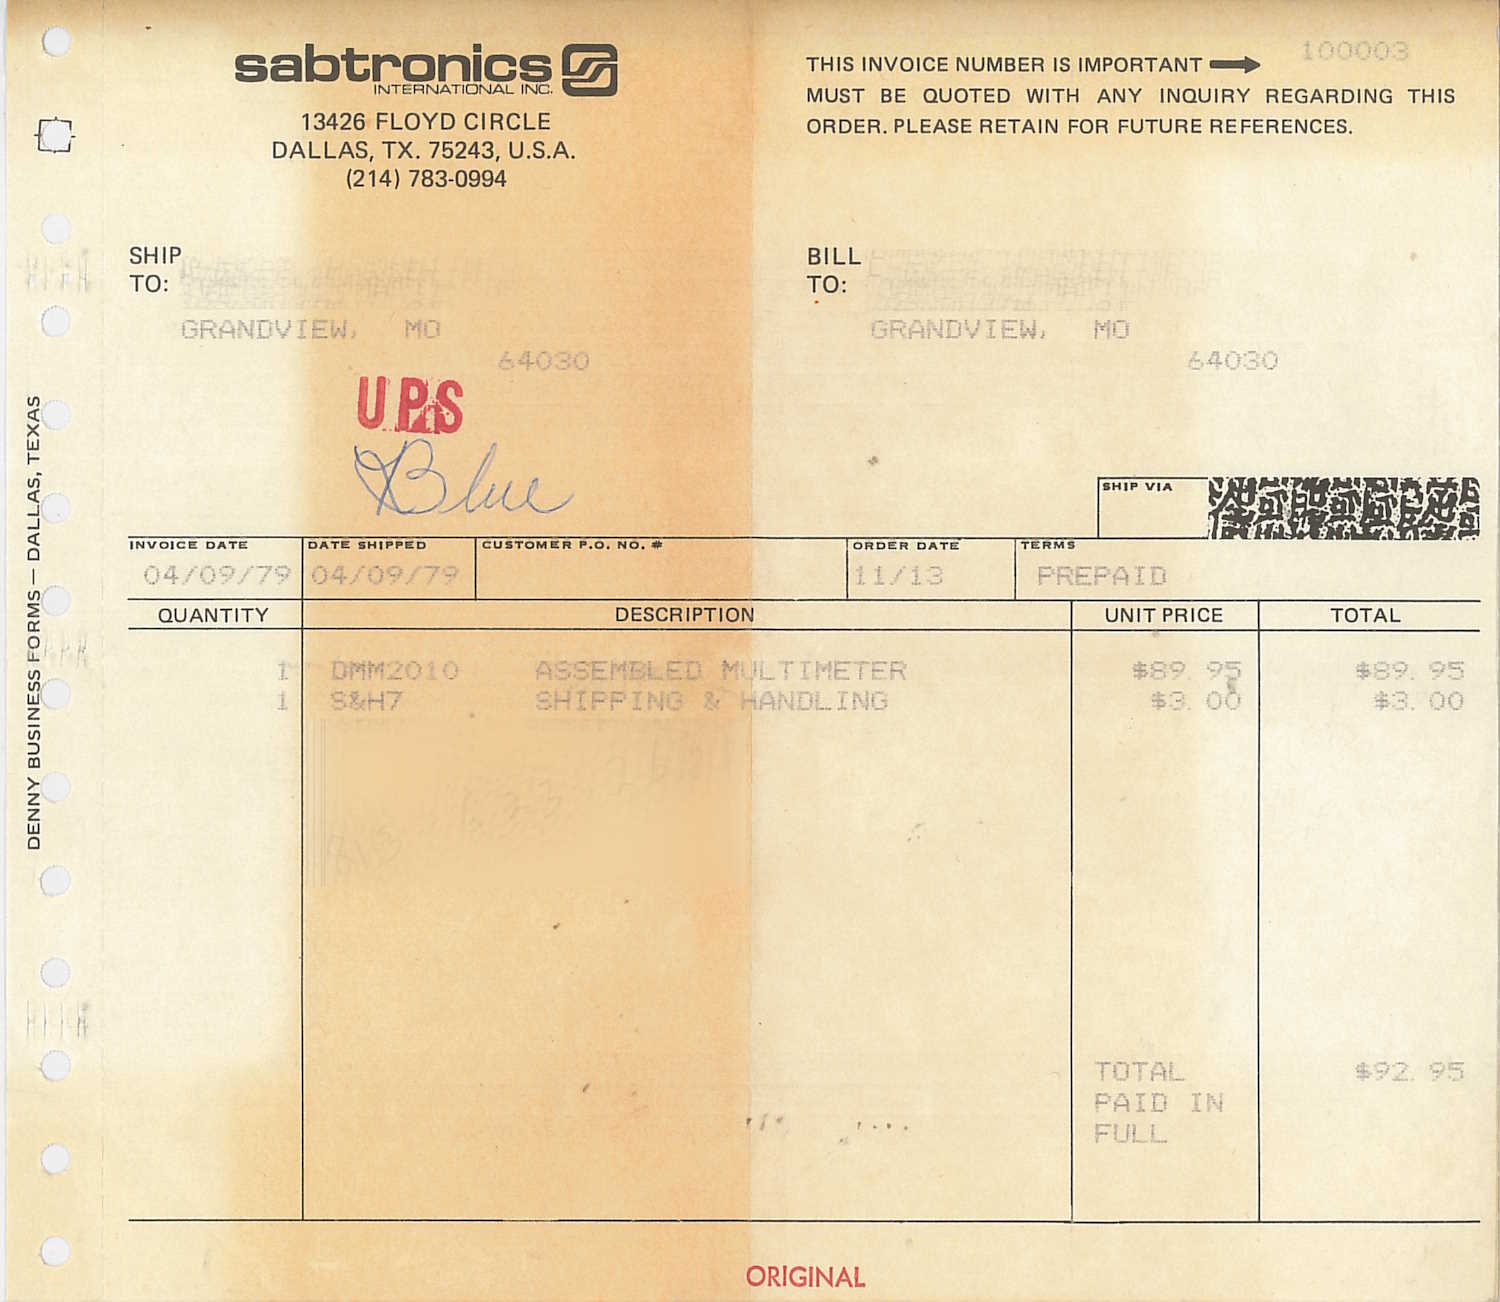
There was some other literature in the box, including invoices. Here’s all of those shots:
These must have been popular - this guy’s order was delayed somehwhat. But, for $90 ($430 on 12/2025) these were cheaper than many alternatives, and fully within hobby pricing.
I will get to the display replacement as soon as possible, stay tuned!
It’s been a while since I’ve zipped up all the files in the document library, so it’s high time I do it again.
If you’d like a copy of everything I’ve collected for projects here, you can grab a copy of it from dropbox: https://www.dropbox. … ro3&st=djfaezpv&dl=0. The file is about 410MB, and is all of the files in a big .zip for easy extraction.
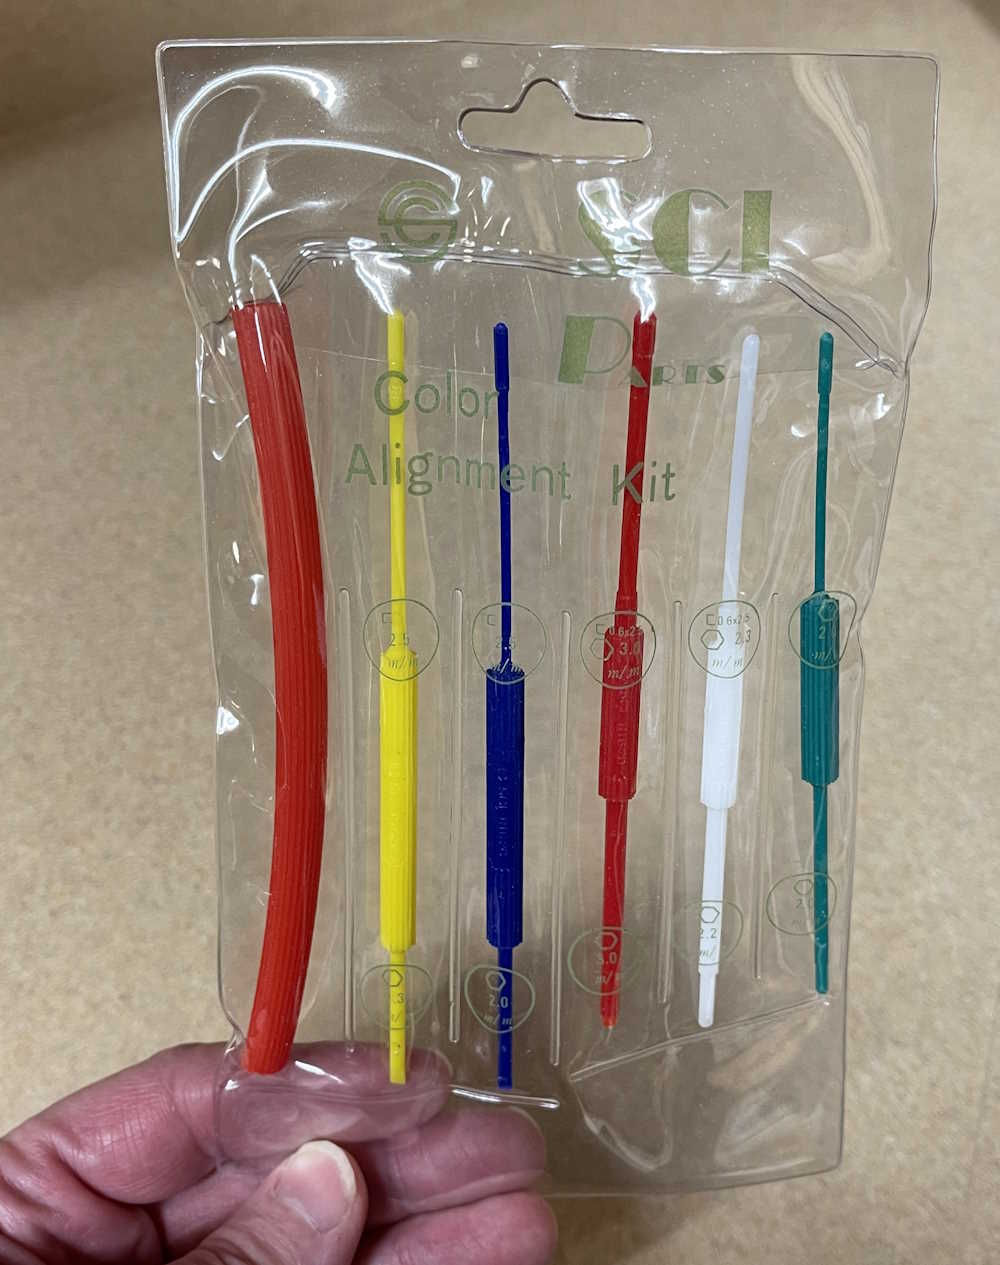
Used to be every technician had a set of them in their toolbox. They were a required purchase when I was a student in vocational electronics. My set generally vanished years ago, and Radio Shack quit selling them long before they became a piece of history.
Turns out you can still get that exact same set. It’s not in the ratshackpack, but you take what you can get.
So I guess I’ll be over here playing with my diddlestick.
I’m (more or less) done re-doing images here. I did find a couple that I messed up and missed, and a few that were deleted before I realized what I did (use that trash can!) but everything should be back in place. Thankfully, the Internet Archive had that all stored…feel free to submit pages there if you want!
What did I do?
1: Cropped a lot of images to show the relevant parts only. You don’t need to see a photo with 1/3 of it being the dirty mat on my desk.
2: Resized a lot of images so they are faster loading - a 2000×2000 image of a single resistor isn’t useful, and just wastes your time.
3: Moved a lot of things around on the back-end. I had images everywhere, but created folders for various projects and moved general images into appropriate folders.
4: Renamed most of the images so you know what they are if you download and store, and then come across the image some time later. The only things that didn’t get completely renamed were event photos since there’s a lot of those. They’re in their own folders, and that may be a project of it’s own.
Anything else?
There are a few document links still pointing towards my old OX drive. Those documents are still there for now, but you can find everything at the Wereboar Documents Library here: https://wereboar.com/docs/?dir=public
I’m going to set a search on those old links and replace them as I find them, or simply point to the docs library in general.
edit: As best I can tell, all links to OX drive have been removed. I’ll leave the files there for a while, but probably will remove them no later than July of this year in case someone wants to grab them from an old link.
That all?
Yep, everything should be back in place, the pages should look better, and you should get image downloads a lot quicker. There may be some short delays as new thumbnails are generated for you, but I tried to take care of all those beforehand during preview setup.
As always, if you find anything broken, please hit the mastodon link at the bottom of each page and let me know. Thank you for visiting, and I hope you’ve found something of interest here.