When I started this blog, I didn’t quite understand the way the image function of flatpress worked - I’ve made several changes over the years but none of them were really satisfactory to me, or even standardized.
I’ve decided to start at the beginning and clean up images, resizing loose images (those not in a gallery) to more standard sizes, adjusting them so they aren’t all over the place in the posts, and generally providing a cleaner look. I’ll crop junk off of them so you just get the part that’s important, instead of a tiny part in a big image. I’m also moving images to more useful locations within the site, collecting posts together so they’re not in random folders.
This is going to be a long project, but older posts should start to look better for you - and perhaps even load just a tad quicker since they won’t be megabytes long. There may be some broken things while I move folders and optimize images, but they should resolve quickly.
So…in honor of the old web - here’s an under construction gif.
Project Status
2021 - Nothing to do.
2022 - Completed January 8th 2026.
2023 - Completed January 9th 2026.
2024 - Completed January 14th 2026.
2025 - Completed January 15th 2026.
2026 - Already using the new format.
Cleanup - Completed January 15th 2026.
QA - Completed January 15th 2026.
Cleanup will involve removing old folders and other leftovers, and QA will consist of going through the entire blog, making sure links all work, and correcting any document/image links that are not using the new format. It’s going a little quicker than I expected, I have some downtime and have been hitting it hard. Stay tuned for some more equipment posts, coming shortly.
In-between cleanup and QA, things may break. I’ll fix them as I see them.
January 15th 2026 - I think we’re done…if you see anything broken, please let me know on mastodon.
Galleries for late 2025 may break, but I’m trying to avoid doing that. If you hit a post and there’s nothing there but a “directory doesn’t exist” message, try again in a day or so - I should have everything image pointing to it’s proper location by the end of the week.I think I have these fixed.
I hope that 2025 was good to you, and I hope you found something here on projects that caught your interest. I have a number of devices lined up for the coming months, and there’s plenty of hamfests on the way.
This will be near to the last post of the year here on projects, and it’s something to browse while you’re waiting for the new year holiday to start. I found out earlier this year that you can reference galleries from different points within this blogging system, and thought it would be cool to have a year-end page with all of the stuff I saw at hamfests. So…here it is! The only ones that won’t be presented in that manner is the SCARF show in May and the Central PA hamfest - both of those because there were very few pictures. They’ll be links instead.
Without further ado, here is the stuff I saw this year at hamfests:
.
The Sunday Creek ARF Hamfest, Shade Ohio.
A bunch of old-school test equipment.
That 1970s blue.
Still a lot of AM CB stuff.
A big, old, Heathkit power supply.
How big can you make a 5W CB?
I didn't buy a voltmeter this time!
.
The Cuyahoga Falls ARC Hamfest, Cuyahoga Falls Ohio.
A nice AOR scanner with a serial control port.
A table full of audio related stuff.
BetaMax anyone?
A giant broadcast tube.
A small capacitor checker. This went home with me.
Some cool 1970s cases. I took a woodgrain special home.
Someone had a collection of early music video.
A lot of radios and tubes.
The club has a table of cheap stuff.
A coffin set. These have become cheap.
The inside of the coffin set.
Another coffin set.
Another coffin set. Would have got this if I had room.
I bet this thing can't hear WLW next to the tower.
A giant-size signal generator.
Some radios and one of those monitor scopes.
Self explanatory.
Some old Heath stuff. Some of it's not all that useful these days.
Another small Heath scope. Took this one home, it's in great shape.
Dad's homebrew projects.
Knobs. Need I say more?
I wonder who Lafayette was channeling here?
The last Heathkit of it's type.
Who didn't have one of these?
A stack of old meters.
An old mill controller.
How many of these were made?
A nice National radio.
Pulse generators.
Various rackmount equipment.
Surprise, radios!
Even more radios.
You guessed it, radios!
You'd think this was a radio show.
An “Electric Eye” science kit.
A nice old Solar cap checker with a meter instead of an eye.
I couldn't pass this up for $5.
I see you hiding in there.
A lot of different equipment.
Just some stuff. There was a calibrator here I took with me.
I wanted the triple stack, but we couldn't come to a bargain.
A television test jig and degaussing coil.
Some oddball one-off set made in the 1970s in the USA.
I love that they used a lot of color on these.
.
The TUSCO Hamfest, New Philadelphia Ohio.
Some interesting equipment. Radio gear?
Lots of vidicon tubes. Lots and lots and lots!
The early 80s still live among us.
A dual band (lol!) Lafayette Radio.
I bet you never thought you'd see more radios.
AM/FM/8-Track with a cool honeycomb face.
Radio Shack ghosts haunt us.
A couple of old Tek (tube-type) scopes. Ok price.
A mini scope. That seems high priced.
Just stuff from the CFARC guys. I took the decade box.
.
The Athens County ARA Hamfest, Athens Ohio.
CD-R…once a miracle, now just junque.
The camera doesn't do the chrome justice.
An interesting passthrough counter.
A desoldering iron from the tube socket era.
An all-in-one RF test station.
Some older test gear including a cap checker in the box.
An HP 200 series generator and an old tape player.
A “Portable” multimeter.
Once of those tube unit power supplies.
An old Sony reel-to-reel tape player.
A couple of scopes. Interesting, but not needed.
An interesting Sencore tube tester.
Radios and an overpriced PACO tube tester.
A bad shot of some old gear. Would have taken the rightmost one if it had been in better shape.
One of Trio's active panel meters.
One of Heathkit's interesting lunchbox tube testers.
Some radio tuning gear.
.
The Dayton Hamvention, Xenia Ohio.
Friday:
I used to work for this toxic company.
Some big rackmount amps.
Somoe old Motorola comm analyzers.
A cool looking antenna controller.
A stack of audio gear.
A cool old blue B&H oscilloscope.
Lots of parts.
Stuff is just laid out on whatever.
It's chrome plated!
Lots of walkies.
A table full of consumer era radios.
One of those high-precision Regency counters.
Someone bought a box of CRTs and related materials.
A nice Heathkit decade box. Took this home.
A dirty Hallicrafters.
Not going to break this one.
Hard to believe it's only 1.7GB.
A giant dummy load. Dummy not included.
A nice Eico harmonic distortion analyzer. Went home as a project piece.
The accompanying Eico RF generator.
An Eico scope. Tempting, but I have too many scopes.
I’ve been posting blog links to a federated social network called Nostr. This was mostly to drive traffic here, but I’d reply to anything that was sent to me that was not obvious spam. I’ve written about that in a couple of past posts:
One of the reasons I chose the site I did was because it supported a feature of Nostr called “communities” - that’s exactly what it sounds like. A basic forum with a title and a common theme. I created /oldtech, a place for stuff like what I talk about here. While I never really got any other posts in the community, I did collect the usual spam.
Spam is a big problem on the Nostr network communities. There’s no good way to manage it, and the more popular you are the more you’ll get the standard Indian scams, crypto crap, and just general-purpose canned ham. You either approve it to show in the community, or you ignore it and it sits there in your inbox forever, waiting for you to approve it. In that regard, spam is very hard to control on Nostr, and it makes the communities messy.
Today I tried to make my usual Monday morning post and found that the site owner had removed communities in favor of a single feed of posts. The reason was that communities were “messy.” I fully understand this reasoning as there’s zero garbage control. Some of the communities I looked at had hundreds of pending spam messages in their box. (You can see pending messages, they just don’t show up in the regular feed.)
I kind of stepped back from this for a while, but I’ve started posting again seeing as how all of my old posts are there - they just aren’t in a community now.
With 2025 coming to a close, I find myself thinking about each show I attended this past year, and which ones I want to go back to. While the first answer is “all of them!” - I think I’m going to cut back some this year. The smaller shows are cool, but I started seeing the same vendors and the same items over and over. This will give things a chance to cycle through.
So - instead of 15 hamfests, I think I’ll probably drop back to 8 or so. There may be a few others in there - Athens, OH and Clearfield, PA, but those will depend primarily on “if I feel like it,” and perhaps Fort Wayne if 2025’s show turns out better than 2024.
As before, not all shows have updated at the time of this posting, so check back or check the Ohio ARRL section page for current event times Links to pictures will be posted as soon as I can after a show, and there will be a year-end wrap-up.
Cuyahoga Falls Amateur Radio Club Hamfest
Emidio & Sons Party Center
48 E. Bath Road
Cuyahoga Falls, OH 44221
Saturday April 11
8A - 1PM
Admission $10
https://sites.google.com/cfarc.org/cfarc/hamfest
Event photos: Coming soon.
Dayton Hamvention
Greene County Fair and Expo Center - The Whole Thing
210 Fairground Road
Xenia, OH 45385
Fri Sat Sun May 15 16 17
Hours vary by day, opens at 9AM
https://hamvention.org
Friday Photos: Coming soon.
Saturday Photos: Coming soon.
Sunday Photos: Coming soon.
Breezeshooters Hamfest
Butler Farm Show
625 Evans City Rd
Butler, PA 16001
Sunday June 14
8A - 2PM
https://breezeshooters.org/ns/
Event photos: Coming soon.
Columbus Hamfest
Aladdin Shrine Center
1801 Gateway Cir
Grove City, OH 43123
Date TBA, usually early August
8A - 1PMish
https://aladdinshrine.org/hamfest/
Event photos: Coming soon.
Johnstown Swapper’s Day
Johnstown Community Sportsmen’s Club
7357 Sportsman Club Rd NW
Johnstown, OH 43031
Labor Day Weekend (Fri Sat Sun)
7A - 6P
https://jcscohio.org/swappers-day/
Event photos: Coming soon.
The Cleveland Hamfest and Computer Show
Cuyahoga County Fairgrounds, Eastland Entrance
160 Eastland Rd
Berea, OH 44107
Sunday September 27
8A - 12P
https://www.hac.org/
Event photos: Coming soon.
Early Television Museum Fall Swap Meet
The Early Television Museum
5396 Franklin St
Hilliard, OH 43026
Date TBA, usually October
10A - 2P
https://www.earlytelevision.org/swapmeet.html
Event photos: Coming soon
Scott Antique Market November
Ohio Expo Center (State Fairgrounds)
717 E 17th Ave
Columbus, OH 43211
Usually Thanksgiving weekend
Hours vary by day, check before you go.
https://www.scottantiquemarket.com/
Event photos: Coming soon
There’s a handful of “Maybe” this year as well. I’ll get to these if time allows:
ACARA Athens Hamfest
Athens Community Center
701 E State Street
Athens, OH 45701
Date TBA, Usually late April
https://www.ac-ara.org/
Central Pennsylvania Hamfest
Clearfield County Fair Grounds, Agriculture Building and grounds
5615 Park St
Clearfield, PA 16830
Sunday September 13
https://clearfieldcountyarc.net/hamfest/
MARC Hamfest
Military Air Preservation Society Hanger (MAPS)
2620 International Parkway
Green, OH 44232
Date TBA, Usually early November
http://w8np.net
Fort Wayne Hamfest
Allen Country War Memorial Coliseum
4000 Parnell Ave
Fort Wayne, IN 46805
Date TBA, usually right before Thanksgiving weekend
https://www.acarts.com/hfmain.htm
Johnstown Swappers Day and the Scott Antique Market aren’t really hamfests, but enough electrical and other goodies show up that it’s worth going if you’re in to general flea market type items. The Early Television Museum is a swap meet that happens during one of the venue’s open work days, so who knows what will show up there.
Always check dates and times before you go, and I’ll see you there!
This was the first time I’d gone to this show, and - while small - it offered quite a bit of television focused vendors. The usual flea market tat that shows up at hamfests these days was absent, even though the show was free to set up and enter.
I did end up spending about $45 and taking home a few project items which may show up later, depending on what I have scheduled. Regardless, here are the photos I took. I don’t have much to say about them, so there’s no description, just enjoy the glory of old television.
etm25-tv1-wereboar.jpg
etm25-tv10-wereboar.jpg
etm25-tv11-wereboar.jpg
etm25-tv12-wereboar.jpg
etm25-tv2-wereboar.jpg
etm25-tv3-wereboar.jpg
etm25-tv4-wereboar.jpg
etm25-tv5-wereboar.jpg
etm25-tv6-wereboar.jpg
etm25-tv7-wereboar.jpg
etm25-tv8-wereboar.jpg
etm25-tv9-wereboar.jpg
.
We did a museum tour as well, and that is well worth the admission price. I highly recommend that if you’re in the area. We didn’t stick around for the auction, while there were a few lunchboxes I’d like to take home I already have examples of them and do not need more.
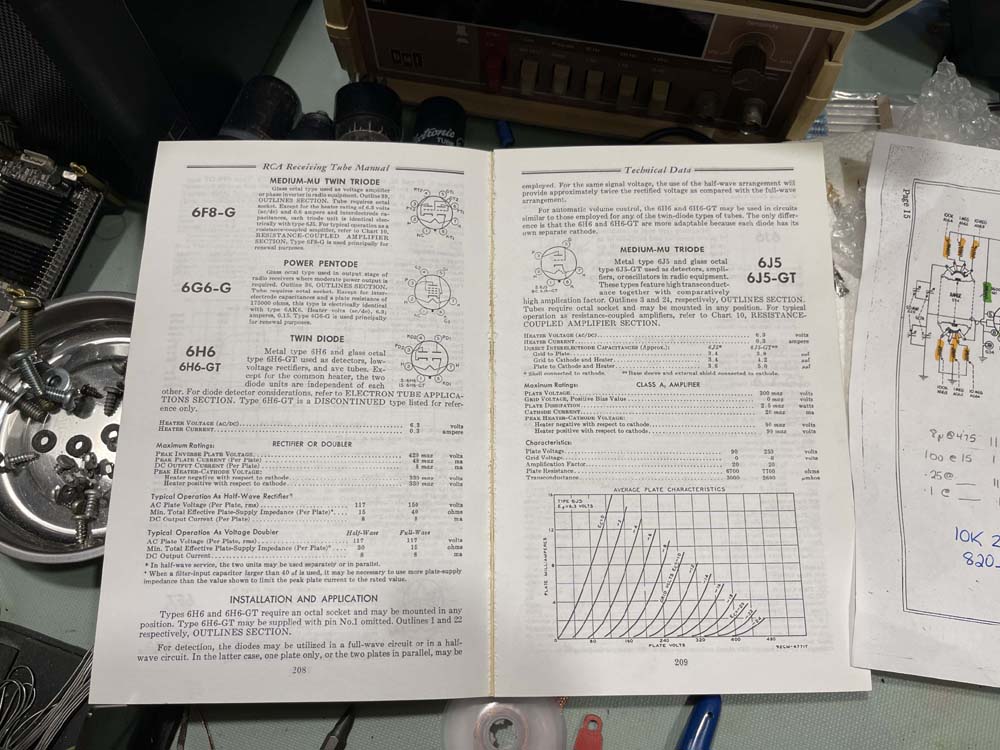
…even your reprint manuals are starting to fall apart. My reprinted copy of the RCA RC-19 tube manual has started to break apart, the glued binding giving way.
This book probably qualifies as an antique itself!
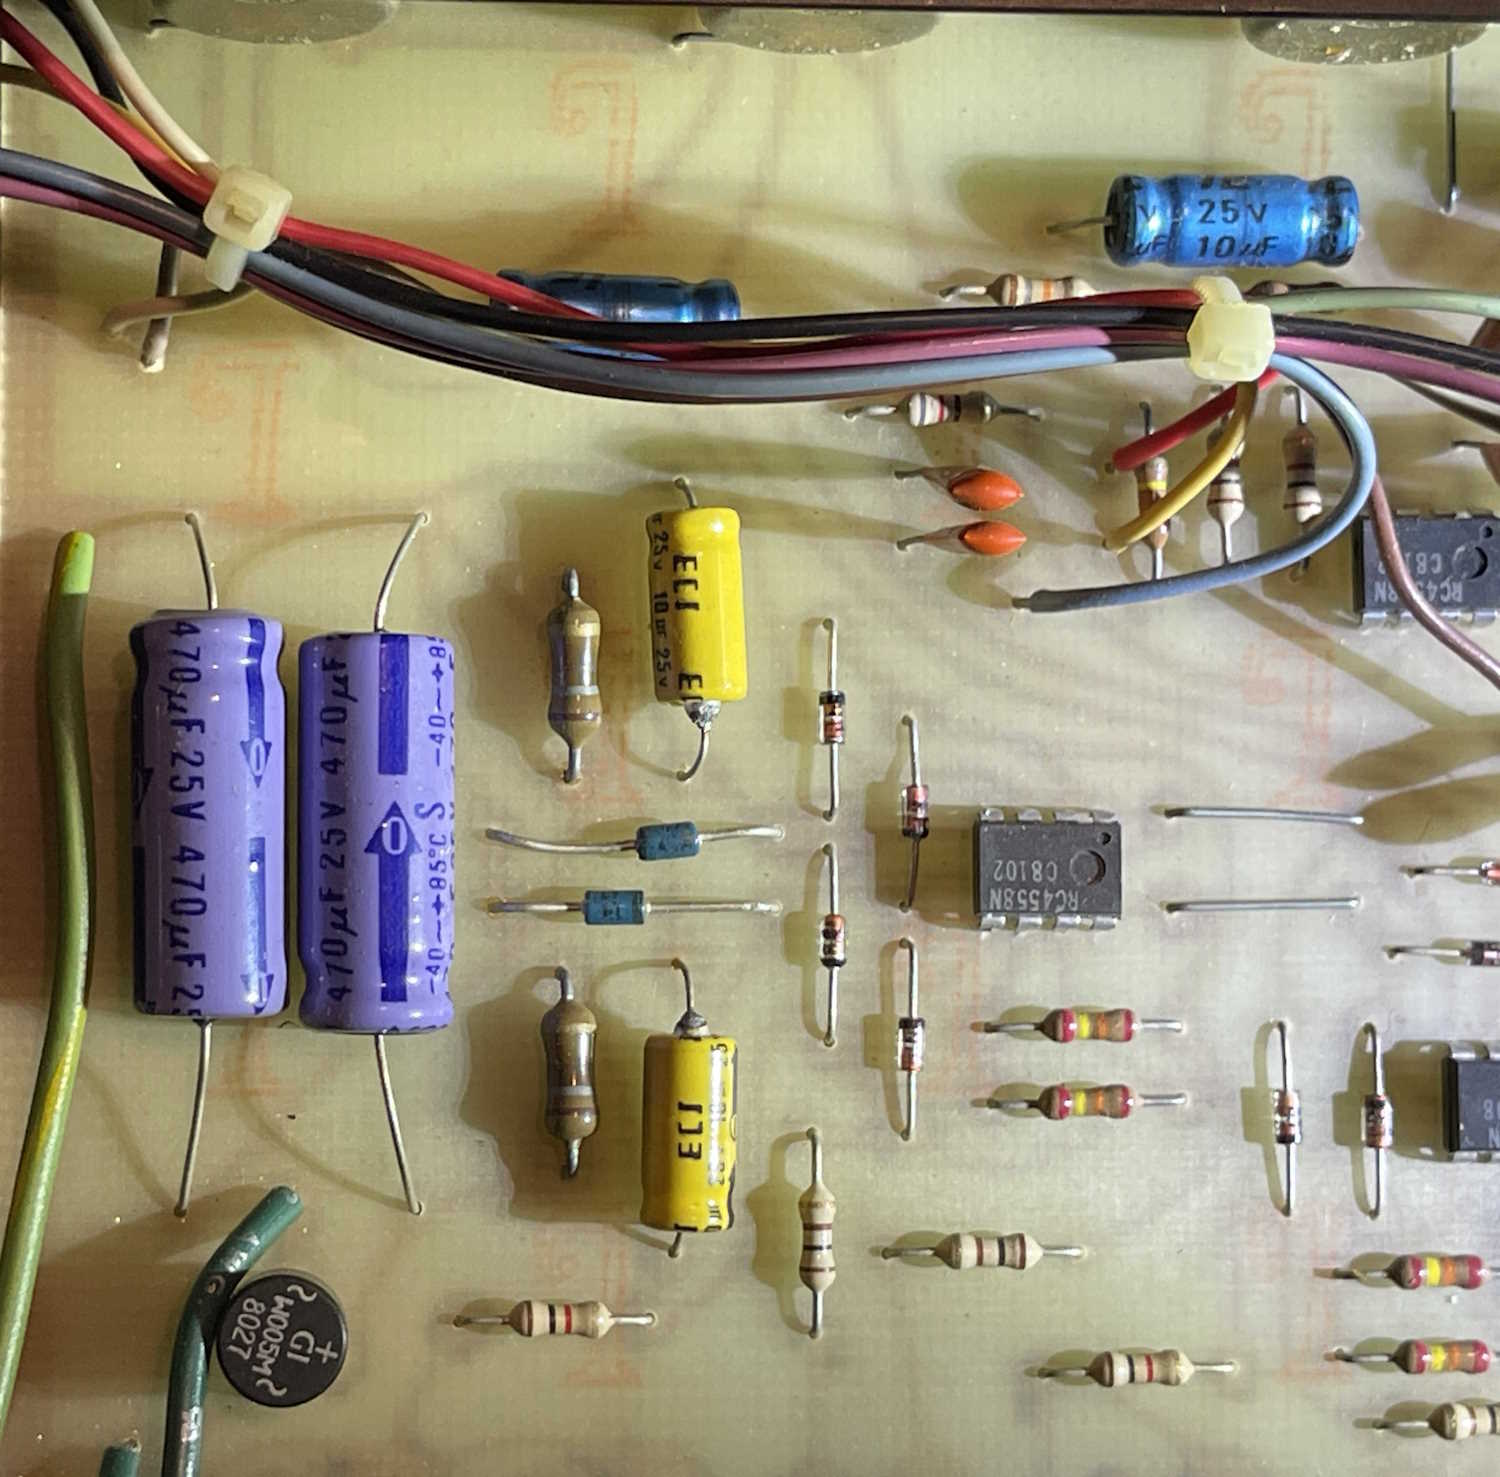
Today’s board comes to you from a resale shop. A friend purchased this (used) electronic crossover for his audio stack, and wanted to open it up to give the controls a cleaning and give it a general once-over. Inside was a well laid-out board with plenty of space and a bunch of antique RCA op-amps. The unit works great, and immediately went into the stack.
However, seeing as this was made in the 1980s right here in the USA, we looked for that one particular mark:
Yep, there it is. That orange script “T” indicating the raw board was manufactured at the GE plant on South 2nd Street in Coshocton, Ohio.
How many stories could the board manufactured there tell us?
July 4th, 2021 is when I opened this as pygg.xyz and transferred some of my old blogger.com content here.
I don’t have anything special to present except thank you - I appreciate all of the views I get here, and I hope you’ve found something of interest over the past 4 years.
I have a number of devices and shows in the works, please check back soon.
The Home Assistant Green is just a Linux boxen running a containerized version of Home Assistant under a minimalist operating system. Technically, it should be able to do anything that the kernal supports, and one of those things is connecting to a shared drive.
I have a Raspberry Pi that has an I2C air pressure sensor connected to it. Once a minute, a cronjob reads that sensor and writes it to a location on the network - in this case a shared folder on a NFS-connected Synology drive. That file is then available for other programs to use - primarily my own garbage php frontend, and Cacti. Since Home Assistant has a nicer frontend than Cacti, I’d also like to present it there.
There’s a lot of conflicting information on how to do this online, and again - the documentation HA provides is just someone’s thought process. It’s actually fairly easy once you figure it out, however.
For this exercise, I’m using my older NFS connected Synology NAS. It has older versions of NFS opened up to the entire network. I’m not going to go into how to do that since I’m running a pre 5.0 variant, but if you want to do this for yourself make sure you understand how the NFS process works, and that you can connect to it. I’m also going to assume that you know how to access the configuration files in your system.
In order to create this new sensor, there are several steps:
1: Create the NFS share on your target device.
2: Create the share in Home Assistant
3: Allow HA to access the share
4: Create the sensor
1: We’ve already covered this, you need to make sure you can do this on your own.
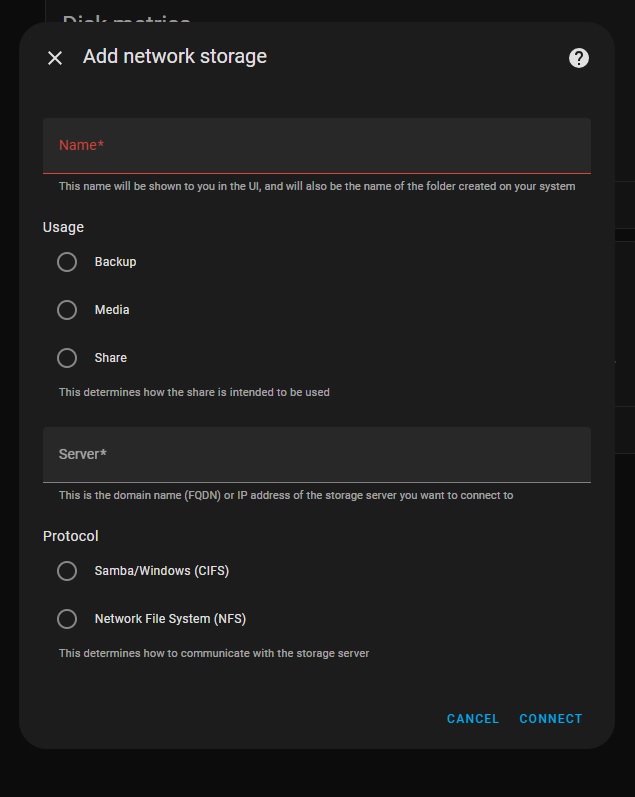
2: Creating a share in Home Assistant is much easier than it used to be. Since a version in 2023, the system now has this builtin to the GUI. To access this, go to:
Give your share a name. I’m going to call my share raspi, because it was originally set up to share files between multiple SBCs on my network. This is the name that the HA process will use when you access it, so make it meaningful, one word, and as short as you can so you don’t have to type a lot of long things. Or, do whatever you like, but I’d suggest keeping it to a single, no-space word. I don’t know how HA handles spaces here.
The next section is entitled “Useage” - this is kind of misleading, as the only thing this does is identify where the share will be located under the HA process. For example, if you choose “share,” your file path will be “/share/raspi” - it’s more of a human readable delineation than an actual “thou shalt only put thine backup here” type of thing. I chose share just because why not.
Next, choose the type of connection you want to make, NFS or CIFS. CIFS is just a fancy name for the type of shares that a Windows system uses, while NFS is the preferred Linux connection method. There’s plenty of info out there on what these acronyms mean if you’re so inclined.
CIFS usually requires a user/pass/domain type thing (Think your windows login and workgroup) whereas NFS can just operate based on IP address limiting. Since I’m using NFS, I chose that and entered my share:
<ip address>:/volume1/raspi
ip address is self explanatory, it’s the address of my share. Follow this with a colon, and the entire path of the share - Synology units call each volume by it’s numeric name, so “volume1, volume2,” etc. My share is on the first disk and is called raspi, which is the same as the name I gave it for home assistant. I’m calling my share on HA and on the remote share the same thing, but you don’t have to. Call it whatever you like within the Home Assistant system, as long as you’re mapped to the correct place on the remote share.
Assuming all is correct, hit connect and if right, it should just do it. Now, on the storage page you should see your new connection as ipaddr/path/to/share. It won’t say this, but now home assistant has mapped /share/raspi to this shared location on your network.
3: You’ll need to allow the Home Assistant container access to these foreign locations, and that involves editing your configuration.yaml file. So load up the file editor add-on (or install it) and navigate to your configuration file. You’ll need to add a new block to your config - I like to do this right before my sensor: block.
What we’re doing here is adding a block called homeassistant: and using the allowlist directive to tell HA it can indeed access these locations that aren’t it’s native systems. I’ve gone ahead and added both the directory I need to access, as well as a directory I can write to later that’s specifically set up for this machine. I don’t know if top-level permissions are inherited, so I just added each individual directory on it’s own. This is pretty much the same format as all other directives in the yaml file, so just follow others if you’re unsure. Spacing is important here!
In my example, raspi is the directory where all the sensor values I want get written, and hass is a directory just for this machine that I can write to and retrieve things from. Create directories as you need them, you don’t need to make extras if you’re not going to use them.
Once you’ve added the directories, use the configuration checker under developer tools to make sure your config is good, then restart the HA process. Allow some time for everything to come back up and populate the new fields. The share seems to persist through this, so you should be good to leave it alone.
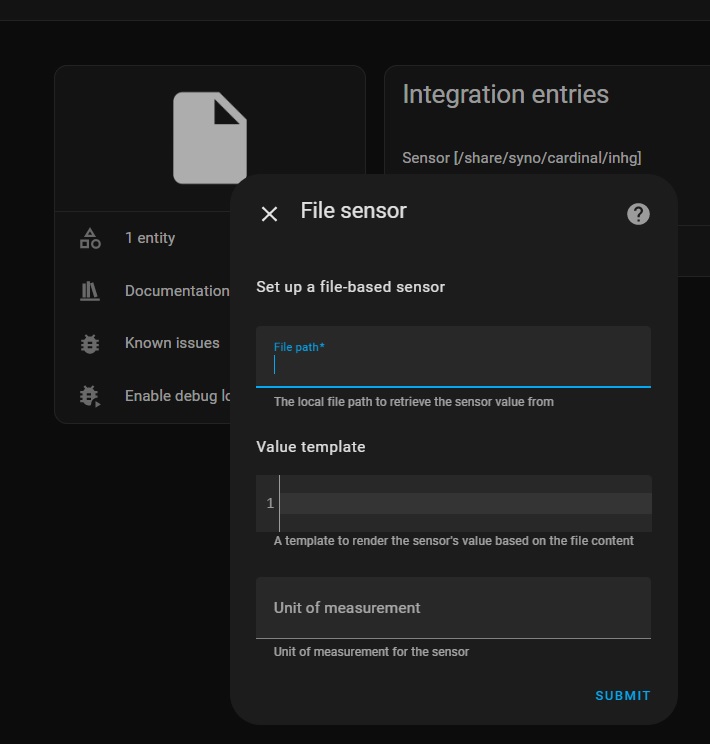
4: To create a sensor, you’ll need the file sensor with the “file” integration. To do this:
setting (gear icon) > devices &services > add integration
     > file > set up a file based sensor
Search for file in the integrations list
You’ll get something that looks like this:
Fill out the form with your sensor (entity) information.
File path is the HA path you set up, in this example it would be:
/share/raspi/airpress.txt
where airpress.txt is the file we want to read. You’ll need to call this whatever you’re trying to read. This should be a single value with no other stuff attached.
Template is the yaml code you want to use to process the value you read. Since my value is already what I want, I left it blank. You may need to change that - yaml code is beyond the scope of this document.
Unit of measurement is just that. It’s just an identifier and only means something for you. In my case, I chose inHg since it’s air pressure. You could call it chickens/hour, °Quackenbush, or “Bob.” Whatever you like. Hit submit, and it should create a new entity creatively called “file.” Click on the entities link, then click the new “file” entity, and edit so the name means something using the gear icon.
You now have a new sensor populated by a value that you can manipulate like any other sensor.


 Lafayette Radio.")


 scopes. Ok price.")


 radios, not as many as previous years.")


 radios.")


 Silvertone Battery Checker.")


")


 future!")