An EICO 950A R-C Bridge Part 5: The power supply.
Monday, June 22, 2026 at 07:41:48
This device is turning into quite the long project - but I knew that going in.
The range switch is in a good a state as it can be at the moment, but there are a few wires still hanging off that will need to be dealt with. We’ll take care of those later - it’s time to get the power supply put back together.
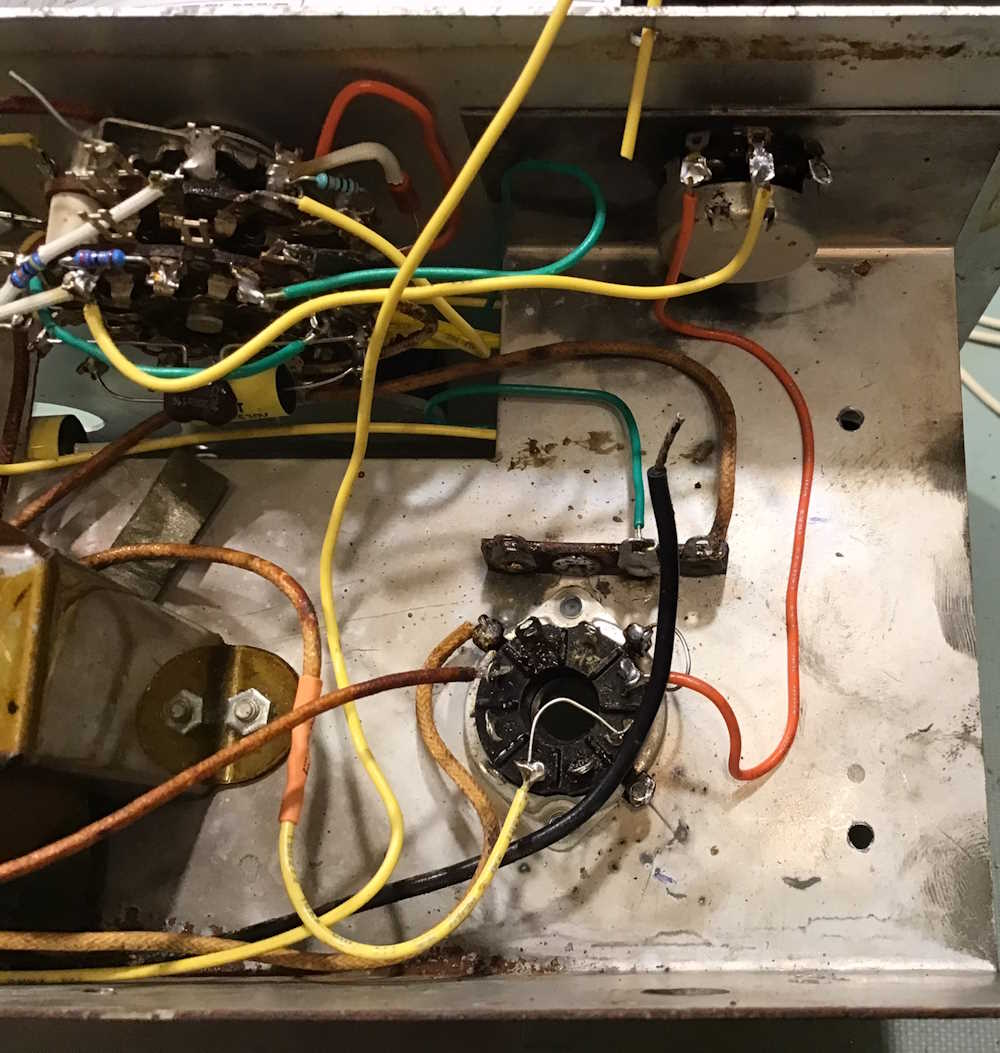
To start, I drilled a couple of small holes in the chassis to mount a new terminal strip. I didn’t want to mount all of the components on the tube socket itself, since some of those were quite a bit larger than I could comfortably place. That’s one of the nice things about this kind of build - you can take your time and re-plan the layout. The OEM wanted to make things as cheaply as possible (not cheap as in poor quality, but cheap as in don’t provide unnecessary parts) so they used every available point to tie things. We have the luxury of being able to rebuild for layout instead of time and costs.
Back to the terminal strip. I wanted to move the AC off the tube, so a big terminal strip was in the works. The AC line is at the bottom, and one of the filters and it’s resistor is mounted on the terminal strip as well, leaving us several tie points if needed. I also used the original terminal strip for a few things, and this will probably come back into play later. The other, smaller filter capacitor mounted on the tube socket with some creative bending after I decided there wasn’t enough room to run it over to the new strip. A quick test of the power transformer, and those leads were dressed in.

There’s a small handful of parts to finish the install, and then comes the final checks. Stay tuned!
Next part of this series: Coming soon.
Previous part of this series: https://wereboar.com … up-the-range-switch/
Wrapup and final thoughts: Coming soon.